External VMS
On the FindFace Multi side, a mechanism of integration with third-party VMS is implemented, allowing you to add cameras from the latter to FindFace Multi and perform their processing. When a camera from a VMS is added, all the actions available for a regular FindFace Multi camera become available for it.
Integration with third-party VMS is possible through a plug-in layer. Interaction between the plugin and FindFace Multi is performed via HTTP. The plugin interacts with the VMS, FindFace Multi interacts with the plugin.
In this section:
This is the step-by-step configuration guide for installing and configuring External VMS feature in FindFace Multi. The reader should have strong experience of administering Linux OS and Docker containers.
Creating a service account for VMS integration plugin
Create a user (username: ntech) with specific set of permissions. This will be used as the service account for the integration plugin. To do so, execute the command below:
adduser --system --disabled-password --disabled-login --home /var/empty \
                --no-create-home --quiet --force-badname --group ntech
FindFace Multi
Open the
/opt/findface-multi/configs/findface-multi-legacy/findface-multi-legacy.pyand locateExternal VMS Integration settingssection.Change the
ENABLEDparameter toTrue.Take a note of the
TOKENvalue, as you will need it to configure the plugin later. (The default value isVmsPluginToken PLUGIN_TOKEN).... # -- External VMS integration settings -- # cleanup settings 'EXTERNAL_VMS_EVENTS_MAX_AGE': 0, 'EXTERNAL_VMS_SEND_EVENTS_STATUS_MAX_AGE': 0, 'EXTERNAL_VMS': { 'ENABLED': True, 'PLUGIN_ADDRESS': 'http://127.0.0.1:18333', 'TOKEN': 'VmsPluginToken PLUGIN_TOKEN', 'EVENT_SENDER': { 'ENABLED': True, 'ALLOWED_TYPES': ['face'], 'SENDER_TASKS': 1, 'MAX_SEND_ATTEMPTS': 1, 'MIN_EVENT_SEND_TIMEOUT': 0.1, 'MAX_EVENT_SEND_TIMEOUT': 100, 'RESPONSE_TIMEOUT': 10, }, }, ...
Tip
In our example, we are installing the plugin on the same host where FindFace Multi installation resides. In the case of using the separate machine, please consider specifying the proper address of the server where the VMS integration plugin resides in the
PLUGIN_ADDRESSfield.Note
If you need to send the events to VMS, please also set the ENABLED value to
Truein theEVENT_SENDERsection.Restart the
findface-multi-findface-multi-legacy-1container.sudo docker container restart findface-multi-findface-multi-legacy-1
Brief description of the parameters available below:
Parameter |
Description |
|---|---|
EXTERNAL_VMS_EVENTS_MAX_AGE |
Time to store the events received from an external VMS system (days). 0 – unlimited. |
EXTERNAL_VMS_SEND_EVENTS_STATUS_AGE |
Time to store the events sent to an external VMS system (days). 0 – unlimited. |
EXTERNAL_VMS: ENABLED |
The status of FindFace VMS Integration module. If enabled, the |
PLUGIN_ADDRESS |
Plugin IP address. |
TOKEN |
Token required for VMS Integration plugin to authenticate in Findface Multi (it must match the token in the plugin configuration file). |
EVENT_SENDER:ENABLED |
If |
ALLOWED_TYPES |
Objects types to send. At present, only face objects supported. |
SENDER_TASKS |
The number of simultaneous tasks to send events to the plugin. Default value = 1. It can be increased if required, please consult NtechLab Support Team (support@ntechlab.com). |
MAX_SEND_ATTEMPTS |
The number of attempts to send before it is considered unsuccessful. |
MIN_EVENT_SEND_TIMEOUT MAX_EVENT_SEND_TIMEOUT |
The time between sending attempts, if a failed sending occurs. It will grow exponentially from minimum to maximum as long as the number of attempts MAX_SEND_ATTEMPTS is increasing. |
RESPONSE_TIMEOUT |
Time to wait for a response from the plugin when sending an event. |
PostgreSQL
Open the file
/opt/findface-multi/docker-compose.yamland take a note ofPOSTGRES_PASSWORDvalue. We will need this for the next step.sudo vi /opt/findface-multi/docker-compose.yaml ... postgresql: environment: {POSTGRESQL_ALLOW_REMOTE_CONNECTIONS: 'no', POSTGRES_PASSWORD: POSTGRES_PASSWORD} ...
Sign in to the
findface-multi-postgresql-1container via executing the following command:sudo docker exec -i findface-multi-postgresql-1 /bin/bash -c "PGPASSWORD={POSTGRES_PASSWORD} psql --username postgres"
To ensure you’ve signed in successfully, use the
\lcommand to view the list of databases: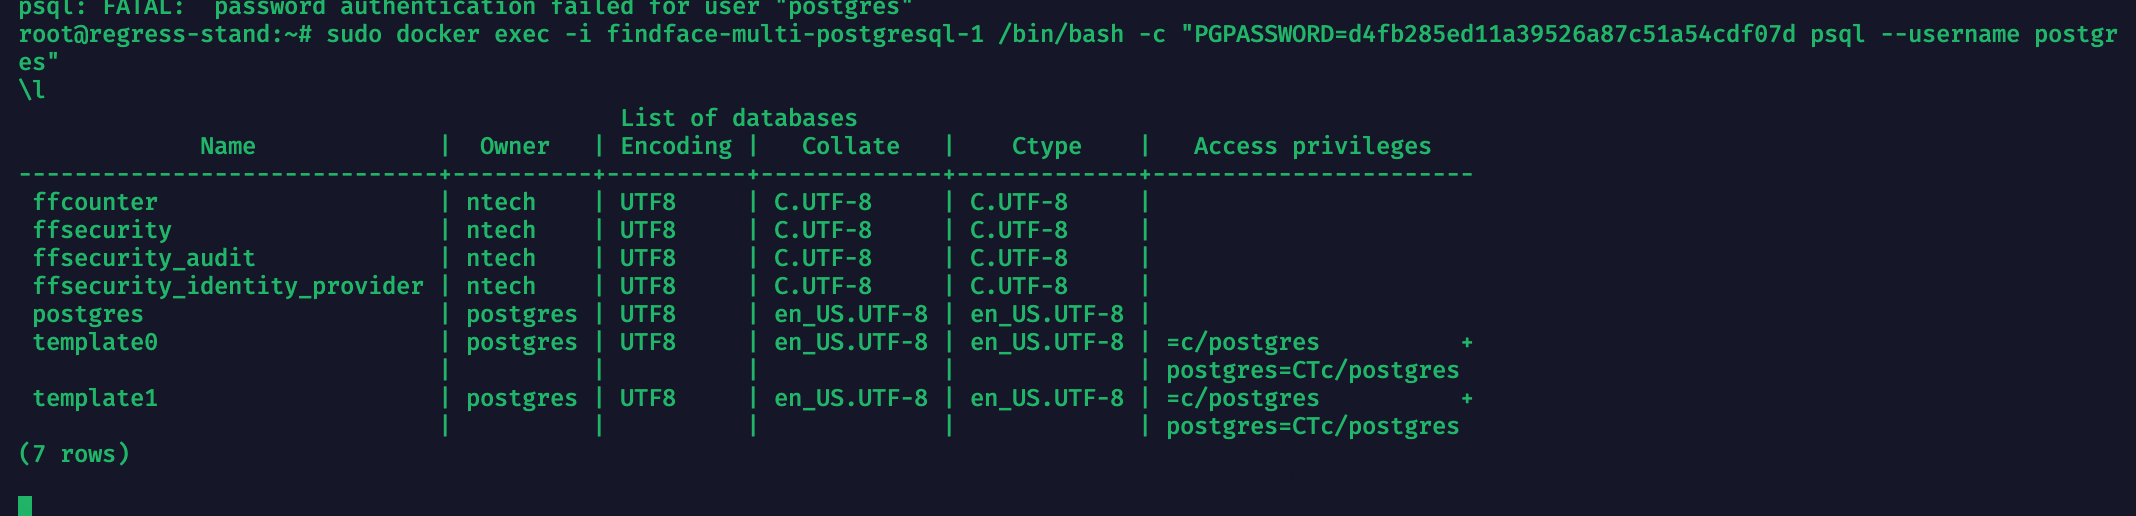
Run the following command to create the new database required for external VMS functionality:
CREATE DATABASE ffsintegration WITH OWNER ntech ;
Validate the database creation via executing
\lagain. Once completed, use\qparameter to exit PostgreSQL.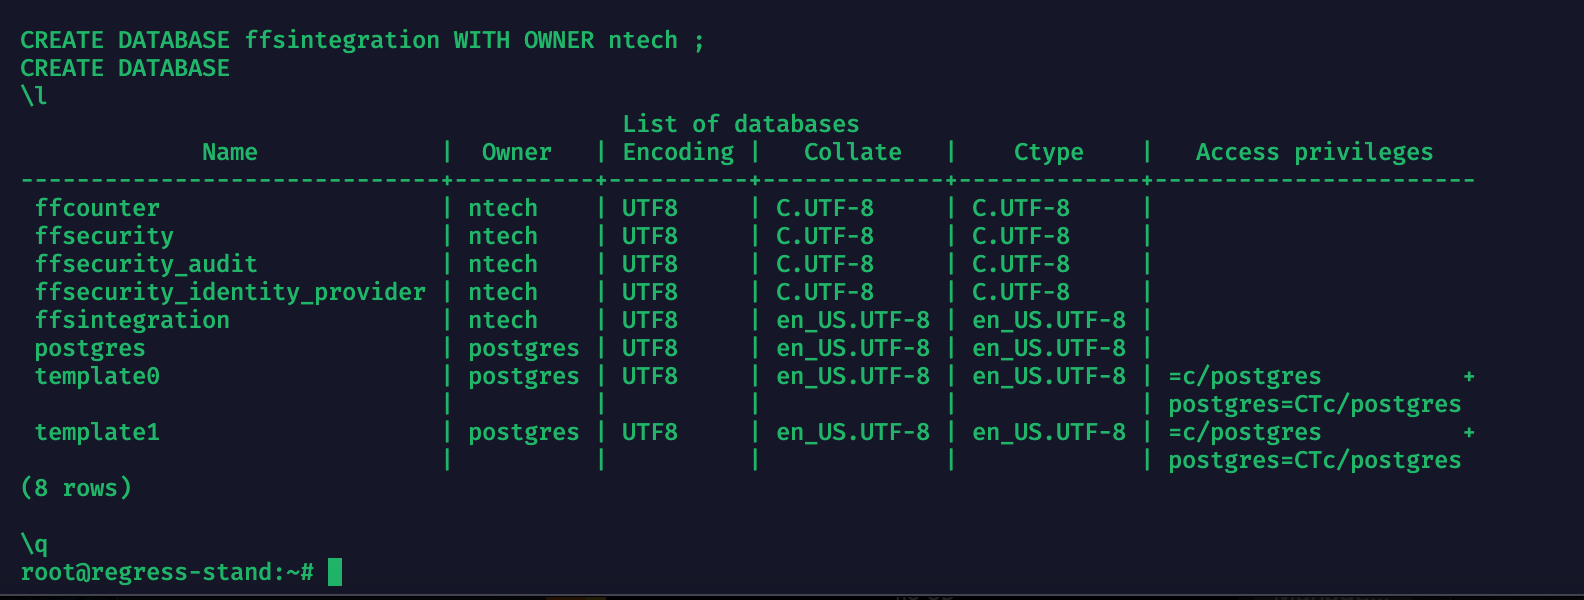
Installing and configuring FindFace VMS Integration Plugin
Open the
/opt/findface-multi/configs/findface-multi-legacy/findface-multi-legacy.pyfile and locateDATABASESsection. Take a note of thePASSWORDvalue for userntech:sudo vi /opt/findface-multi/configs/findface-multi-legacy/findface-multi-legacy.py ... # camera groups, watchlists and so on. Only PostgreSQL is supported. DATABASES = { 'default': { 'ENGINE': 'django.db.backends.postgresql', 'DISABLE_SERVER_SIDE_CURSORS': True, 'NAME': 'ffsecurity', 'HOST': '127.0.0.1', 'PORT': 5439, 'USER': 'ntech', 'PASSWORD': 'PASSWORD' } }
Download FindFace plugin installation file (.deb) using the link from NtechLab representative.
Install it using the command:
sudo dpkg -i findface-vms-integration-plugin_0.1.0_amd64.deb
Open the config file of the plugin, located at
/etc/findface-vms-integration-plugin.conf. Uncomment and insert the following data here:sudo vi /etc/findface-vms-integration-plugin.conf
POSTGRES_SERVER (specify the server, where postgresql container is running)
POSTGRES_PORT (use the value different from the one specified in config.py, for example, use
5432)POSTGRES_USER (specify
ntech)POSTGRES_PASSWORD (use the
PASSWORDvalue for userntechfrom the/opt/findface-multi/configs/findface-multi-legacy/findface-multi-legacy.pyfile, see 1.)POSTGRES_DB (specify
ffsintegration)PUBLIC_URL (default: http://127.0.0.1:18333)
FFS_PUBLIC_URL (default: http://127.0.0.1)
FFS_TOKEN (specify the token as in the section
EXTERNAL_VMS→TOKENin/opt/findface-multi/configs/findface-multi-legacy/findface-multi-legacy.pywithout prefixVmsPluginToken)
The resulting configuration file will look
as follows:Tip
In our example, we are installing the plugin on the same host where FindFace Multi installation resides. In case of using the separate machine, please consider specifying the proper address of FindFace Multi server in the
POSTGRES_SERVERfield and the FindFace Multi URL in theFFS_PUBLIC_URLfield.The rest parameters are optional and not required for the initial configuration.
Update the database using the following command:
sudo /opt/findface-vms-integration-plugin/bin/vms-integration-plugin-alembic upgrade head
In case of success, the output will look as follows:

To start the plugin service and ensure the service is launching automatically, execute the following command:
sudo systemctl start findface-vms-integration-plugin && sudo systemctl enable findface-vms-integration-plugin && sudo systemctl status findface-vms-integration-plugin

Warning
It is necessary to set the same time zone on the external VMS server as on the FindFace Multi server for correct playback of video archives from the external VMS.
Adding External VMS in FindFace Multi
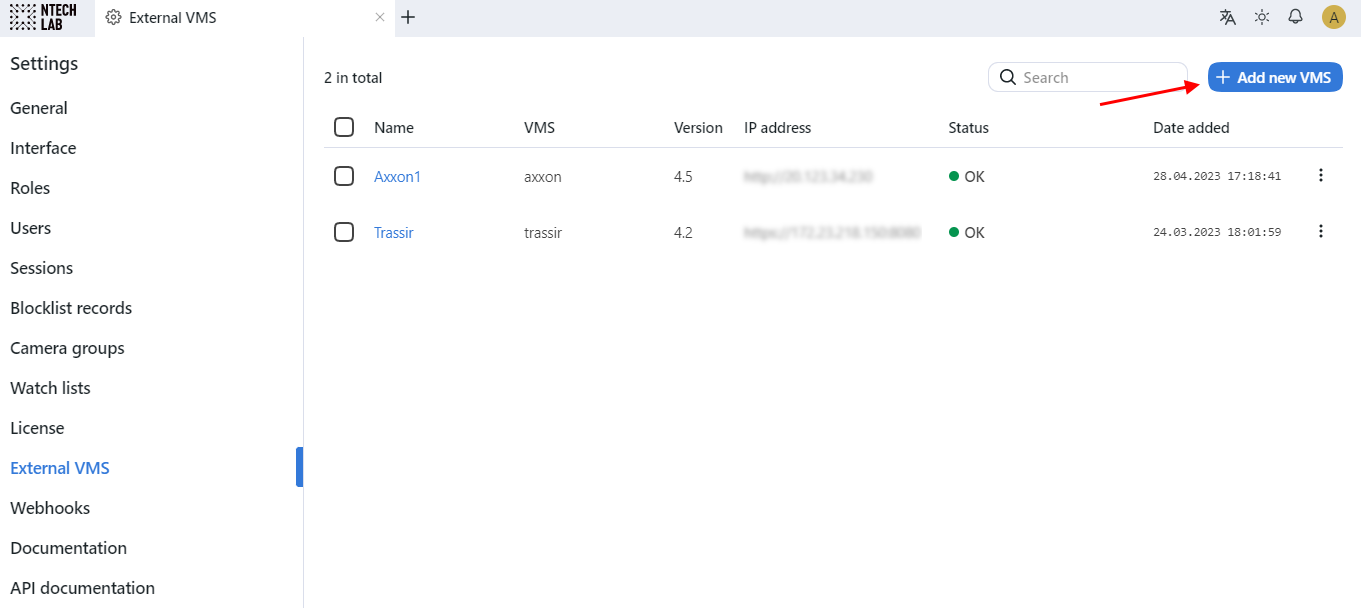
Sign in to FindFace Multi in your web browser, go to Settings -> External VMS section. Click on the Add new VMS button.
Specify your VMS parameters in the opened windows and click on the Save button once ready:
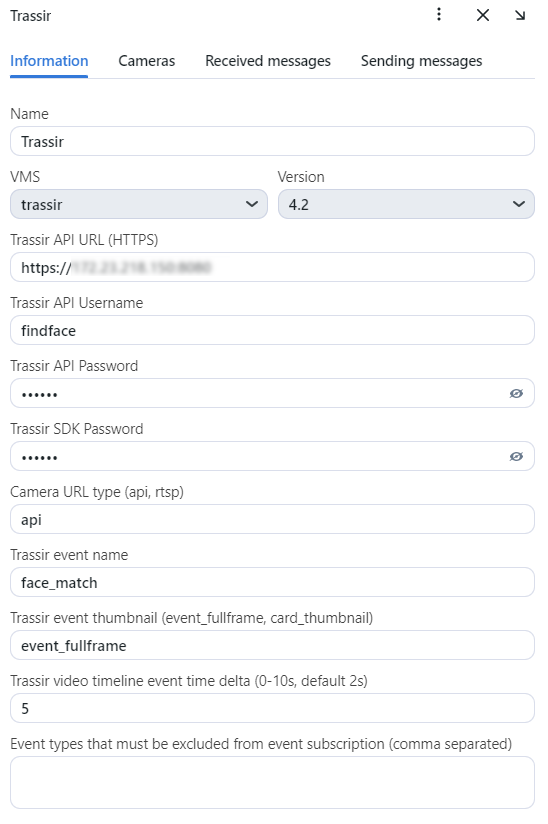
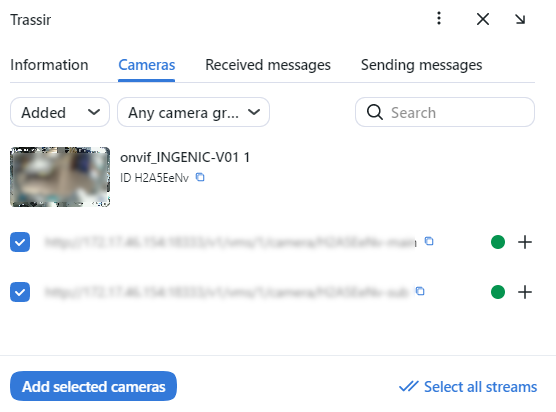
Once completed now you can manage the streams from your VMS in the Cameras tab. For instance, you may add all or selected cameras in FindFace Multi instantly.
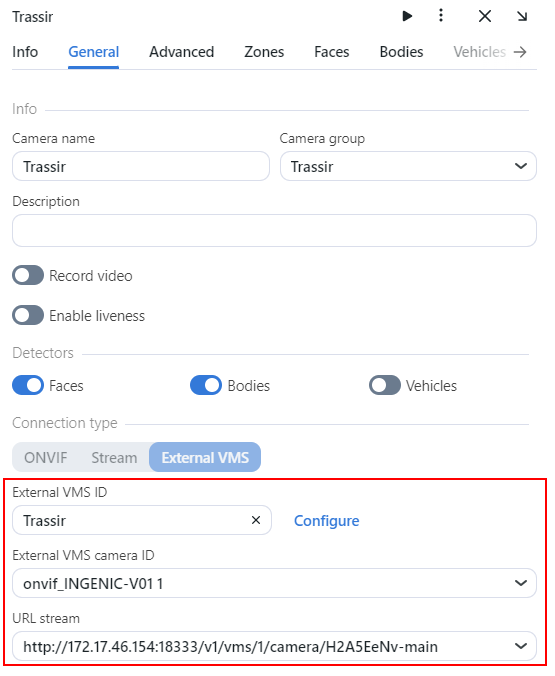
Should you need to send the events to an external VMS, In the Camera settings added from VMS, check if it configured to send the events to the external VMS:
In the required watch list properties, activate the checkbox
Send mapping events to VMSand click on Save button to apply the changes.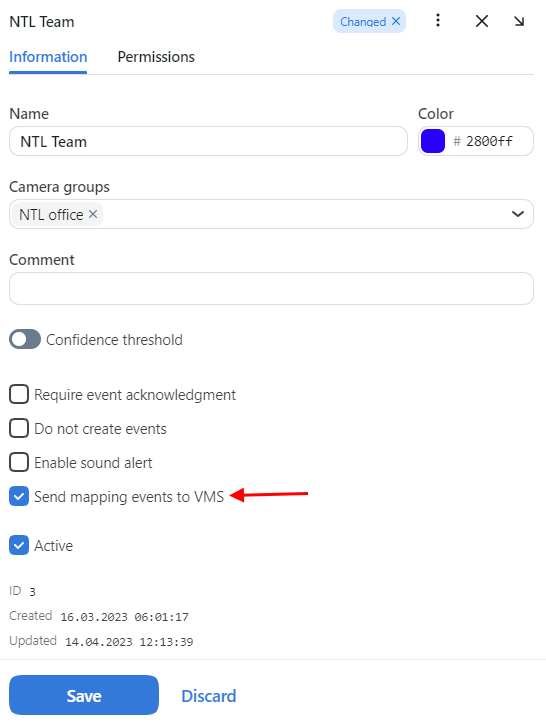
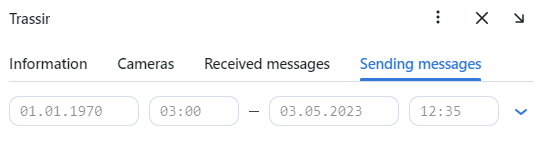
Sent and received messages can be viewed in the corresponding tabs of the target VMS:
Now, your FindFace Multi installation is enhanced by external VMS support. You may connect as many VMS systems and required and add existing video streams in FindFace seamlessly within just a few clicks.