S3-Compatible Storage Configuration
S3 (Simple Storage Service) provides reliable and long-term storage of an unlimited number of files and data. It gives a way to avoid the limitations of the file system when it comes to large amounts of data.
Configure S3-Compatible Storage
In this section, we will describe how to configure S3-compatible MinIO storage for operation with FindFace Multi. If you prefer another S3-compatible storage, you are yourself responsible for its configuration.
-
Note
MinIO operation has been tested on Ubuntu only. Refer to the official MinIO documentation to find out whether other OS are supported.
To start a container with MinIO, execute the following command, specify the
MINIO_ROOT_USERandMINIO_ROOT_PASSWORDlogin credentials:docker run -d \ -p 9003:9000 \ -p 9004:9001 \ -e "MINIO_ROOT_USER=admin" \ -e "MINIO_ROOT_PASSWORD=admin_admin" \ -v /path/to/storage_directory:/data \ quay.io/minio/minio server /data --console-address ":9001"
where
/path/to/storage_directoryis a directory, allocated for the S3 storage.MinIO web interface address will depend on the interface that you have selected during FindFace Multi installation in step #4.5. The port in use is
9004, e.g.,192.168.112.254:9004. Log in to the MinIO web interface withMINIO_ROOT_USER,MINIO_ROOT_PASSWORDlogin credentials that you have specified in the previous step.In the MinIO UI, create a bucket (Buckets -> Create Bucket). Assign a default name
ffsec.storageto the bucket.Note
We advise keeping the bucket name
ffsec.storageas suggested by default, because it corresponds to the'STORAGE_BUCKET_NAME'parameter in the/opt/findface-multi/configs/findface-multi-legacy/findface-multi-legacy.pyand/opt/findface-multi/configs/findface-multi-legacy/findface-multi-identity-provider.pyconfiguration files. If you use another name for a bucket, make sure to adjust it in the above-mentioned configuration files accordingly.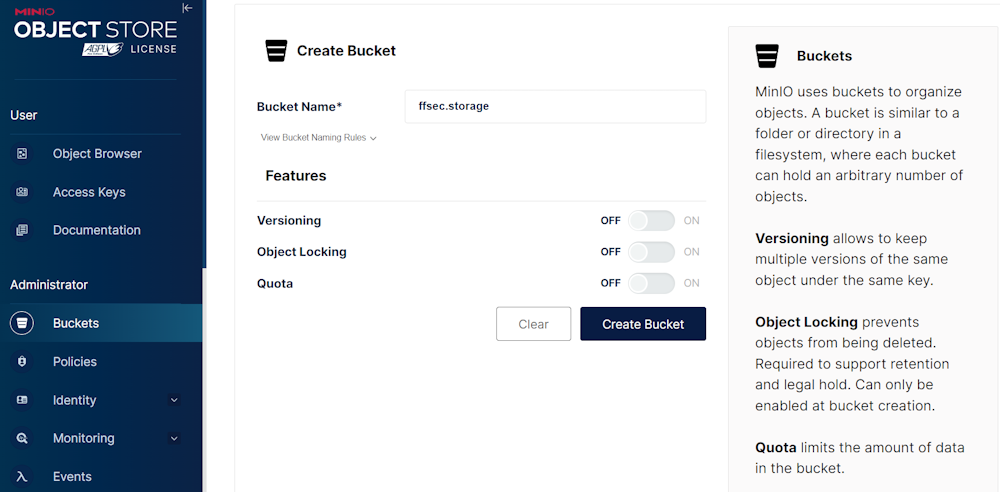
Click on the bucket to open its settings.
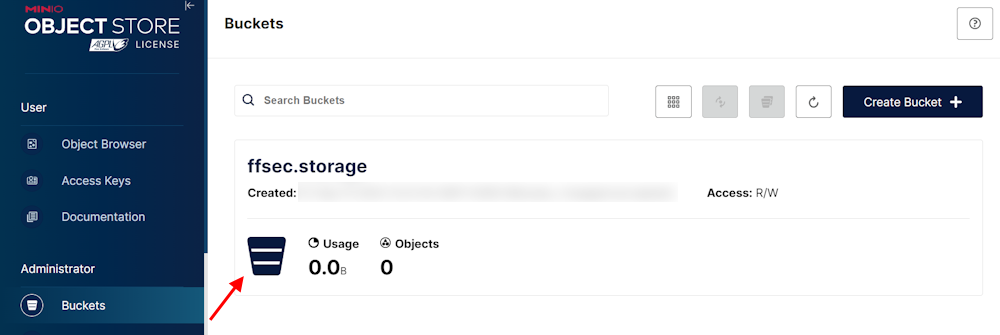
Change access policy for the bucket to
publicfor the correct processing of video archives.
In the User -> Access Keys section, create an access key. Write down the
Access keyandSecret keyvalues as you will need them later for FindFace Multi configuration.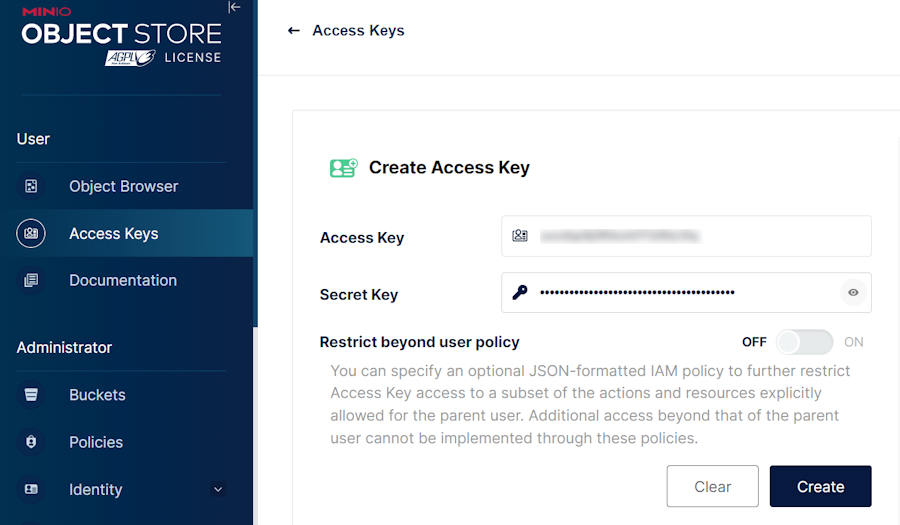
Note
MinIO UI may differ. In the earlier versions, set up an access key in the Identity -> Service Accounts -> Create service account section.
Configure FindFace Multi to Employ S3-Compatible Storage
In the
/opt/findface-multi/configs/findface-multi-legacy/findface-multi-legacy.pyconfiguration file, locate theEXTERNAL_STORAGE_CONFIGsection.sudo vi /opt/findface-multi/configs/findface-multi-legacy/findface-multi-legacy.py EXTERNAL_STORAGE_CONFIG = { 'STORAGE_TYPE': None, 'STORAGE_BUCKET_NAME': 'ffsec.storage', 'ACCESS_KEY_ID': 'access-key', 'SECRET__KEY': 'secret-key', 'REGION_NAME': 'eu-west-3', 'LOCAL_S3_SETTINGS': { 'CONNECTION_ADDRESS': 'localhost:9003', }, }
Configure the
EXTERNAL_STORAGE_CONFIGparameters:The
'STORAGE_TYPE'parameter may take values'LOCAL','AWS',None:None– local file system (default)'LOCAL'– any S3-compatible storage (e.g., MinIO)'AWS'– Amazon S3 storage.
Change the
'STORAGE_TYPE'parameter to'LOCAL'to enable S3-compatible storage.The values of the
'STORAGE_BUCKET_NAME','ACCESS_KEY_ID', and'SECRET__KEY'parameters should correspond to those that were specified during MinIO initialization.'REGION_NAME'– the default value iseu-west-3. It can be changed in MinIO settings.In the
'LOCAL_S3_SETTINGS'->'CONNECTION_ADDRESS', replace thelocalhostwith MinIO IP host address, e.g.,192.168.112.254.
Configure the
/opt/findface-multi/configs/findface-multi-identity-provider/findface-multi-identity-provider.pyfile in the same way. Locate theEXTERNAL_STORAGE_CONFIGsection and apply changes, analogous to those made in the/opt/findface-multi/configs/findface-multi-legacy/findface-multi-legacy.pyfile in the previous step.sudo vi /opt/findface-multi/configs/findface-multi-identity-provider/findface-multi-identity-provider.py EXTERNAL_STORAGE_CONFIG = { 'STORAGE_TYPE': None, 'STORAGE_BUCKET_NAME': 'ffsec.storage', 'ACCESS_KEY_ID': 'access-key', 'SECRET__KEY': 'secret-key', 'REGION_NAME': 'eu-west-3', 'LOCAL_S3_SETTINGS': { 'CONNECTION_ADDRESS': 'localhost:9003', }, }
In order for the UI to load content (thumbnails, full frame images, and so on), configure the
/opt/findface-multi/configs/findface-multi-ui/nginx-site.conffile. In theserversection, locate theadd_header Content-Security-Policyand add{ip_host_s3}:9003/address, e.g.:sudo vi /opt/findface-multi/configs/findface-multi-ui/nginx-site.conf ... server { listen 80 default_server; listen [::]:80 default_server; ... location / { ... } add_header Content-Security-Policy "default-src 'self' 192.168.112.254:9003/ ; img-src 'self' 192.168.112.254:9003/ blob: data:; media-src 'self' blob:; style-src 'self' 'unsafe-inline';"; ... }
Rebuild all FindFace Multi containers from the
/opt/findface-multidirectory .cd /opt/findface-multi sudo docker-compose down sudo docker-compose up -d
To make sure that the
FindFace Local S3 Storageservice is running, explore thefindface-multi-findface-multi-legacy-1logs:sudo docker logs findface-multi-findface-multi-legacy-1
Data Transfer Command
To transfer data to either remote or local storage, use the following command:
sudo docker exec -it findface-multi-findface-multi-legacy-1 /opt/findface-security/bin/python3 /tigre_prototype/manage.py transfer_data --to_local / --to_remote
The argument
--to_remotetransfers data to remote storage.The argument
--to_localtransfers data to the local file system.
Before executing the above command, make sure that you have configured FindFace Multi to use S3-compatible storage.