Alarm Monitor
In this chapter:
FindFace Multi allows for embedding an alarm monitor service, an additional functionality that displays information about individual alarms and events as they occur. This increases the awareness of the security service regarding critical events. An alarm monitor cannot be blocked by other windows, and the configuration cannot be changed to mute, which makes it a simpler tool for monitoring centers. Operators can acknowledge alarms or discard.
Server Preparation
For working alarm monitor service, FindFace Multi uses Annex, a software platform that provides video analytics tools. Annex is installed by default when you deploy FindFace Multi, and includes a set of components and services:
Component |
Ports in use |
Description |
Vendor |
|---|---|---|---|
backend_provider |
1111 |
Service that provides an interface (REST API) for delivering data to various microservices, enriches input data if necessary and converts them to the desired format. |
NtechLab own deployment |
backend_api |
2222 |
Service that provides an interface (REST API) to application service databases, as well as a proxy interface to FindFace Multi and FindFace Server. |
|
service_notifier |
3311 |
The auxiliary service for sending notifications (Notify) through various client channels (WebSocket, Telegram, Mail), as well as for sending client responses (Reply) back to the services. |
|
alarm-app |
4444 |
A web service of the Alarm Monitor. |
|
service_alarmer |
n/a |
An application service for announcing alarm messages with the ability to acknowledge them by the user. |
Annex receives events from FindFace Multi via webhooks and sends them to Alarm Monitor.
Before runnning Alarm Monitor, make sure Annex is deployed and perform some preliminary actions in FindFace Multi.
Make sure all Annex services are running.
sudo docker ps -a
In order Alarm Monitor to work correctly with Annex, it is necessary to enable the VERBOSE_WEBHOOKS parameter to get information about the webhook, line crossing, matched cards as well as SAVE_DETECTOR_PARAMS to get information about the bbox.
sudo vi /opt/findface-multi/configs/findface-multi-legacy/findface-multi-legacy.py

FFSECURITY = {
    ...
    # send serialized cards, card-lists, camera and camera groups in webhooks
    'VERBOSE_WEBHOOKS': True,
    ...
    # save full detector params from video worker request
    'SAVE_DETECTOR_PARAMS': True,
    ...
}
Restart all FindFace Multi containers.
cd /opt/findface-multi/

sudo docker-compose restart
In the web interface FindFace Multi create a user. See Role and User Management. Use these credentials to log in Alarm Monitor.
Setting Events
In order for the alarm monitor service to be able to receive events of matching objects, line crossing and counter events from FindFace Multi, use webhooks.
To monitor events, do the following:
In the FindFace Multi web interface, navigate to the Settings tab. Click Webhooks.
Click Add new webhook.
Specify the webhook header.
Specify URL to automatically send notifications
http://ip_address:port/ff_multi/alarmer/.Note
ip_address:portmust be substituted into your IP address for Annex and a port forbackend_provider, for examplehttp://127.0.0.1:1111/ff_multi/alarmer/.Specify filters.
Setting Application
The application is available for different platforms and operating systems.
The application is deployed in the standard way for your operating system and also available from the FindFace Multi navigation bar in the web-interface.
Note
We recommend installing Alarm Monitoring Application. Please contact our support and sales team on support@ntechlab.com to get the latest version.
Do the following:
Download the latest version of Alarm Monitoring Application for your operating system.
Run the executable file to launch the application.

Navigate to the settings.

Note
If you use a web interface for running the Alarm Monitor, enter
http://ip_address:4444/config/in the address bar to navigate to the settings. Whereip_addressis the IP address available for Annex.Select the alarm sound and volume.
If necessary, test the alarm sound by clicking the button Imitation Alarm.
Specify the web service address, for example
ws://ip_address/annex.Note
ip_addressis the IP address available for Annex.Select the interface language.
Click Save.
Click Log in.
Enter username and password.
Work with the Alarm Monitor
Alarm Monitor does not display any information by default. When receiving the alarm, the application displays information about the event together with an audio signal. The application will alternately display events until each of them is confirmed.
The following types of alarm events are supported by Alarm Monitor:
Line crossing (the line and track are currently displayed only for bodies and faces)
Matches/non-matches with lists (for faces, bodies and vehicle)
Counters (bbox are currently displayed only for bodies)
Example of line crossing event
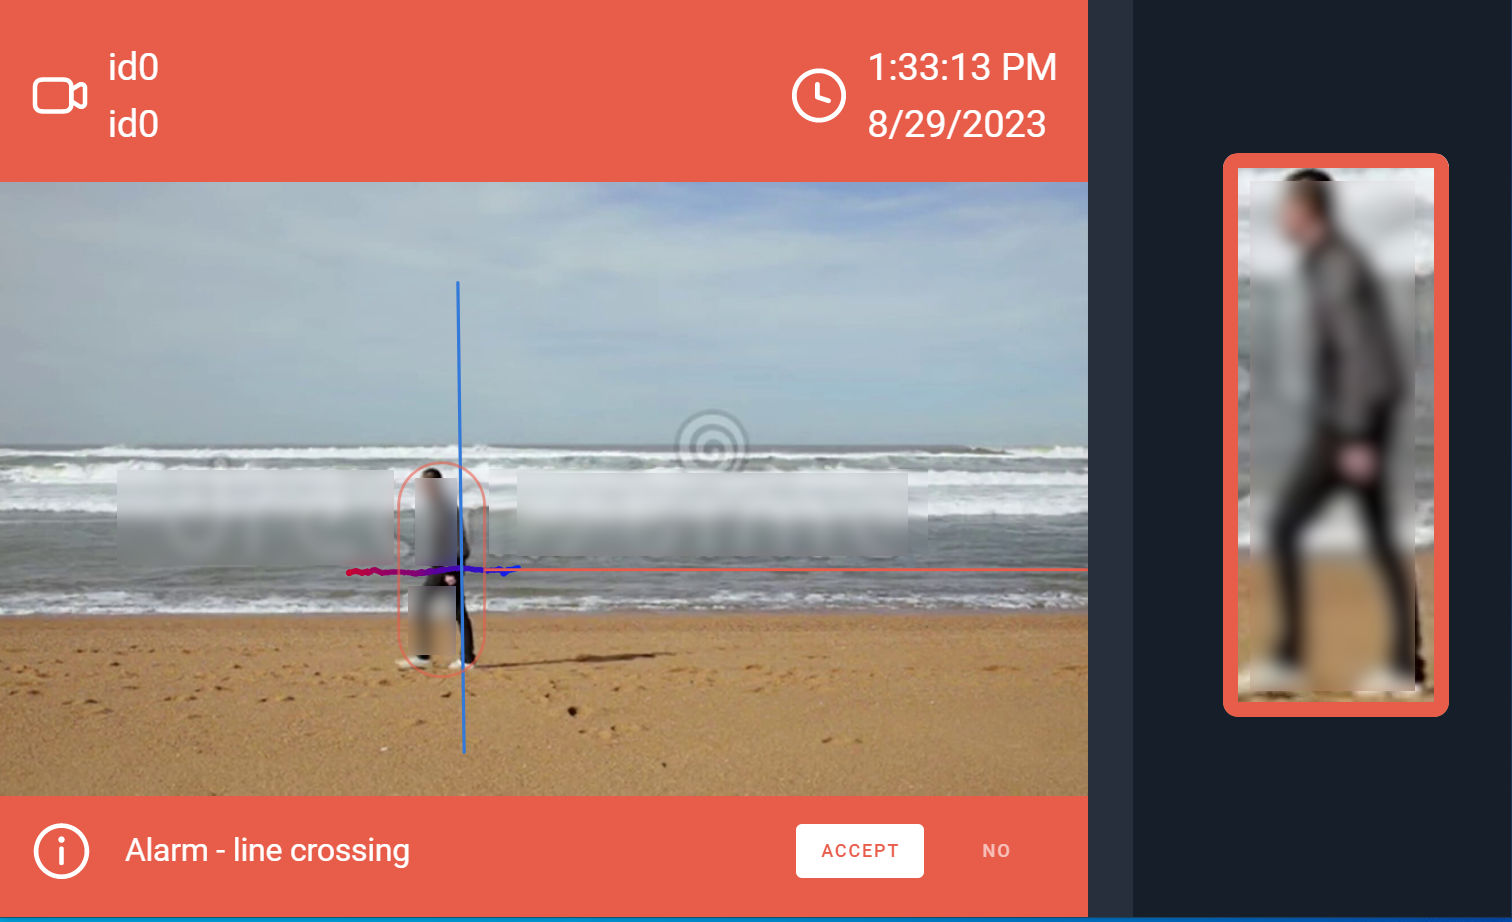
The following elements are displayed:
Full frame of the event with the bbox of the body, the line crossing and the track of the object
Photo of the body crossing the line
Webhook header
Camera group/Camera
Date and time of the event
Example of object (face/body) matching event

The following elements are displayed:
Full frame of the event
Photo of the object from the video stream
Photo of the matched object from the record index and a match probability
Watch lists that contain a person/vehicle
Webhook header
Camera group/Camera
Date and time of the event
Example of counter event
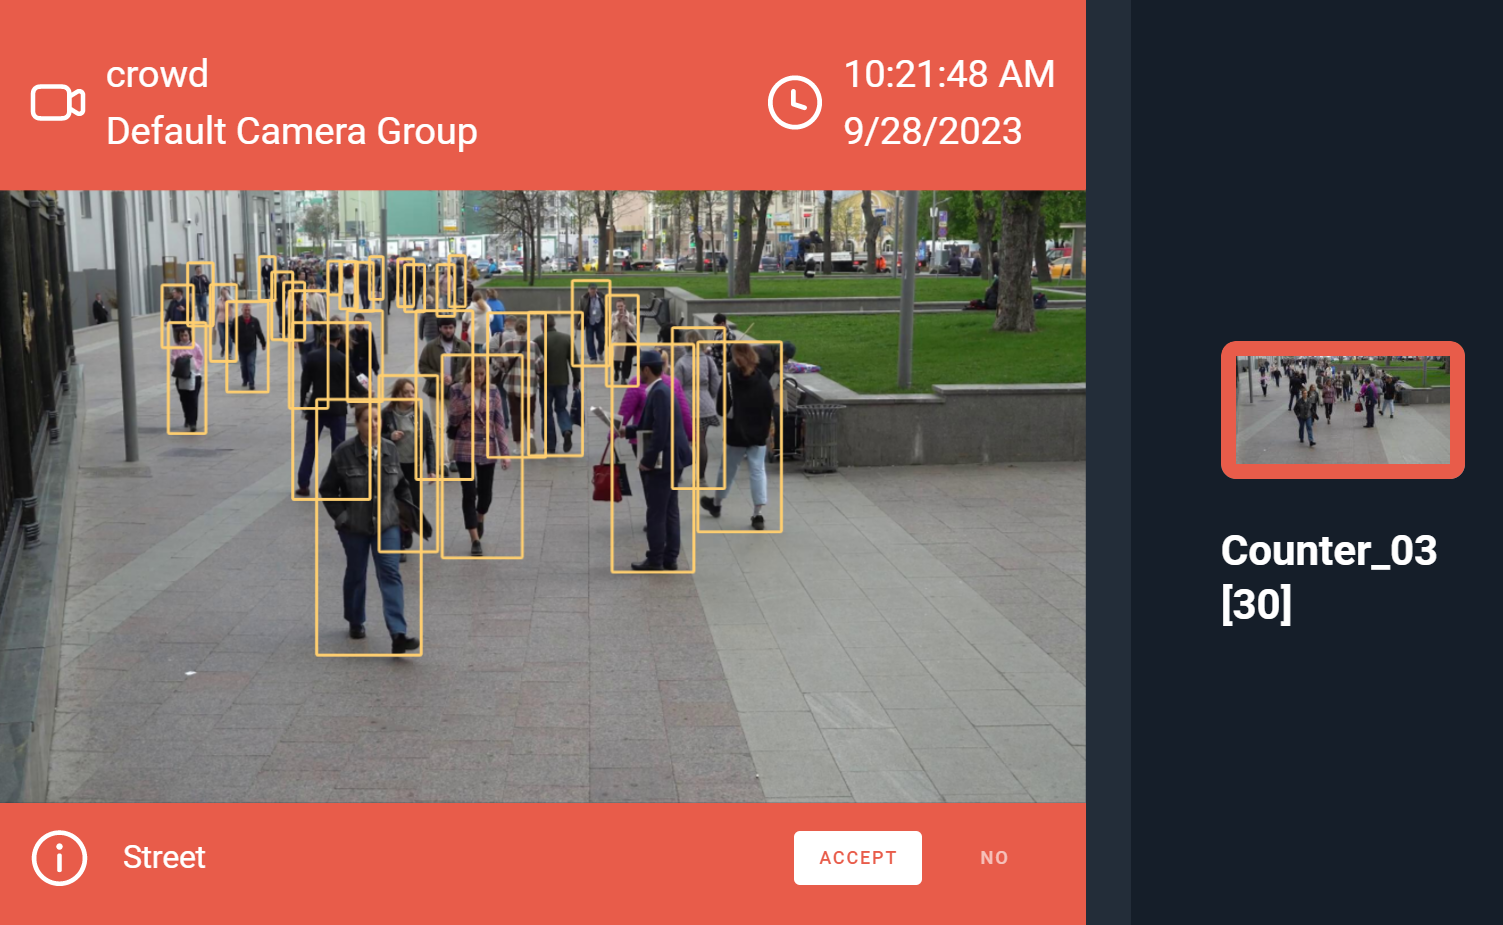
The following elements are displayed:
Full frame of the event
Screenshot
Counter name and number of bodies in the screenshot
Webhook header
Camera group/Camera
Date and time of the event
Click Accept to acknowledge the alarm, or No to discard. Alarm confirmation is expected within 90 seconds by default. After the interval expires, an automatic confirmation occurs. You may change this value using the ack_interval parameter in the webhook URL, for example http://127.0.0.1:1111/ff_multi/alarmer/?ack_interval=180. If the value is 0, no confirmation is expected.