Alarm Feed
Important
Before using this functionality, disable record index protection by setting 'OVERPROTECT_MEDIA': False. Alerts will not work properly with OVERPROTECT_MEDIA enabled.
Back in FindFace Multi 2.1, we introduced the Alarm Monitor — a simple alarm monitoring service that allows an operator (e.g, a security staff member) to see an alarm and quickly react to the alarming event. In FindFace Multi 2.2 this functionality was further developed into another service — Alarm Feed. Although the functionality of the services overlaps, they are intended for different purposes and complement each other.
An Alarm Feed user is a responsible person in the monitoring center, who needs to view alarm notifications at the facility for a certain period of time and download a report. At the same time, the Alarm Feed serves for finalizing work with alarming events that a user acknowledged or rejected in the Alarm Monitor, or in case an alarm was acknowledged automatically.
In this chapter:
Alert Manager
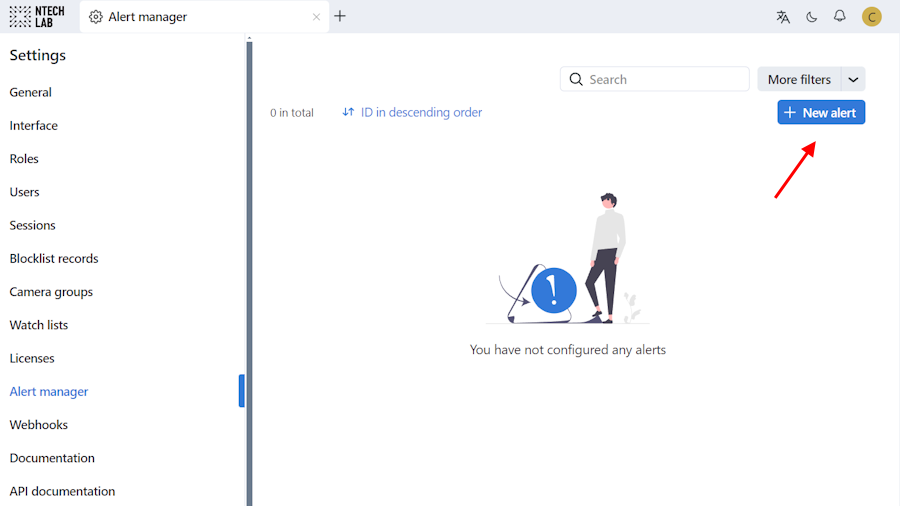
To start receiving notifications about alarms, configure an alert — a selection of rules and settings, under which the system will send a notification to the selected delivery channels. In FindFace Multi, navigate to Settings → Alert manager and click + New Alert.
It will open an alert configuration wizard. To configure an alert, do the following:
In the General tab, provide an alert name and tags if necessary. Select Active to make an alert active. Then, click Next to move to the Alert rules tab.
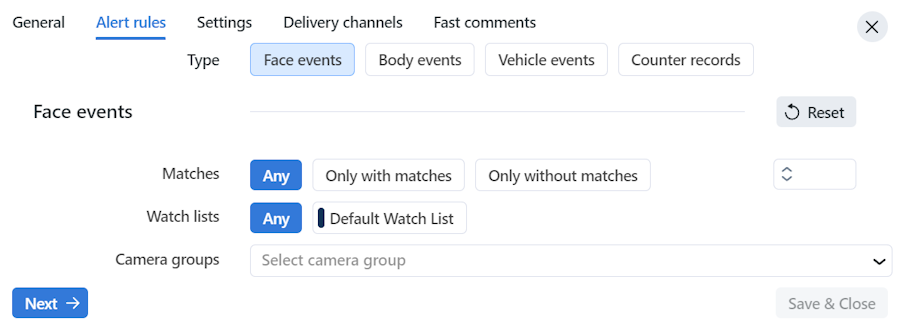
In the Alert rules tab, define alert conditions using filters. You can configure a rule for one entity only. Namely, a single rule cannot combine face events and body events filters. They should be separate rules: one is for face events and another one is for body events. A match to the rule will trigger an alert about the alarm. This section has the same set of filters as the Webhooks section does.
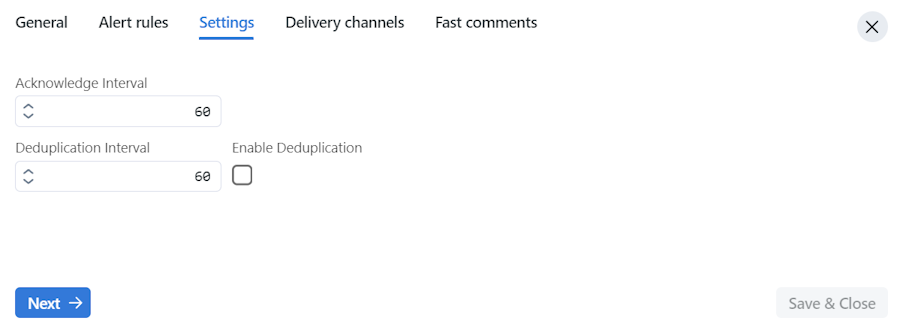
The Settings section allows you to specify:
Acknowledgment interval (enabled by default): time in seconds to manually acknowledge or reject an alarming event, 60 seconds by default. An alarm becomes acknowledged automatically after the time interval expires. If the acknowledgment interval is set to
0, alarms become acknowledged automatically right after they occur. At any time, you can follow up on the acknowledged alarm in the pending status and complete it manually.Deduplication interval: time in seconds to exclude coinciding object recognition events, 60 seconds by default. For face objects, the system compares their tracks and feature vectors, for silhouettes — their tracks, for vehicles — their tracks and license plate numbers. This setting is disabled by default. To enable it, select the Enable deduplication checkbox.
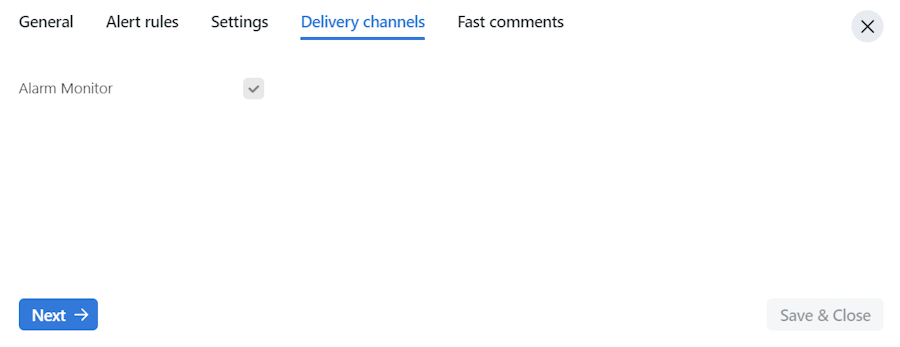
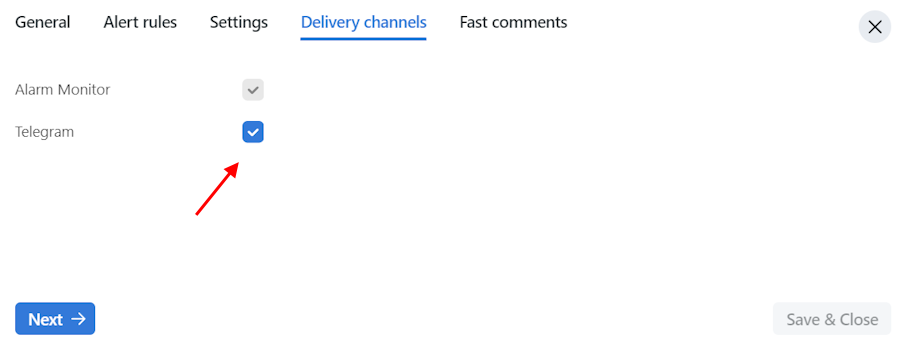
In the next tab, select the Delivery channels to get notifications to. A delivery channel Alarm Monitor implies sending notifications in the Alarm Monitor and Alarm Feed. This setting is enabled by default (non-configurable).
To get notifications in the Telegram messenger, configure Telegram bot and enable it in FindFace Multi.
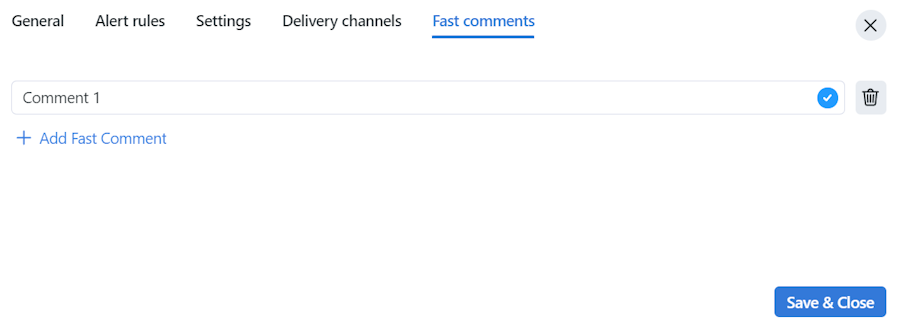
In the Fast comments tab, create a comment (optional) for an alert. These comments are used to complete your work with an alarm in the Alarm Feed. These comments are alert-specific. They will be added to the default comments (common to all alerts), provided by the system. Read more here.
After you have finished an alert configuration, click Save and Close. You will be redirected to the list of already created alerts. Use More filters to work with alerts.
Display Custom Alarms
FindFace Multi includes integration with Annex – a software platform that provides video analytics tools. Such kind of integration allows you to monitor events that involve attributes not yet supported by FindFace Multi (e.g., fire, a left item, etc.) subject to the appropriate license.
You can configure the display of custom alarms in FindFace Multi. To do that, take steps 1-4 if your FindFace Multi instance uses an external address. Or jump to steps 3 (see Note), 4 in case your FindFace Multi instance is running on the local host.
Open the
/opt/findface-multi/docker-compose.yamlconfiguration file. Configure theservice_alarmerservice by addingDSN_FF_UPLOAD: 'http://<external-ip>:3333/to the environment:sudo vi /opt/findface-multi/docker-compose.yaml ... service_alarmer: command: [python, -m, service_alarmer] depends_on: [rabbitmq, timescaledb] environment: {DROP_ALL: 'False', DSN_AMQP: 'amqp://ntech:123sNyvm5axPkYgI08wiTsnQ5VtJtUAv@127.0.0.1:5672/', DSN_PG: 'postgresql+asyncpg://ntech:LcyEL1UpVUcmxvYIc12jMiR2HkKF123m@127.0.0.1:5433/annex', DSN_FF_UPLOAD: 'http://192.168.112.254:3333/'} image: docker.int.ntl/presale/annex:2.0.1 logging: {driver: journald} network_mode: service:pause restart: always ...
Add the
sed -i 's/listen 127.0.0.1:3333/listen 3333/g' /etc/nginx/conf.d/ffupload.confline to the end of the/opt/findface-multi/configs/findface-upload/40-ffupload.shfile:sudo vi /opt/findface-multi/configs/findface-upload/40-ffupload.sh #!/bin/sh sed -i 's/listen 3333/listen 127.0.0.1:3333/g' /etc/nginx/conf.d/ffupload.conf sed -i 's/listen 127.0.0.1:3333/listen 3333/g' /etc/nginx/conf.d/ffupload.conf
In the
/opt/findface-multi/configs/findface-multi-ui/nginx-site.conffile, configureadd_header Content-Security-Policy: add the sourcehttp://<external-ip>:3333to theimg-srcdirective:sudo vi /opt/findface-multi/configs/findface-multi-ui/nginx-site.conf ... add_header Content-Security-Policy "default-src 'self'; img-src 'self' http://192.168.112.254:3333 blob: data:; media-src 'self' blob:; connect-src 'self' data:; style-src 'self' 'unsafe-inline';"; ...
Note
If your FindFace Multi instance is running on the local host, add the source
http://<localhost>:3333to theimg-srcdirective in theadd_header Content-Security-Policyline.Restart all FindFace Multi containers.
cd /opt/findface-multi/

sudo docker-compose down
sudo docker-compose up -d
Work with Alarm Feed
Access Alarm Feed from the main menu.
An alarm may take up a status:
New: new and unprocessed alarms without comments.
Pending:
acknowledged/rejected by an operator;
no action is taken by an operator: an alarm becomes automatically acknowledged after acknowledgment interval expires.
Completed: the first comment has been added to an alarm.
When a new alarm occurs, you may acknowledge it  or reject it
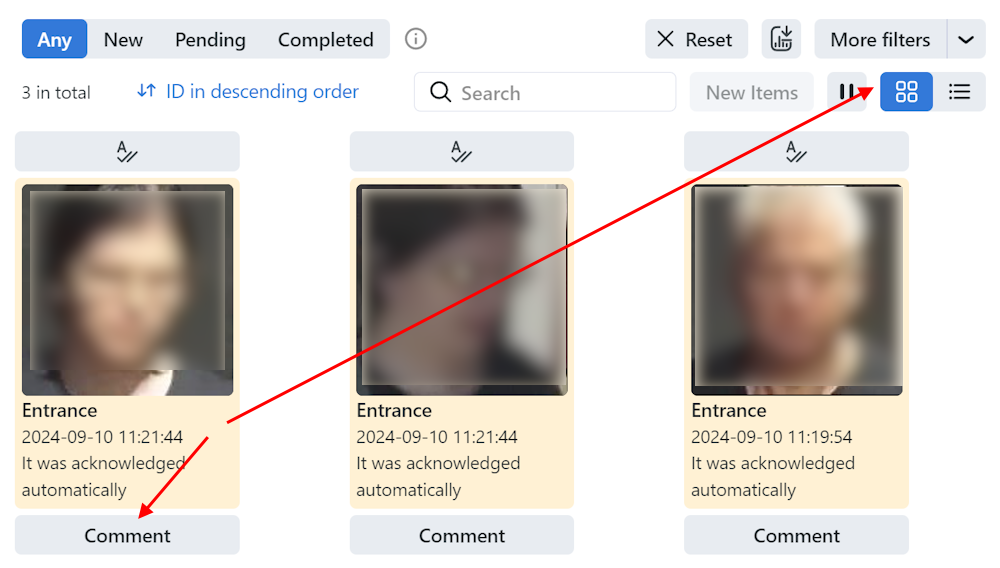
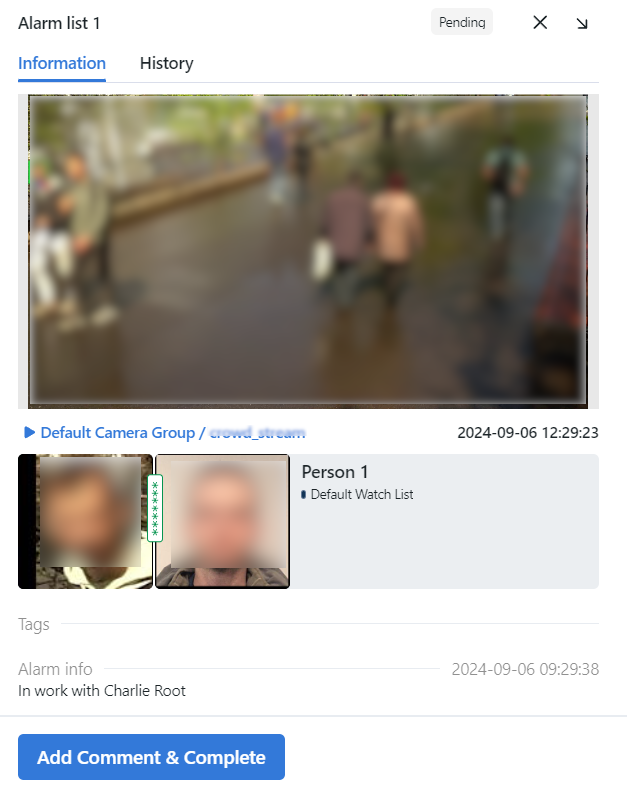
  (in case you consider an alarm false). If no action is taken by an operator, an alarm becomes automatically acknowledged after acknowledgment interval expires. An alarm is considered processed and completed only when at least one comment is left. Depending on the page layout (tile or list), to leave a comment, go to Add Comment & Complete in case you are using a list layout:
or Comment, if you switched to a tile view:
You can complete an alarm with a default comment, provided by the system, or with your own comment that was configured on the step of creating fast comments in the alert. To configure or delete the default comments, locate the "annex" section in the /opt/findface-multi/configs/findface-multi-legacy/findface-multi-legacy.py file. Remove a default comment or replace it with your own one in the "comments" parameter:
sudo vi /opt/findface-multi/configs/findface-multi-legacy/findface-multi-legacy.py

"annex": {
    "enabled": True,
    "comments": [
      "Action taken"
      ...
    ]
},
Note
A user who completes an alarm in the Alarm Feed, may have limited permissions compared to a user who created an alert in the Alert manager. To view fast comments that were left for an alert in the Alert manager , a user must have an alertrule view permission enabled. If an alertrule view permission is disabled, a user will only see and be able to work with the default comments, provided by the system.
In order to pause the flow of notifications, click  in the upper-right corner of the Alarm Feed tab.
While working with Alarm Feed, use the following filters:
Status: filter alarms by status: new, in progress, or completed.
Reaction: display only acknowledged, only rejected alarms, or alarms without any reaction applied.
Detection time: display only alarms that were detected within a given date and time interval.
Processed by: filter by the person who last acknowledged/rejected and completed an alarm.
Comments: filter alarms by comments.
Alert ID: filter by an alert ID (alert in the Alert manager)
Alert message ID: filter by an alert notification ID (alert notification in the Alarm Feed)
Note
Each alarm status has preset conditions. E.g., New alarms are always without reaction and comments. Pending alarms are either acknowledged or rejected and without comments. Completed alarms are acknowledged or rejected and with comments.
Clicking the alarm record will open the alarm sidebar. The alarm sidebar view may differ depending on the source of the alarm. For alarms that have been configured with FindFace Multi, the Information tab in the sidebar displays a full frame image of the event, a thumbnail of the event, a line with a track (if preconfigured), a camera group/name, detection date and time, a camera preview (if the video player is enabled), tags (if any), and alarm information. You will also see if there’s a match with a record index and the match probability. In the Information tab, you can Add Comment & Complete your work with an alarm.
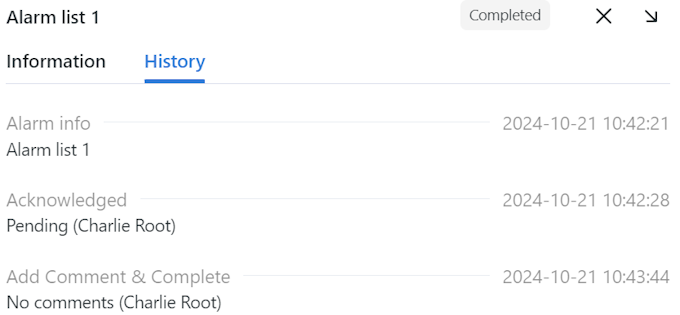
The History tab keeps the following information: date and time of the alarm, who acknowledged/rejected the alarm and at what time, who completed the alarm and at what time.
For alarms that have been configured with Annex, the sidebar does not display FindFace Multi-specific information.
Configure Telegram Bot
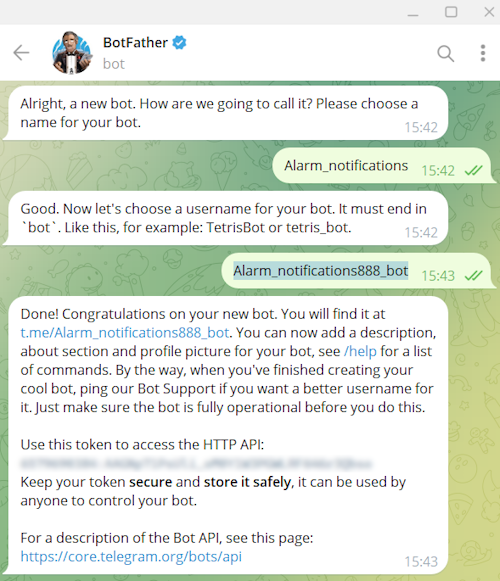
You can create a Telegram bot to get alarm notifications into your Telegram messenger. To create a bot, do the following:
Switch to BotFather in the Telegram messenger and click
/start.Send
/newbotcommand.Choose a name for your bot, e.g.,
Alarm_notifications– this is the name that will be used as your bot title.Choose a username for your bot (if you use letters as a part of the username, mind that only Latin letters allowed): it must be unique and end with
_bot, e.g.,Alarm_notifications888_bot.You will get a message with the token and a link to your bot.
Copy the token.
Open the
/opt/findface-multi/docker-compose.yamlconfiguration file. In theservice_notifier_tgsection, locate theBOT_TOKENand paste the token that you have copied in the previous step into it.sudo vi /opt/findface-multi/docker-compose.yaml ... service_notifier_tg: command: [python, -m, service_notifier.tg] depends_on: [rabbitmq] environment: {ALLOWED_SERVICES: null, ALLOWED_STREAMS: null, BOT_TOKEN: 'QWERTYUIOPASDFGH', DSN_AMQP: 'amqp://ntech:CxL2UmYgJU8T36P7734af906pYieGB6Q@127.0.0.1:5672/'} ...
Open the
/opt/findface-multi/configs/findface-multi-legacy/findface-multi-legacy.pyconfiguration file. In theFFSECURITYsection set'ENABLE_TELEGRAM': True.sudo vi /opt/findface-multi/configs/findface-multi-legacy/findface-multi-legacy.py FFSECURITY = { 'ENABLE_TELEGRAM': True,
Restart all FindFace Multi containers.
cd /opt/findface-multi/

sudo docker-compose down
sudo docker-compose up -d
In FindFace Multi UI, you will see that Telegram has appeared in the list of delivery channels. To enable it, navigate Alert manager → New alert → Delivery channels.
Access your bot and
/loginwith FindFace Multi credentials.
Warning
According to the Telegram official documentation, bots have limitations on the number of messages they can broadcast in a single interval. So, if the system sends a number of alerts beyond the limits set by Telegram, some alerts may be skipped.
