Licensing
In this chapter:
Licensing Principles
The overall number of extracted feature vectors.
Note
The feature vectors are extracted from objects detected in the video, from images in the record index, and user photos, and when building so-called cluster centroids.
The licensing scheme is the following:
Events: 1 event of video object detection = 1 object in a license.
Record Index: 1 photo in a record = 1 object in a license.
Clusters: 1 person = 1 object in a license.
Users: 1 photo of a user = 1 object in a license.
The number of video sources currently in use (i.e., active video processing jobs for video files).
The number of model instances in use in the
findface-extraction-apiservice.Face attribute recognition: gender/age/emotions/glasses/beard/face mask/etc.
You can choose between the following licensing methods:
The online licensing is provided by interaction with the NtechLab Global License Manager
license.ntechlab.comand requires a stable internet connection, DNS, and open port 443 TCP. Upon being disconnected from the internet, the system will continue working off-grid for 4 hours.
Note
It is possible to prolongate the off-grid period for up to 2 days. Inform your manager if you need that.
The offline licensing via a USB dongle requires a USB port on the physical server with the
findface-ntlsservice (license server in the FindFace core).The offline licensing via hardware fingerprint requires Sentinel drivers installed on the physical server with the
findface-ntlsservice.
Important
For the system to function, a single instance of findface-ntls should be enough. If your system requires more license servers, contact your NtechLab manager beforehand to prevent your system from being blocked.
View and Update License
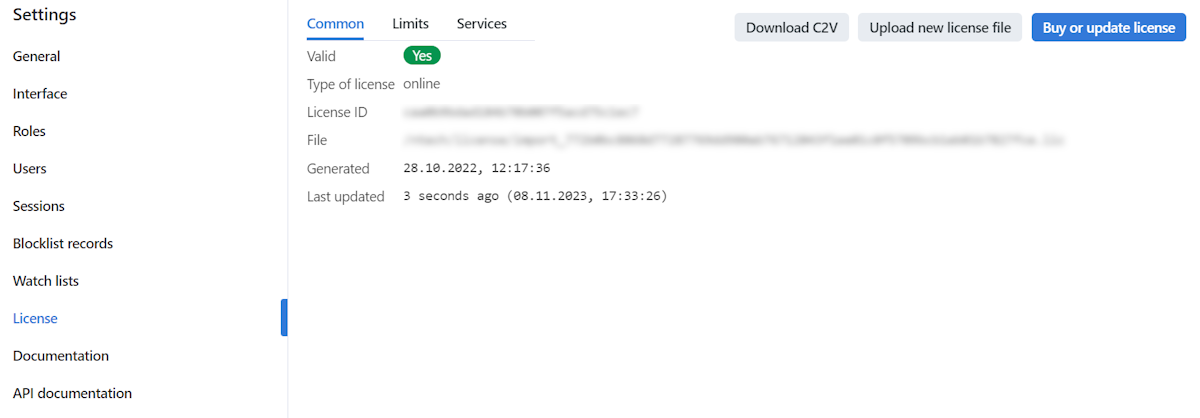
After installing FindFace CIBR, upload the license file you obtained from the manager into the system. To do so, navigate to .
Use the same tab to consult current licensing information and upgrade your license.
Offline Licensing via USB dongle
To implement the licensing via a USB dongle, do the following:
Inform your manager that you intend to apply this licensing method and request your USB dongle and a license file.
Open the
/opt/findface-cibr/docker-compose.yamlconfiguration file.sudo vi /opt/findface-cibr/docker-compose.yaml
Add the line
privileged: true. Mount the/devdirectory into thefindface-cibr-findface-ntls-1container by listing it in the volumes of thefindface-ntlssection. As a result, the entire section will look as follows:findface-ntls: command: [--config=/etc/findface-ntls.cfg] image: docker.int.ntl/ntech/universe/ntls:ffserver-9.230407.1 network_mode: service:pause privileged: true restart: always user: root volumes: ['./configs/findface-ntls/findface-ntls.yaml:/etc/findface-ntls.cfg:ro', './data/findface-ntls:/ntech/license', '/dev:/dev']
Rebuild all FindFace CIBR containers.
cd /opt/findface-cibr

sudo docker-compose down

sudo docker-compose up -d
Insert the USB dongle into a USB port.
Upload the license file on the License tab.
Offline Licensing via Hardware Fingerprint
Note
Sentinel is a type of offline licenses that, unlike guardant licenses, do not require any physical media for its work.
Glossary:
Sentinel is a software protection and licensing system by Thales. It allows you to implement offline licensing without access to a global server.
The C2V file is a file, containing data about a hardware fingerprint of the client’s machine, for binding the license only to this machine. This file is generated by the sentinel library. The C2V file is generated on the client’s machine where the license key will be installed later.
To implement the fingerprint licensing, do the following:
Inform your manager that you intend to apply this licensing method and request your unique license id. The manager will also supply you with the
findface-sentinel-lib_*.debpackage necessary for the FindFace CIBR and Sentinel integration.Install the Sentinel drivers on the physical server with the
findface-ntlscomponent.Do the following:
Download Sentinel drivers from the official website.
Unzip the downloaded archive and browse to it.
tar -xvzf Sentinel_LDK_Linux_Runtime_Installer_script.tar.gz
cd Sentinel_LDK_Linux_Runtime_Installer_script/
There is another archive
aksusbd-*.tar.gzinside the archive. Unzip it and browse to the resulting directory.tar -xvzf aksusbd-*.tar.gz cd aksusbd-*/
Run the installation command.
sudo ./dinst
Run and check the statuses of the Sentinel services.
sudo systemctl start aksusbd.service hasplmd.service
sudo systemctl status aksusbd.service hasplmd.service
Mount the
/var/hasplmand/etc/hasplmdirectories into thefindface-cibr-findface-ntls-1container. To do so, open the/opt/findface-cibr/docker-compose.yamlconfiguration file and list them in the volumes of thefindface-ntlssection.sudo vi /opt/findface-cibr/docker-compose.yaml findface-ntls: ... volumes: ['./configs/findface-ntls/findface-ntls.yaml:/etc/findface-ntls.cfg:ro', './data/findface-ntls:/ntech/license', '/var/hasplm:/var/hasplm', '/etc/hasplm:/etc/hasplm']
Rebuild all FindFace CIBR containers.
cd /opt/findface-cibr

sudo docker-compose down

sudo docker-compose up -d
Put the
findface-sentinel-lib_*.debpackage received from your manager into some directory on the same host. Install the package.sudo dpkg -i /path/to/findface-sentinel-lib_*.deb
In the FindFace CIBR web interface, navigate to . Take a hardware fingerprint (C2V file) by clicking the Download C2V for activation button.
Tip
If you prefer working with the console, you can send the following API request to
findface-ntlsinstead:curl <findface-ntls-server-ip>:3185/c2v >my_pc.c2v
Send the License ID and the C2V file to your manager and receive your license file in return.
Upload the license file on the License tab.
