Line Crossing
In this chapter:
The line crossing functionality is an integral part of the video analytics system and plays a significant role in perimeter security. It allows you to determine the violation based on the crossing of pre-defined virtual lines by people or vehicles.
In addition, the line crossing functionality allows you to collect data for further analysis of the flow of visitors in the Analytical BI service and solve the following tasks:
Perimeter control and penetration into restricted areas:
passage to prohibited areas
crossing a line in a forbidden direction
Marketing analytics – analytics of the number of people or cars crossing the line in a given direction (in a shop, in the parking lot, at a bus stop, when visiting parks and public places). For example:
analysis of the flow of visitors and determine the most popular areas inside the store
analysis of the load on the transport network depending on the day of the week and time of the day and others
Setting Up Video Sources
For working with line crossing functionality, configure cameras and uploads. Do the following:
Navigate to the Video Sources tab.
Check the camera or uploads on the list to open the processing configuration wizard.
Navigate to the Faces, Bodies or Vehicles tab, depending on the specified detectors.
Check Send track history.
Set the Track maximum duration to a value greater than 1 (the recommended value is 1000).
Click Save.
Tip
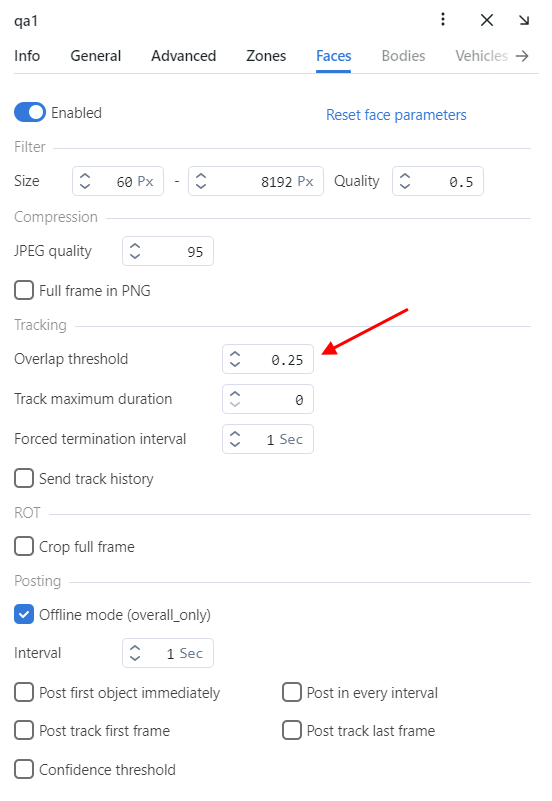
If there are a lot of objects in the video stream, and they begin to overlap each other periodically, which is why some line crossings may not be fixed, then you can increase the value of Overlap threshold in the camera settings for the desired detector.
Tip
If the objects are far enough away, and are poorly or not recognized at all, then you can reduce the value of min_size in the findface-video-worker.yaml file for the desired detector, for example, 32 or 16.
sudo vi /opt/findface-multi/configs/findface-video-worker/findface-video-worker.yaml

...
models:
  cache_dir: /var/cache/findface/models_cache
  detectors:
    body:
      fnk_path: /usr/share/findface-data/models/detector/body.jasmine_fast.018.cpu.fnk
      min_size: 60
    face:
      fnk_path: /usr/share/findface-data/models/detector/face.jasmine_fast.003.cpu.fnk
      min_size: 60
    car:
      fnk_path: /usr/share/findface-data/models/detector/car.gustav_normal.004.cpu.fnk
      min_size: 60
...
Important
When reducing the value of min_size, the load on server resources is increased.
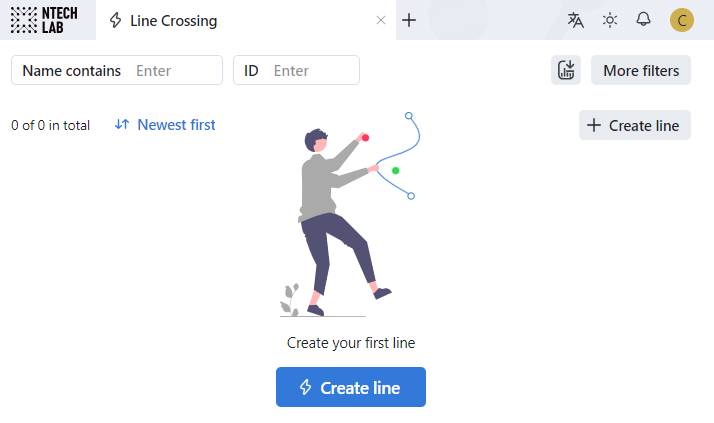
Create Line Crossing
To create a line crossing, do the following:
Navigate to the Line Crossing tab.
Click Create line.
On the Information tab, specify the line name. Add a comment, if needed.

Check Active.
Specify data source. On the Camera tab or Video tab, select a camera group and a camera or a video archive accordingly.
Set the intersection point of the bounding box.
On the Line tab, draw the line.

On the BI Analytics tab, set the line attributes for the Analytical BI service, if necessary.
Click Save.
You will see your list of lines on the Line Crossing tab.

By clicking the three dots, you can apply the following actions to each line crossing:
Filter events
Deactivate
Delete
Filter Line Crossing
The most frequently used filters for the line crossing are available in the upper part of the window.
To display the entire set of filters, click the More filter button. Here it is:
Name contains: filter lines by name.
ID: display a line crossing with a given ID.
Status: filter line crossing by status.
Camera group: display only line crossing from a selected group of cameras.
Cameras: display only line crossing from a selected camera.
Video archive: display only line crossing from a selected video archive.
To create a report, click Apply and create report.
Monitor Line Crossing Episodes and Events
To monitor episodes and events of line crossing, navigate to the Episodes & Events tab. Click Episodes or Events.
You can navigate directly to the Events tab by clicking three dots → Filter face events/Filter body events/Filter vehicle events on the list of lines.
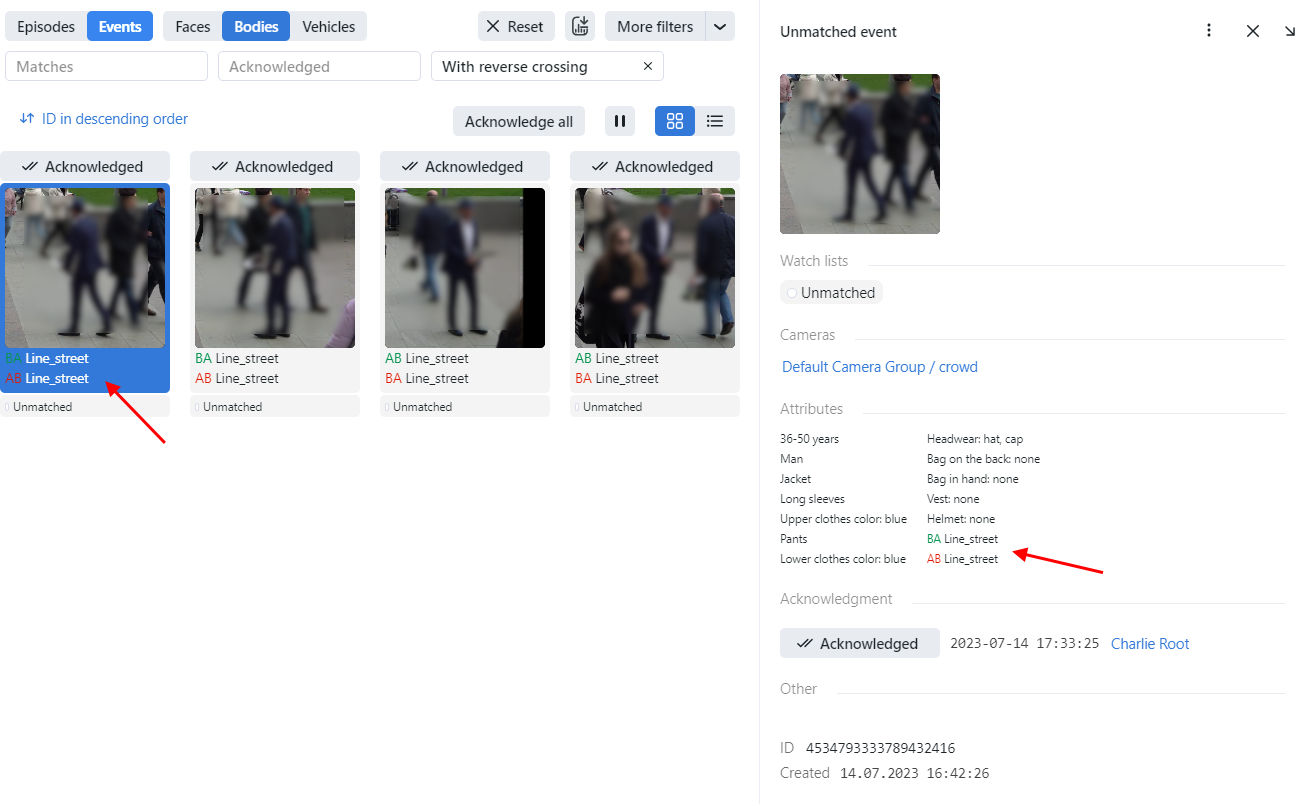
An episode ticket contains information about line crossings that have been created in all of its events (AB or BA).

Also for an event or episode, a red crossing indicates a reverse crossing: when the object has crossed the same line an even number of times and the last crossing is in reverse of the direction from which the first crossing began.
On the full frame of an episode with a line crossing, the best event of an episode with the bbox of an object is displayed, and the line with the track is displayed from the event that had a crossing. The blue color shows the beginning of the track, and the red color shows the end of the track. If there are several events with crossing in the episode, the line and track will be displayed from the first event with crossing in the episode.
