FindFace Web User Interface
FindFace Enterprise Server SDK is equipped with a web user interface which generally duplicates the functionality available via REST API.
To install the web interface, execute on the findface-facenapi host:
Note
First, install nginx if you do not already have it. You can do this as such:
sudo apt-get install nginx
sudo apt-get install findface-ui
To open the web interface, do the following:
In the address bar of your browser, enter
http://<facenapi_ip>:8000/#/.To log in, specify the authentication token for your FindFace Enterprise Server SDK instance. The web interface home page will appear.

The web interface has a highly intuitive and handy design and provides the following functionality:
Note
To work with gender, age and emotions recognition (GAE) in the web interface, you need to configure it in the settings.
Note
Working with photos requires configured findface-upload.
Note
Working with persons requires configured dynamic person creation.
Note
To allow the web interface to run Flash in Chrome, add its IP address to the relevant list: http://<facenapi_ip>:8000/#/. Restart Chrome.
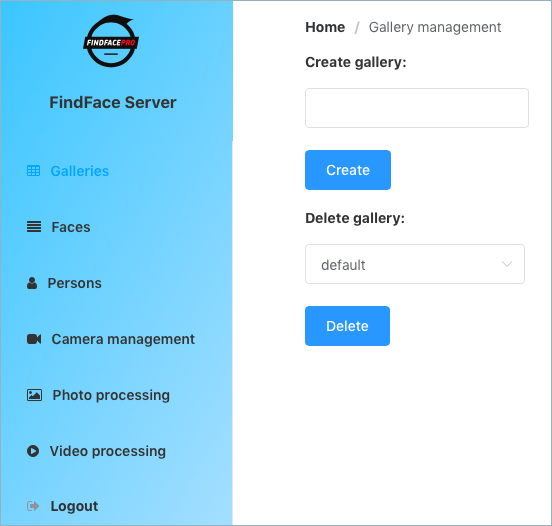
Galleries. Create and delete galleries here.
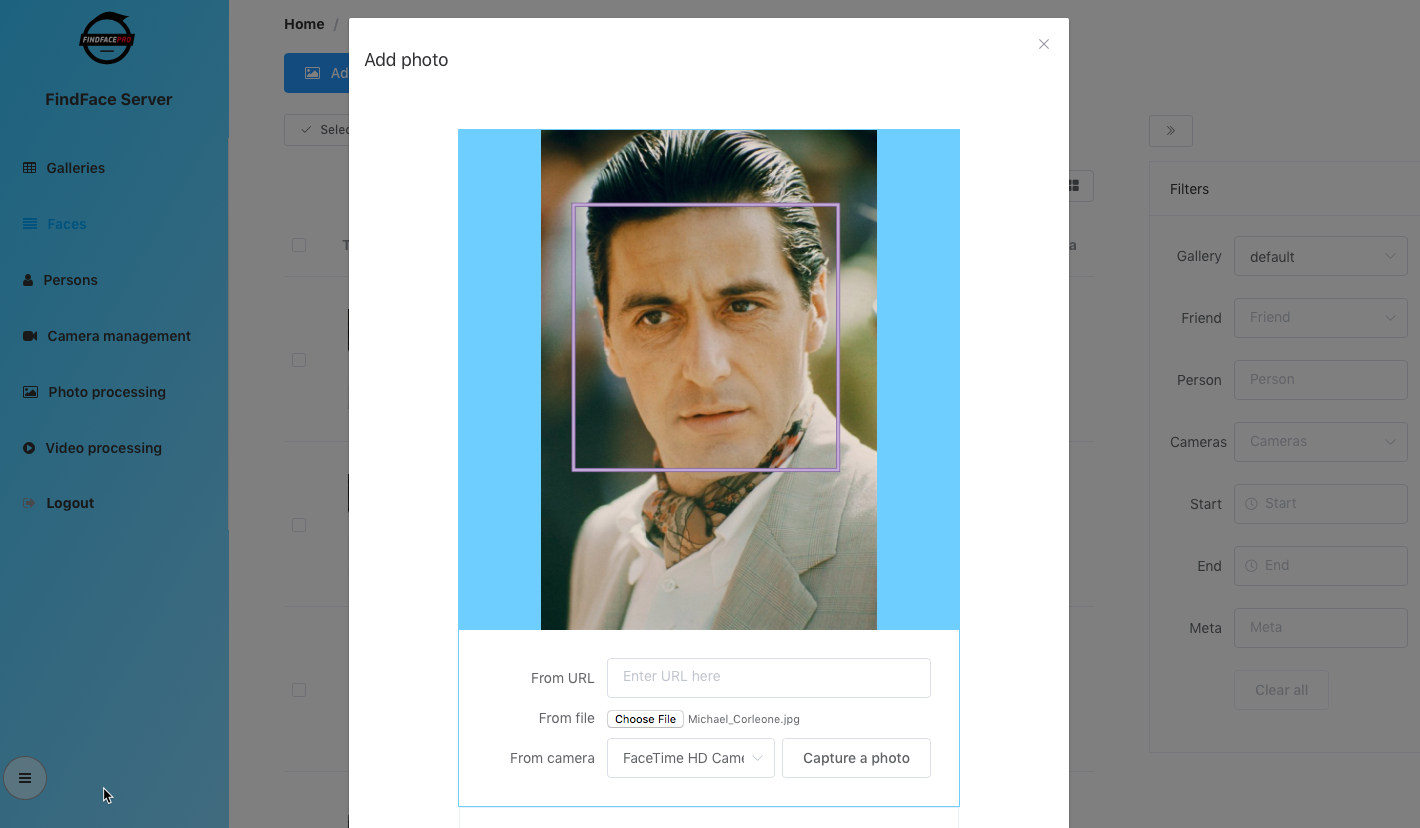
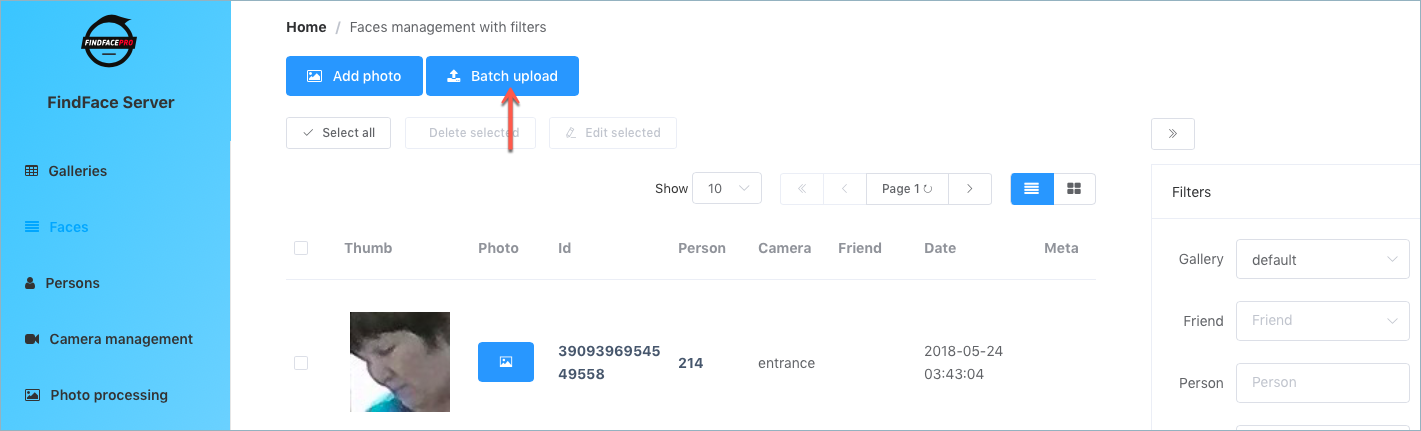
Faces. In this section, you can view, add and delete faces from the galleries.
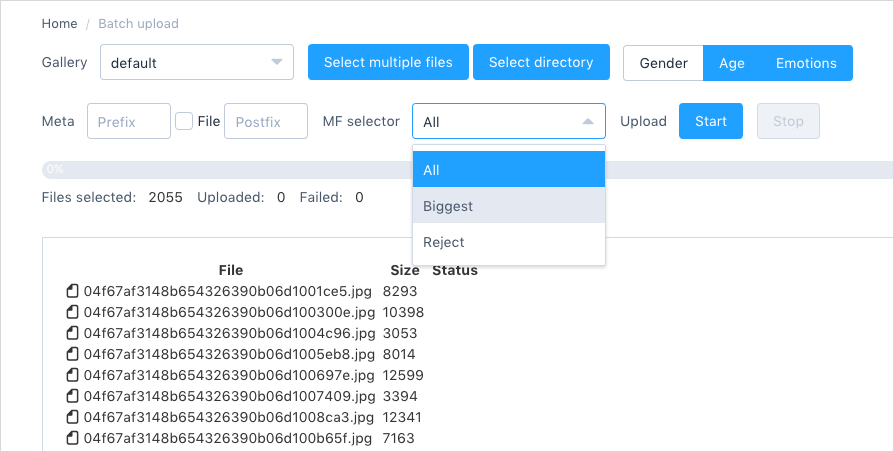
Use the Batch upload option to upload image files in bulk.
Tip
You may also want to use its console alternative.
Select multiple files or a directory, and then configure the automatic meta description for the enrolled faces. Use MF selector to specify behavior in case if multiple faces are detected in an image: enroll all faces, only the biggest one, or reject enrollment.
Tip
You can configure the automatic face meta by appending a custom prefix and/or postfix to the image file name. To avoid merging the 3 words into one, use underscore or another symbol in the prefix and postfix.
Tip
To select photos in the icons mode, click on them as you hold down the CTRL key.
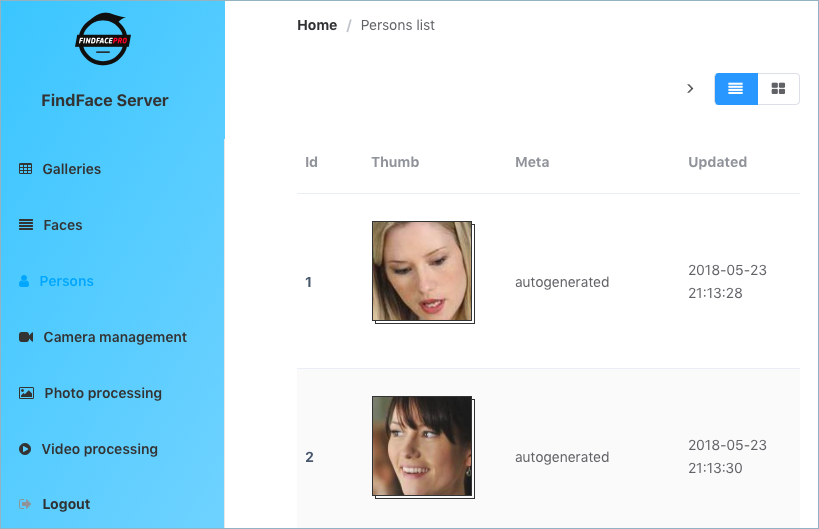
Persons. View and filter persons here.
Camera management. Add cameras to your system. When adding a camera, you can specify
ROTto enable detecting and tracking faces only inside a clipping rectangle (region of tracking), and/orROIto enable posting faces detected only inside a region of interest.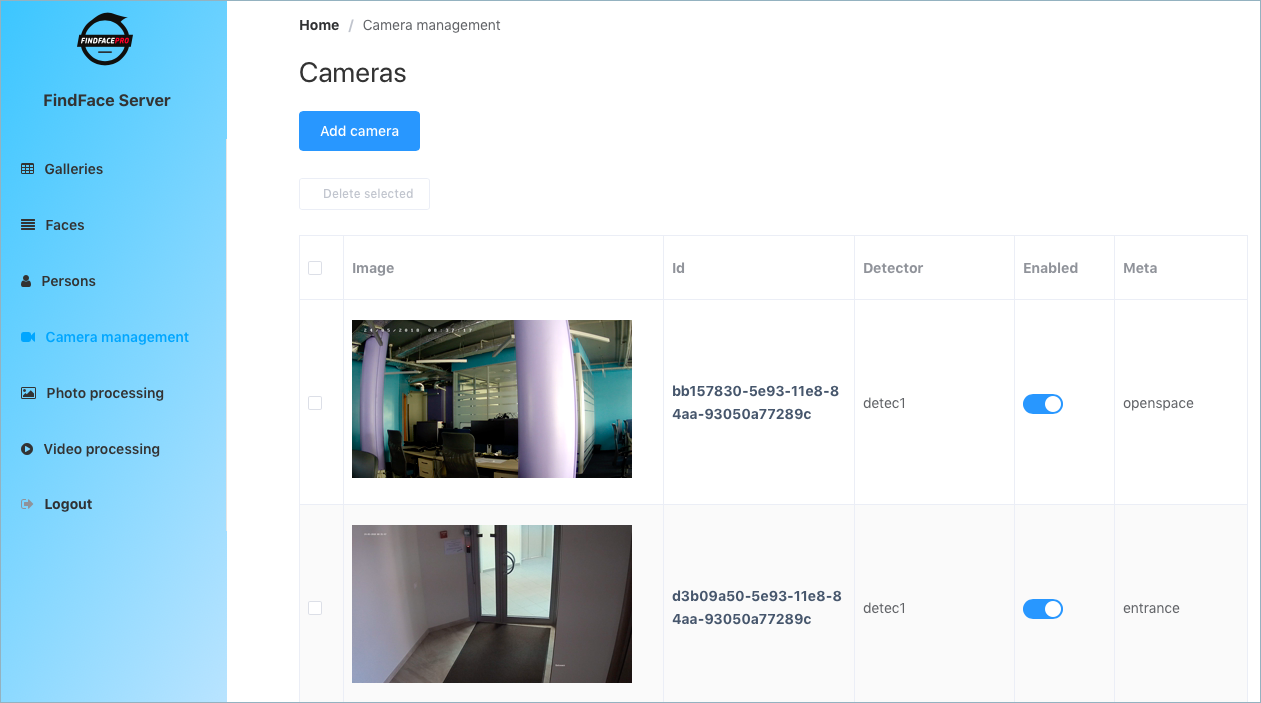
Tip
The
ROToption is used to reduce the video face detector load.Tip
To specify
ROTandROI, use the visual wizard. First, create a camera without ROT and ROI, then open it for editing and click Change ROI/ROT with image.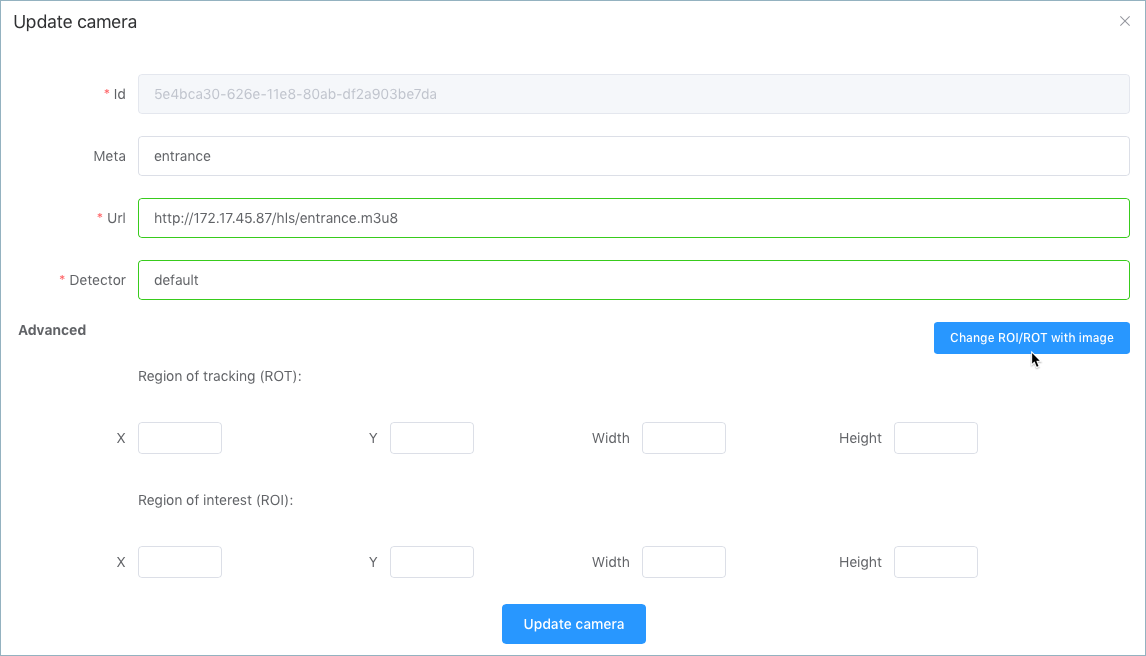
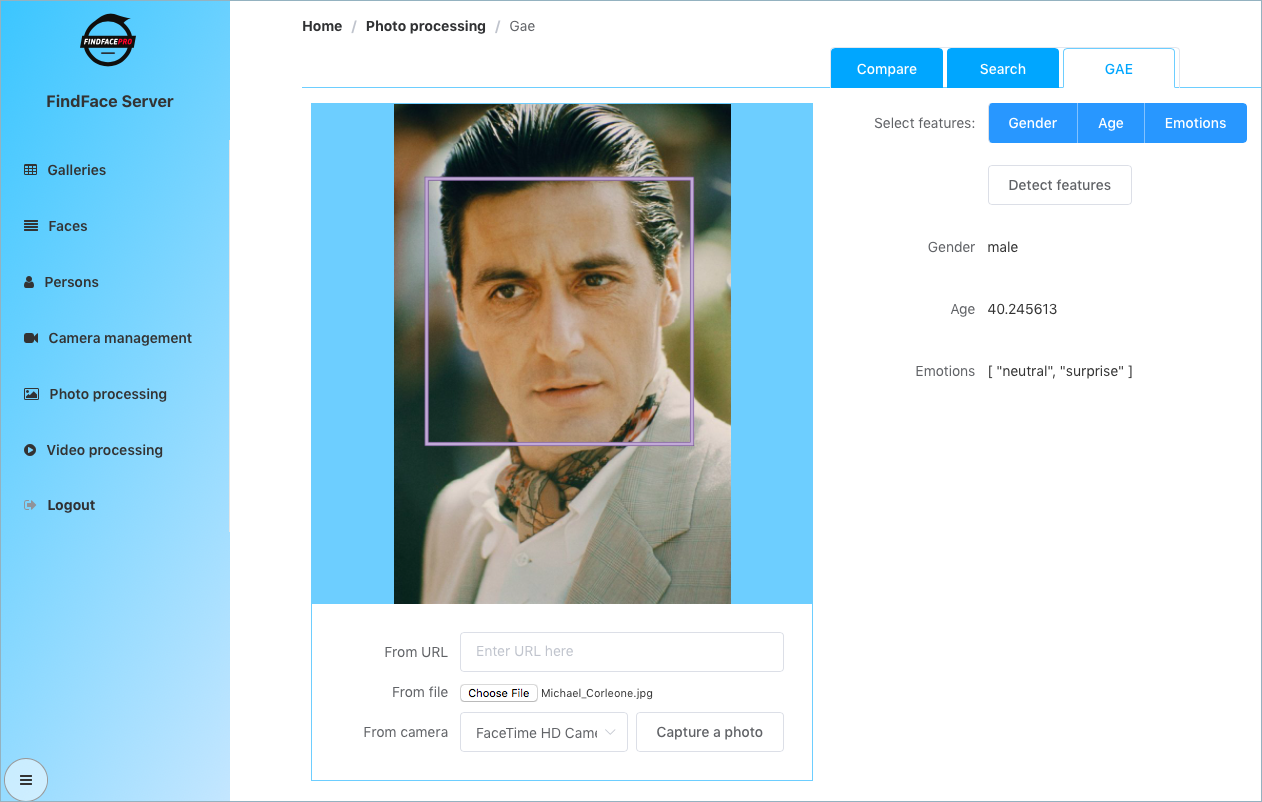
Photo processing. Select this section to detect faces in static images, recognize gender, age and emotions, search a face in the database (identification), and compare two faces (verification).
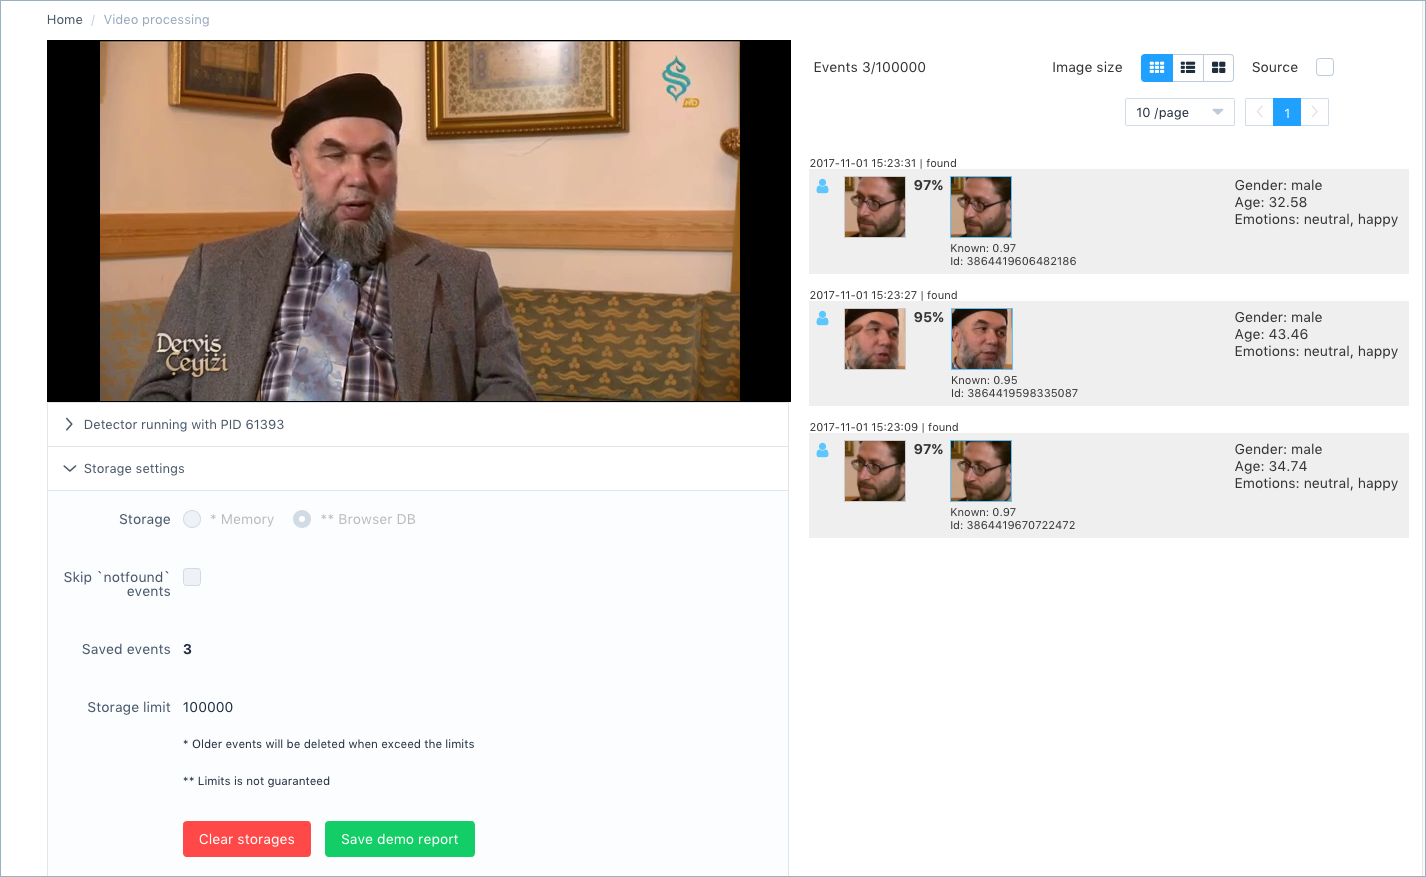
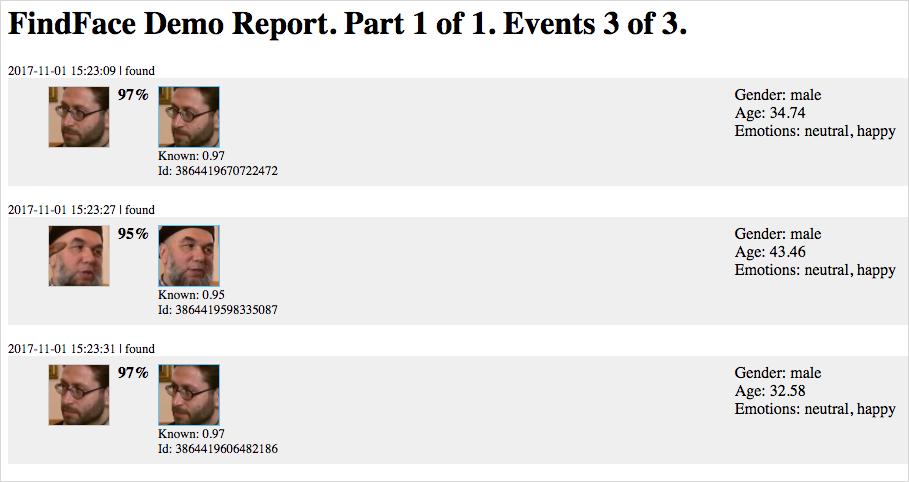
Video processing. Here you can work with video streams from rtsp and web cameras, and video files. Detect, enroll (add to a gallery) and identify faces in video with gender, age and emotions recognition. Generate enrollment and face identification reports in HTML by clicking on the Save demo report button.
Note
The video processing functionality in the web interface is great for tests. In production mode, use fkvideo_detector.