Configure Object Monitoring. Dossier Database
This chapter is all about configuring object monitoring and creating the dossier database.
FindFace Multi provides video monitoring of the following objects:
human face
human body (silhouette)
car
Object monitoring is implemented using a set of default and custom watch lists, e.g., wanted, VIP, etc., and a database of dossiers. You can create as many custom watch lists as necessary. Each dossier contains one or several object photos and is allocated to one or several watch lists. To put an object on monitoring, you need to make a relevant watch list active.
You can save mixed data and objects of different kinds to the same dossier as long as these objects are connected. For example, a dossier can contain a face and full-length photo, car photo, and license plate number, all linked to a wanted perpetrator. In this case, the system will be looking for any of these objects in the camera field.
Tip
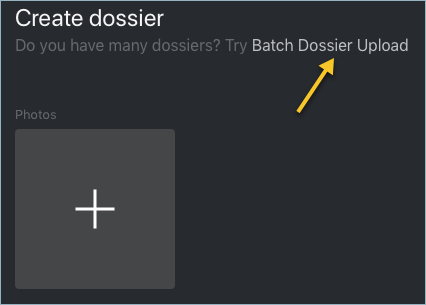
To create dossiers in bulk, use the batch photo upload functionality.
In this section:
Monitoring Unmatched Objects
FindFace Multi features a special pre-configured watch list used for monitoring only unmatched objects (objects that do not match any dossier). This watch list cannot be removed from the system. To edit its settings, navigate to the Preferences tab. Click Watch Lists and then click Unmatched in the table.

Note
To view only unmatched objects in the event list, select Only without matches in the Matches filter on the Events tab.
Create Watch List
You can create a custom watch list. Do the following:
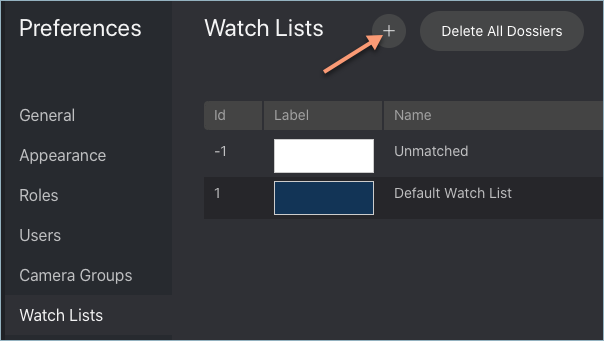
Navigate to the Preferences tab. Click Watch Lists.
Click +.
From the Label palette, select a color which will be shown in event notifications for this list. Keep in mind that the right color makes for a quicker response of the person on duty.
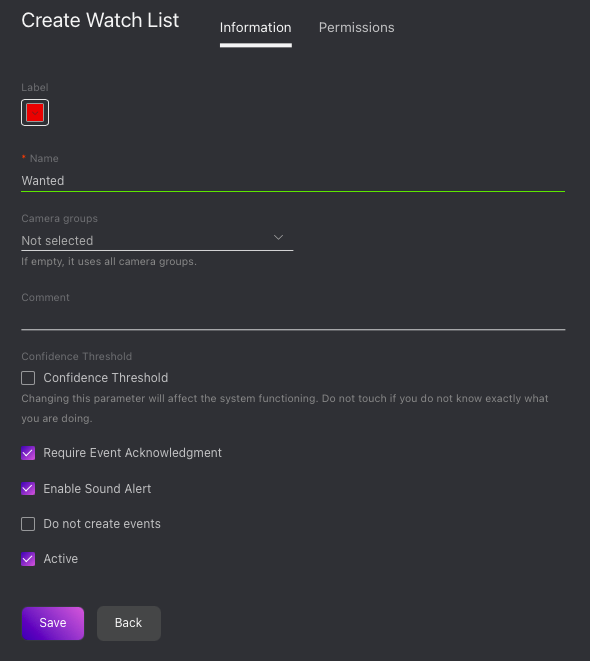
Specify the watch list name. Add a comment if needed.
Select a camera group(s) that will be used to monitor the watch list. If no groups specified, the watch list will be monitored by all active cameras in the system.
Check Require acknowledgment if it is mandatory that events associated with the list be manually acknowledged.
Check Enable sound alert to turn on sound notifications for the list if needed.
By default, all watch lists in the system are applied the generic confidence threshold. To set an individual threshold for the watch list, check Confidence Threshold and specify the threshold value.
Important
The default generic confidence threshold is optimal for the majority of recognition cases. We do not recommend changing it on your own. Be sure to consult with our technical experts by support@ntechlab.com.
Check Active.
Click Save.
On the Permissions tab, assign privileges on the watch list, specifying which user roles are allowed to change/view the watch list settings.
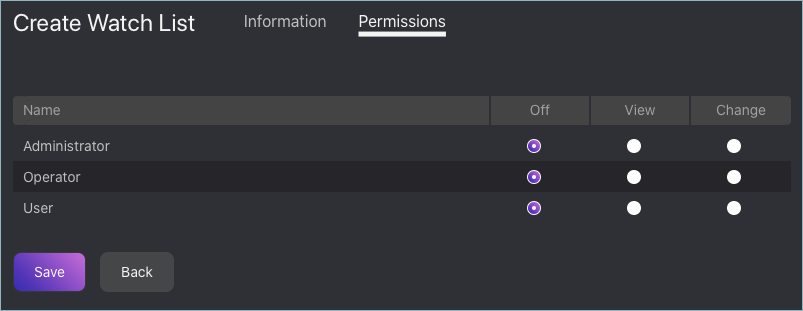
Click Save.
Create Dossier Manually
To create a dossier manually, do the following:
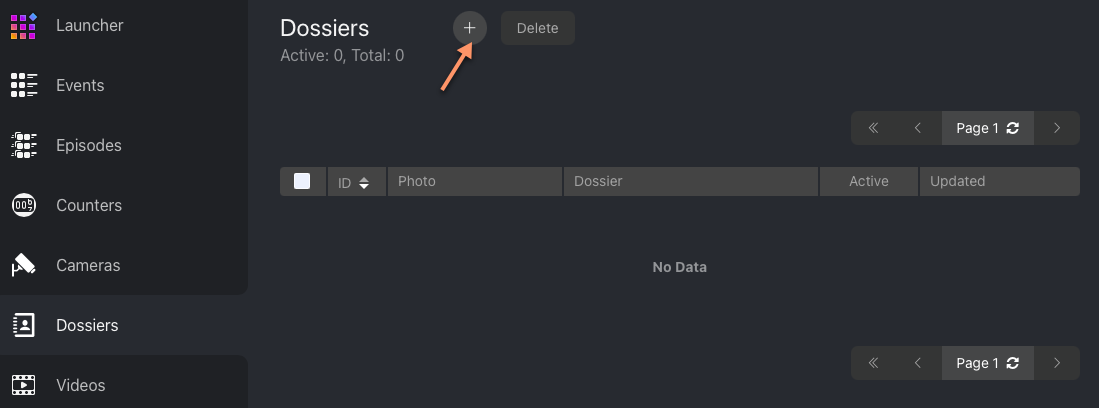
Navigate to the Dossiers tab.
Click +.
Attach photos of at least one of the following objects: face, body, car. Supported formats: WEBP, JPG, BMP, PNG.
Important
A face or body in the photos must be close to a frontal position. Distance between pupils: 60 px. Photos that do not meet the requirements will be rejected with a detailed error description.

Attach related files.
Specify the person’s name. If necessary, add a comment.
Specify the car’s license plate number if applicable.
From the Watch lists drop-down menu, select a watch list (or several lists, one by one) for the dossier.
Check Active. If a dossier is inactive, it is excluded from the real time monitoring.
Click Save. If a similar dossier already exists in the database, you will be able to merge it with the new dossier, create the new dossier anyway, or cancel creation.
Batch Photo Upload
To create dossiers in bulk, use the batch photo upload. Do the following:
Tip
If you need to upload a large number of photos (more than 10,000), use Console Bulk Photo Upload.
Important
Supported formats: WEBP, JPG, BMP, PNG.
Important
A face and body in the photos must be close to a frontal position. Distance between pupils: 60 px. Photos that do not meet the requirements will be rejected with a detailed error description.
Navigate to the Dossiers tab.
Click +.
Click Batch Dossier Upload.
Specify the type of objects to detect in the photos.
Select multiple image files, or a directory.
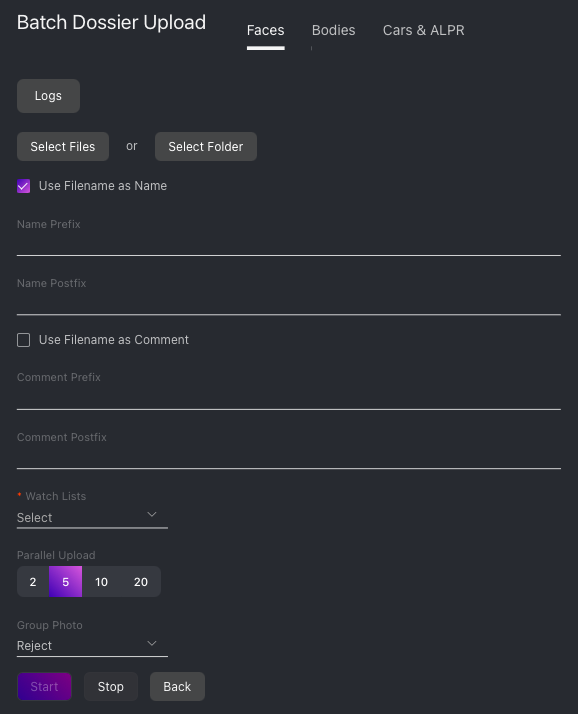
You can use image file names as a basis for names and/or comments in dossiers to be created. Select the necessary option(s). Then configure the automatic name/comment generation rule by appending a custom prefix and/or postfix to the file name.
Tip
To avoid merging the 3 words into one, use underscore or another symbol in the prefix and postfix.
From the Watch lists drop-down menu, select a classification list for the dossiers.
Use the Parallel Upload option to specify the number of photo upload streams. The more streams you use, the faster it takes to complete the upload, however it requires more resources as well.
From the Group Photo drop-down menu, select the system behavior upon detecting several objects in a photo: reject the photo, upload the biggest object, or upload all objects.
Click Start to launch the photo upload.
Important
To view the batch photo upload log, click Logs. You can then download the log in the
.csvformat if needed.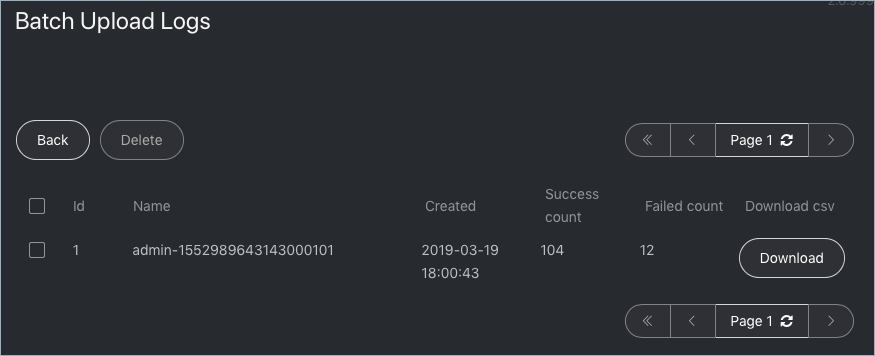
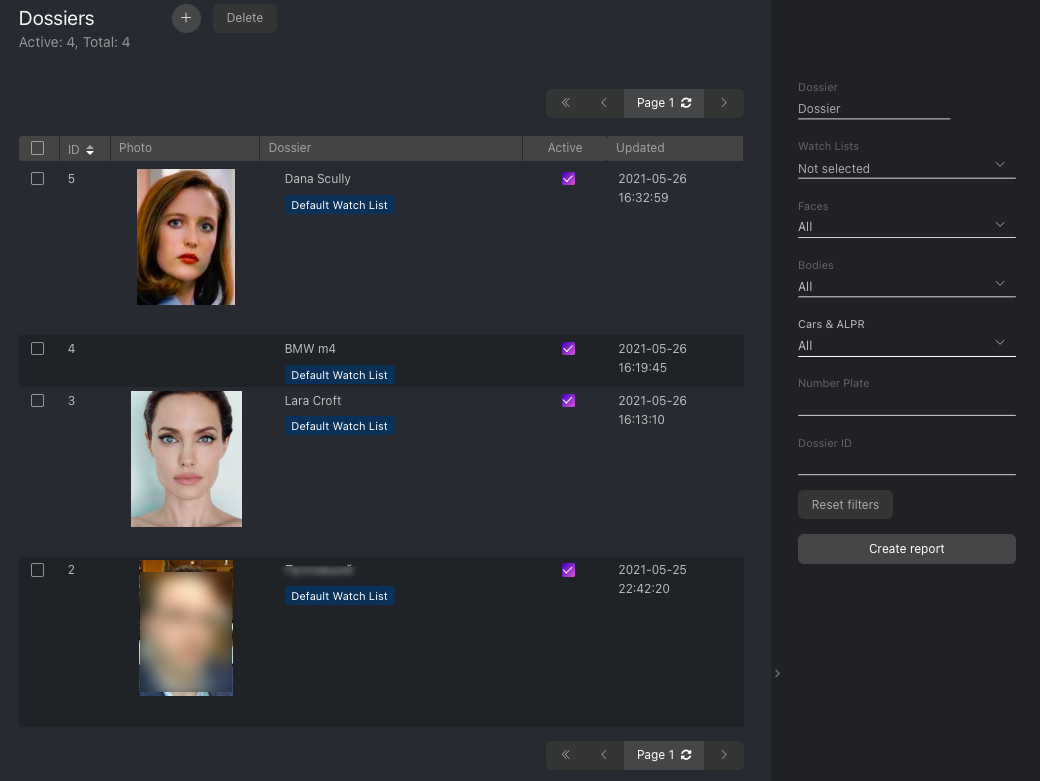
Filter Dossiers
You can find all dossiers created in FindFace Multi on the Dossiers tab. Use filters to sort them out.
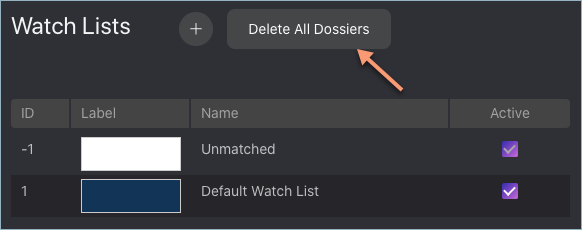
Purge Dossier Database
You can purge the entire dossier database in one click. To do so, navigate to the Preferences tab. Click Watch Lists. Click Delete All Dossiers.
Disable Event Creation for Specific Objects
Sometimes, it is necessary to omit certain objects during monitoring. One of the most common cases is the objects in advertisement media located in the camera field. Being detected continuously by your system, they can easily overflow the event feed and the database.
To prevent this from happening, do the following:
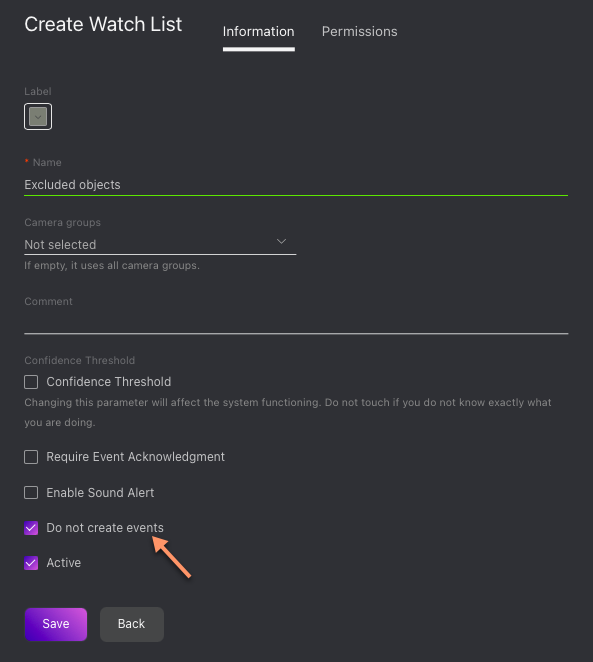
Create a watch list that will store the objects excluded from detection. In its settings, check Do not create events.
For each excluded object, create a dossier and add it to the watch list.