Face, Body, Vehicle Counters. Distance Measurement
Important
To be able to count human bodies (silhouettes) or vehicles, you first have to enable body detection or vehicle detection.
FindFace Multi allows you to count faces, bodies and vehicles on connected cameras. This functionality can apply to a wide range of situations, such as people counting in queues and waiting areas, monitoring public gatherings, crowding prevention, traffic jam detection, and more.
The counting method is based on time slices, which means that the system counts faces, bodies and vehicles in static screenshots taken with a given count interval.
You can opt for counting faces/bodies/vehicles either on each camera independently, or collectively on all selected cameras.
In this section:
Create Counter
To set up a counter, do the following:
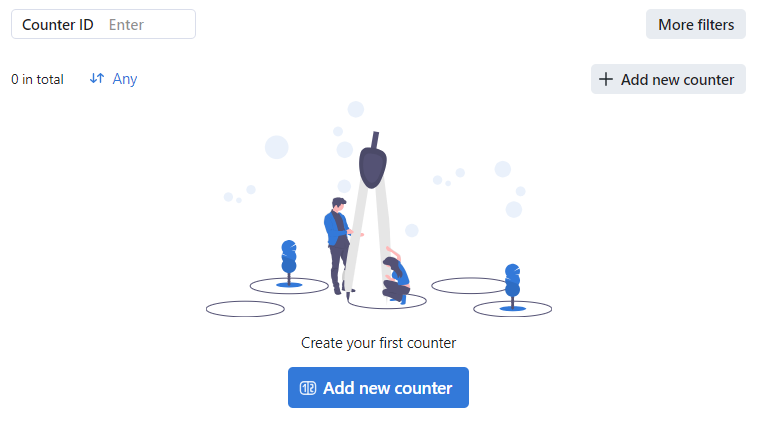
Navigate to the Counters tab.
Click + Add new counter.
Specify the counter name.
Select one or several camera groups for counting.
Select one or several cameras for counting.
Check Faces to count faces.
Check Bodies to count bodies. Body detection has to be enabled.
Check Vehicles to count vehicles. Vehicle detection has to be enabled.
Specify the interval in seconds between two consecutive screenshots used for counting.
Click Save.
Check Distance measurement to count the distance between bodies. This option becomes available only if Bodies detector is checked.
Make sure that the counter is activated.
Click Save.
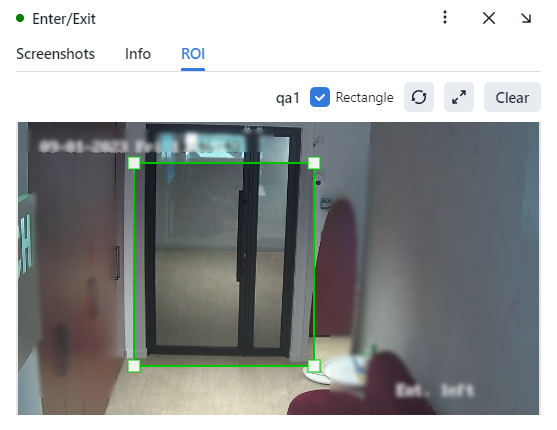
(Optional) Navigate to the ROI tab to specify the face/body/vehicle tracking region within the camera(s) field. Select a camera and specify a region of interest. Click Save.
Calibrate Counter for Distance Measurement
If Distance measurement is enabled, you should perform the counter calibration.
For counter calibration:
Ask a person to stand before the selected camera at full height.
Ask a person to walk through the area visible by the camera, along which the distances will be calculated. To achieve the best quality, the person must walk on a flat surface.
Enter the counter calibration timeframe (from 15s to 300s) and click Calibrate counter.
If you need to calibrate the counter for several cameras, perform steps 1-3 for each camera selected in the Cameras field.
If you are unsatisfied by the result, click Delete calibration and perform the calibration once more.
Monitor Counter Operation
To monitor the operation of counters, navigate to the Counters tab.
Counter statuses:
Green: the counter is running without errors, all frames from all cameras of the counter have been received for a certain period.
Yellow: the number of errors is less than 70%.
Red: the number of errors is over 70%.
Grey: the counter is disabled.
You may use the counter status filter to find counters with technical problems, for example, if the counter could not receive frames due to loss of connection with the camera.
By selecting a counter, you can filter the list of frames and leave only frames with errors. The error tooltip is displayed when pointing over the frame id.
Tip
You can configure the yellow and red statuses based on the portion of failed counter records. To do so, modify the MAX_COUNTER_ERROR_RECORDS parameter in the /opt/findface-multi/configs/findface-multi-legacy/findface-multi-legacy.py configuration file:
sudo vi /opt/findface-multi/configs/findface-multi-legacy/findface-multi-legacy.py

FFSECURITY = {
    ...
    # Counter health status config:
    # max percent of camera records with errors
    'MAX_COUNTER_ERROR_RECORDS': {'yellow': 0.3, 'red': 0.5},
    ...
}
Work with Counter Records
Static screenshots taken by a counter, with the number of faces, bodies and vehicles in them, are saved as counter entries. If you have enabled the distance measurement, each record will also contain a minimum, average, and maximum detected distance in meters.
If the counter is running with errors, the system will be creating blank records with an error message.
To see the counter records, navigate to the Counters tab. Click on the counter. Navigate to the Screenshots tab.
You can scale the screenshots by clicking on them. If distance measurement is enabled, the screenshot will contain boxes around bodies and the distance between them.
To work with the counter list, use the following filters:
Name contains: filter counters by name.
Counter ID: display a counter with a given ID.
Camera groups: display counters from selected camera groups.
Cameras: display counters from a selected camera.
Distance: filter counters with/without distance measurement or any.
Status: filter counters by status.
To work with counter screenshots, use the following filters:
Cameras: display screenshots from a selected camera.
Date and time: display screenshots that occurred within a certain period.
Error: filter screenshots with/without errors.
Count faces: display screenshots with the number of faces within a certain interval.
Count bodies: display screenshots with the number of bodies within a certain interval.
Count vehicles: display screenshots with the number of vehicles within a certain interval.
Counter entry ID: display screenshots with a given counter entry ID.
Minimum distance: display screenshots with a minimum distance within a certain interval.
Maximum distance: display screenshots with a maximum distance within a certain interval.
Average distance: display screenshots with an average distance within a certain interval.
Set Webhook for Counter
To take it up a notch, configure a webhook for counter records with a specific number of faces, bodies and vehicles.
Configure Counters
To configure counters, open the /opt/findface-multi/configs/findface-multi-legacy/findface-multi-legacy.py configuration file and modify the following parameters:
COUNTERS_DEDUP_OPTIONS: a set of options that help avoid object duplication in multi-camera counters, i.e., the situation when the same object is counted on several cameras at the same time, leading to the overly increased counting result. Two options are available for each object type (face,body,car):enabled- enables object deduplication,threshold- defines the minimum level of similarity between objects for the system to consider them duplicates.COUNTERS_SAVE_FULLFRAMEdetermines saving options of full frames in counters:always,detect- only save if faces, bodies or vehicles have been detected,never.COUNTERS_FULLFRAME_JPEG_QUALITY: JPEG quality of full frames.COUNTERS_THUMBNAIL_JPEG_QUALITY: JPEG quality of thumbnails.COUNTERS_ROI_INTERSECTION_THRESHOLD: required percentage of the rectangle around the object (a.k.a.bbox) intersection with the region of interest defined for the counter.
sudo vi /opt/findface-multi/configs/findface-multi-legacy/findface-multi-legacy.py

# deduplicate objects on multi-camera counters
 'COUNTERS_DEDUP_OPTIONS': {
     'face': {
         'enabled': False,
         'threshold': 0.714,  # model: [mango_320]
     },
     'body': {
         'enabled': False,
         'threshold': 0.65,  # model: [durga]
     },
     'car': {
         'enabled': False,
         'threshold': 0.65,  # model: [bottas]
     },
},
# counters full frame saving options:
# `always` - save always
# `detect` - save only if faces or bodies have been detected
# `never` - never save full frames
'COUNTERS_SAVE_FULLFRAME': 'always',
'COUNTERS_FULLFRAME_JPEG_QUALITY': 75,
'COUNTERS_THUMBNAIL_JPEG_QUALITY': 75,
# required percentage of bbox intersection with ROI
'COUNTERS_ROI_INTERSECTION_THRESHOLD': 0.75,
...
Be sure to restart the findface-multi-findface-multi-legacy-1 container after making changes.
sudo docker container restart findface-multi-findface-multi-legacy-1


