Face Monitoring and Dossier Database
This chapter is all about monitoring detected faces and creating the dossier database. Each dossier has to contain one or several photos of a person and belong to a certain classification list (watch list), black or white in the simplest case. You can create several watch lists, subject to a person status or hazard level.
Tip
To create dossiers in bulk, use the batch photo upload functionality.
In this section:
Monitoring Unmatched Faces
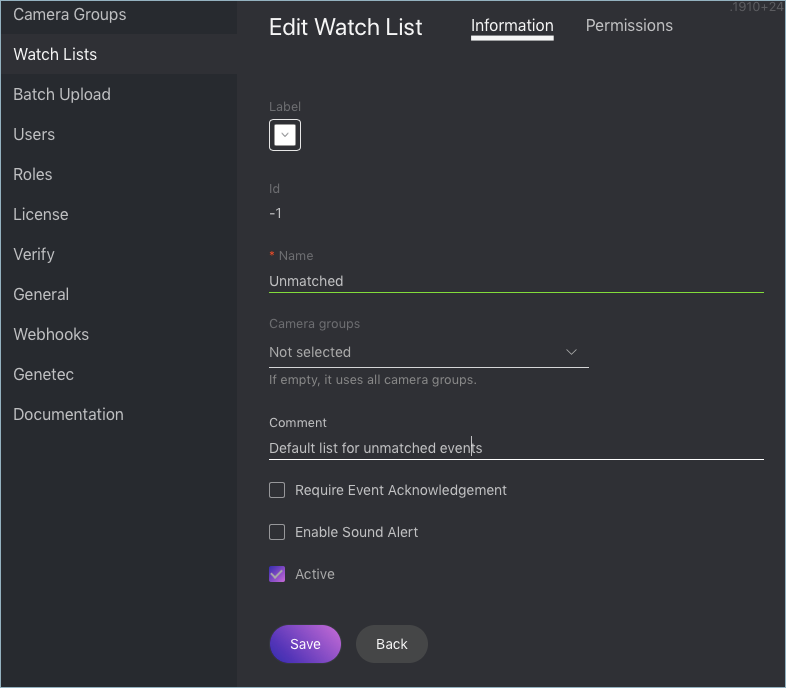
FindFace Security features one pre-configured watch list that is used for monitoring only unmatched faces. This watch list cannot be removed from the system. To edit its settings or deactivate it, navigate to the Preferences tab. Click Watch Lists and then click Unmatched in the table.
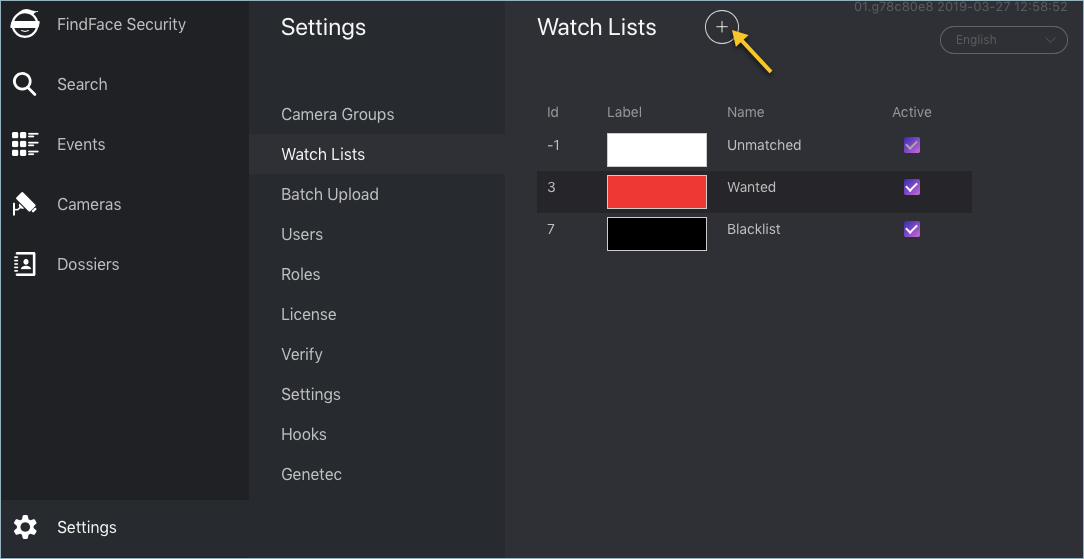
Create Watch List
To create a custom watch list, do the following:
Navigate to the Preferences tab. Click Watch Lists.
Click +.
From the Label palette, select a color which will be shown in notifications for this list. Keep in mind that the right color makes for quicker response of security and hospitality managers.
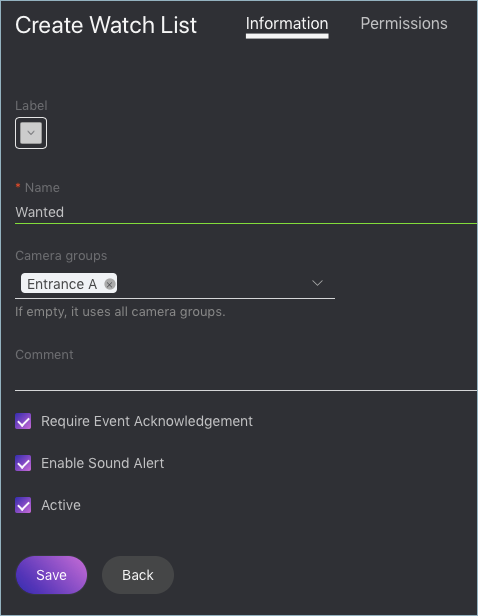
Specify the watch list name. Add a comment if needed.
Select a camera group(s) which will be used to monitor the watch list. If no groups specified, the watch list will be monitored by all active cameras in the system.
Check Require acknowledgment if it is mandatory that a manager acknowledge events for the list.
Check Enable sound alert to turn on sound notifications for the list if needed.
Check Active.
Click Save.
On the Permissions tab, assign privileges on the watch list, specifying which user roles are allowed to change/view the watch list settings.
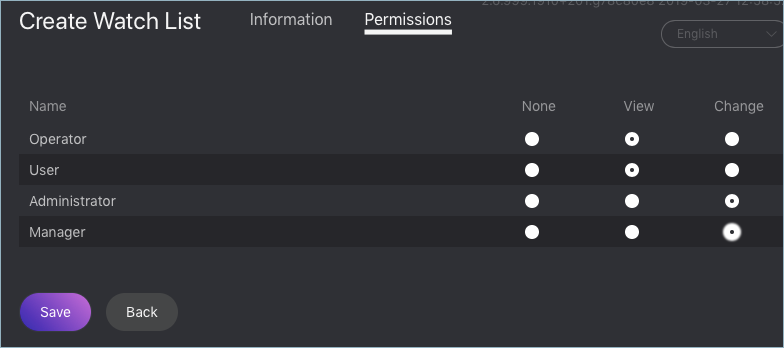
Click :Save.
Create Dossier Manually
To create a dossier manually, do the following:
Navigate to the Dossiers tab.
Click +.

Attach a photo and specify the name of a person. If necessary, add a comment.
Important
A face in the photo must be of high quality, i.e. close to a frontal position. Photos that do not meet the requirement will be rejected with a detailed error description.
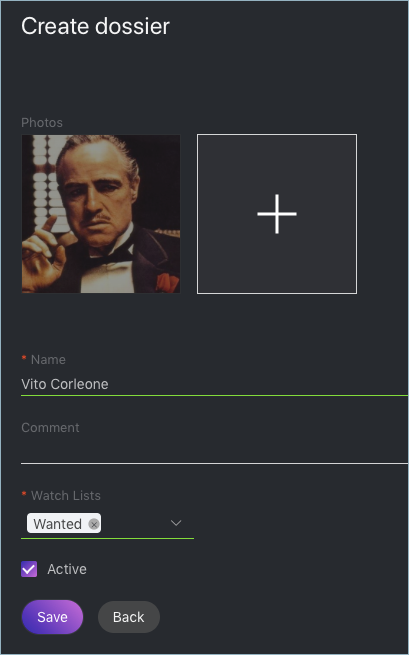
From the Watch lists drop-down menu, select a classification list (or several lists, one by one) for the dossier.
Check Active. If a dossier is inactive, it is excluded from the real time face identification.
Click Save.
Batch Photo Upload
To create dossiers in bulk, use the batch photo upload. Do the following:
Tip
If you need to upload a large number of photos (more than 10,000), use Console Bulk Photo Upload.
Navigate to the Preferences tab. Click Batch Upload.
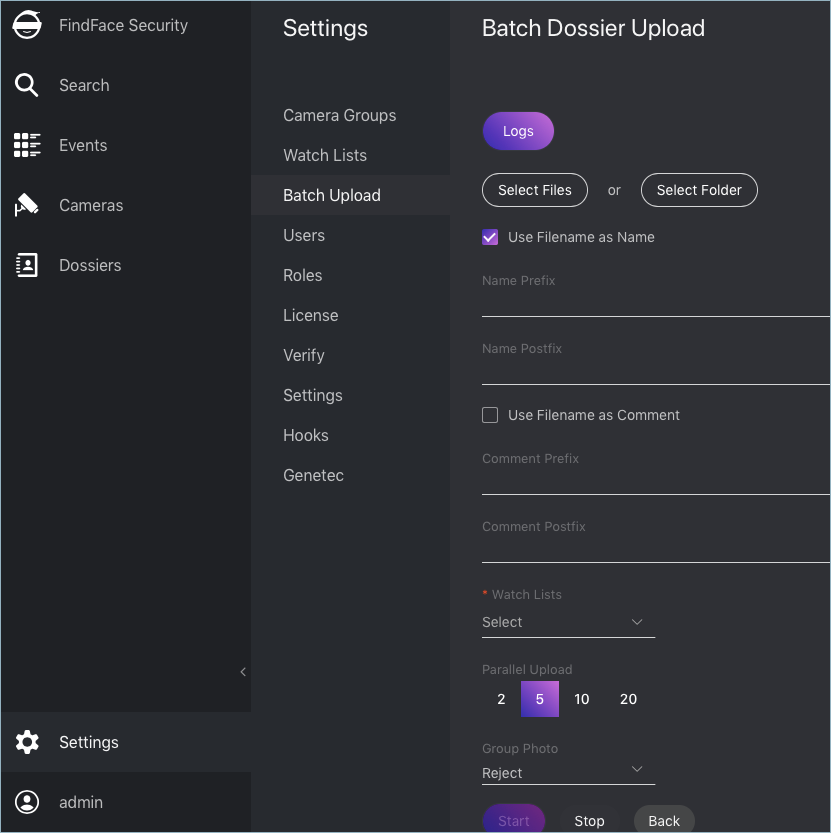
Select multiple image files, or a folder.
You can use image file names as a basis for names and/or comments in dossiers to be created. Select the necessary option(s). Then configure the automatic name/comment generation rule by appending a custom prefix and/or postfix to the file name.
Tip
To avoid merging the 3 words into one, use underscore or another symbol in the prefix and postfix.
From the Watch lists drop-down menu, select a classification list for the dossiers.
Use the Parallel Upload option to specify the number of photo upload streams. The more streams you use, the faster it takes to complete the upload, however it requires more resources as well.
From the Group Photo drop-down menu, select the system behavior upon detecting several faces in a photo: reject the photo, or upload the biggest face.
Click Start to launch the photo upload.
Important
To view the batch photo upload log, click Logs. You can then download the log in the
.csvformat if needed.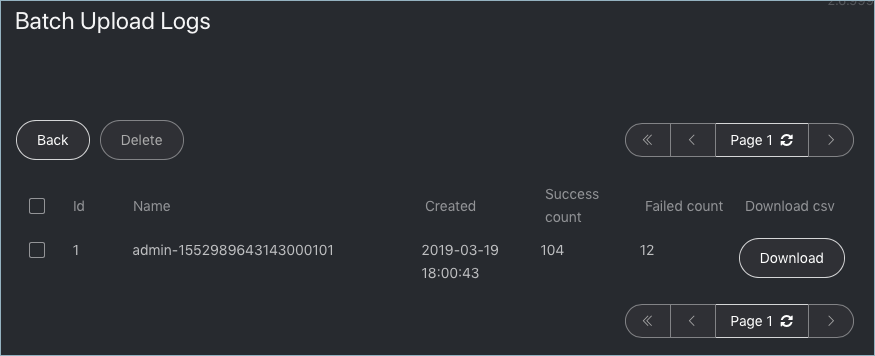
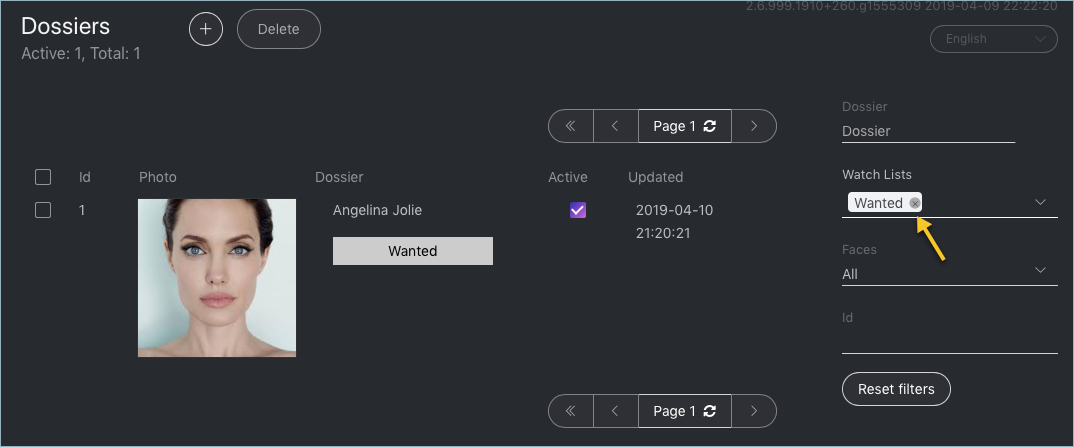
Filter Dossiers by Watch List
You can find all dossiers created in FindFace Security on the Dossiers tab. Use the Watch lists filter to filter dossiers by list.