Camera Management
To configure video-based object monitoring, add cameras to FindFace Multi, grouping them subject to their location.
Note
Privileges to create camera groups and cameras are managed in user’s permissions (see User Management).
In this chapter:
Create Camera Group
Tip
A default preconfigured camera group is available in the system.
To create a group of cameras, do the following:
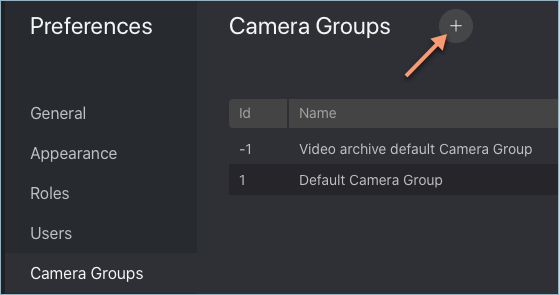
Navigate to the Preferences tab. Click Camera Groups.
Click +.
On the Information tab, specify the group name. Add a comment if needed.
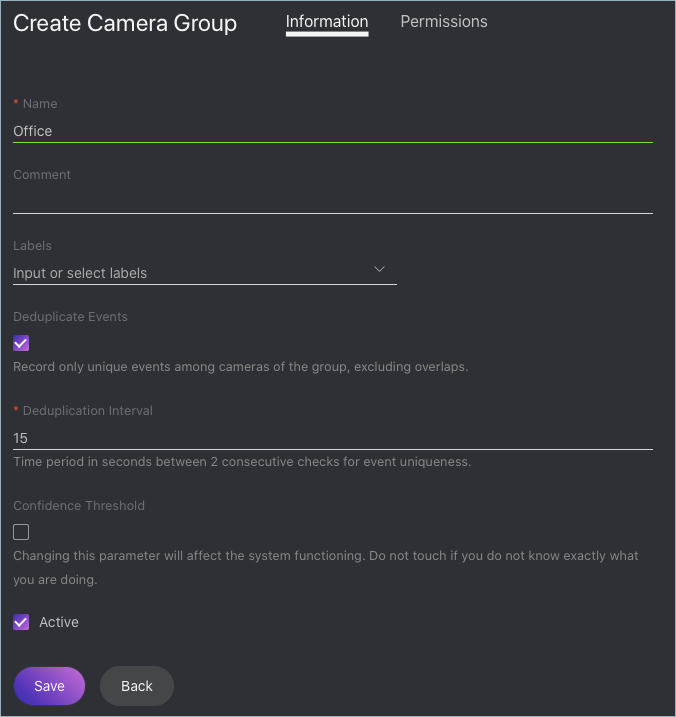
If you want to allocate a certain
findface-video-workerinstance to process video streams from the group, create or select one or several allocation labels.Note
To complete the allocation, list the labels in the
/etc/findface-video-worker-gpu.ini(/etc/findface-video-worker-cpu.ini) configuration file. See Allocate findface-video-worker to Camera Group for details.If you want to deduplicate events from cameras that belong to the same group, i. e. exclude coinciding events, check Deduplicate Events and specify the deduplication interval (interval between 2 consecutive checks for event uniqueness).
Warning
Use deduplication with extreme caution. If cameras within a group observe different scenes, some objects may be skipped. See Deduplicate Events for details.
By default, video from all camera groups is processed using the generic confidence threshold. To set an individual threshold for the camera group, check Confidence Threshold and specify the threshold value.
Important
The default generic confidence threshold is optimal for the majority of recognition cases. We do not recommend changing it on your own. Be sure to consult with our technical experts by support@ntechlab.com.
Check Active.
Click Save.
On the Permissions tab, assign privileges on the camera group, specifying which user roles are allowed to change/view the camera group settings.
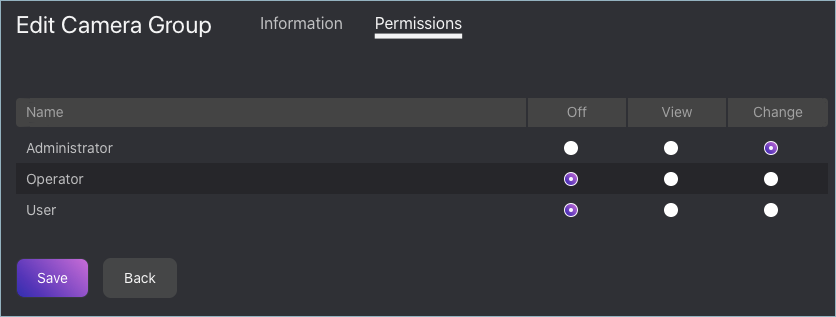
Click Save.
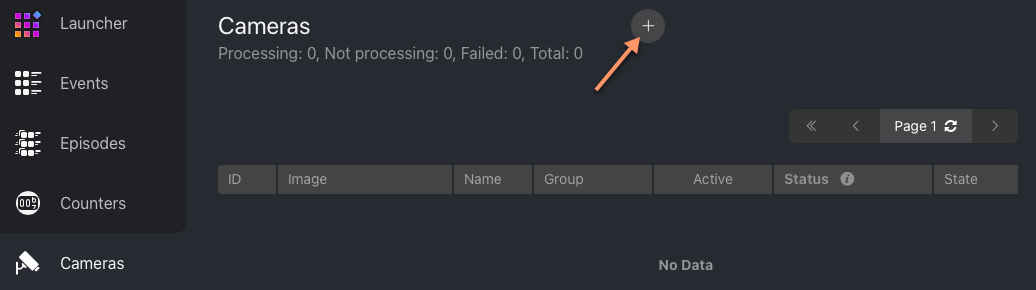
Add Camera
To add a camera, do the following:
Navigate to the Cameras tab.
Click +.
On the Settings -> Main tab, enter the general camera information:
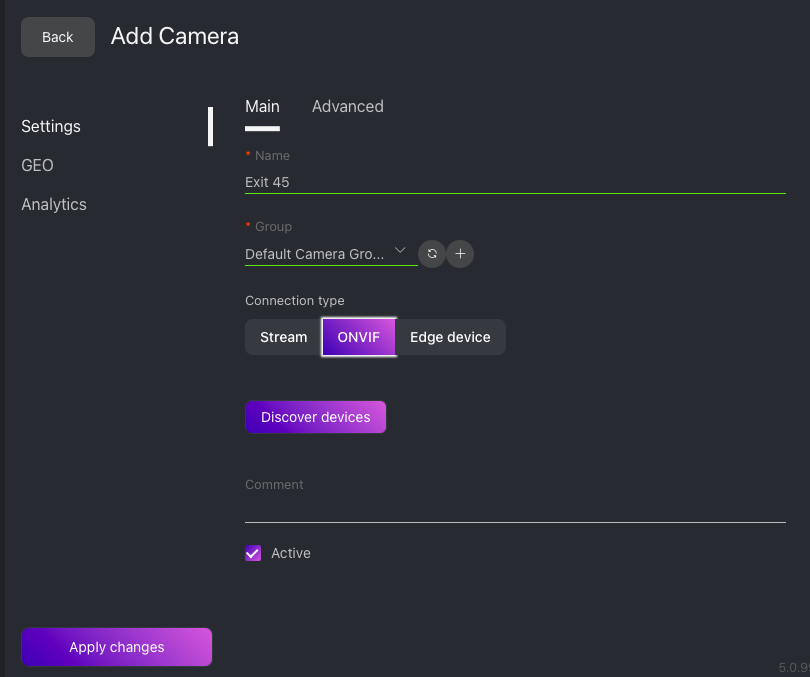
Specify the camera name.
Add the camera to a camera group.
Specify the camera URL (Stream). If the camera is ONVIF, select it from the list of detected devices to automatically load available settings and streams.
Note
A camera object can also be used for integrating an edge device. Learn more.
If necessary, add a comment.
Check Active.
On the Settings -> Advanced tab, fine-tune the camera:
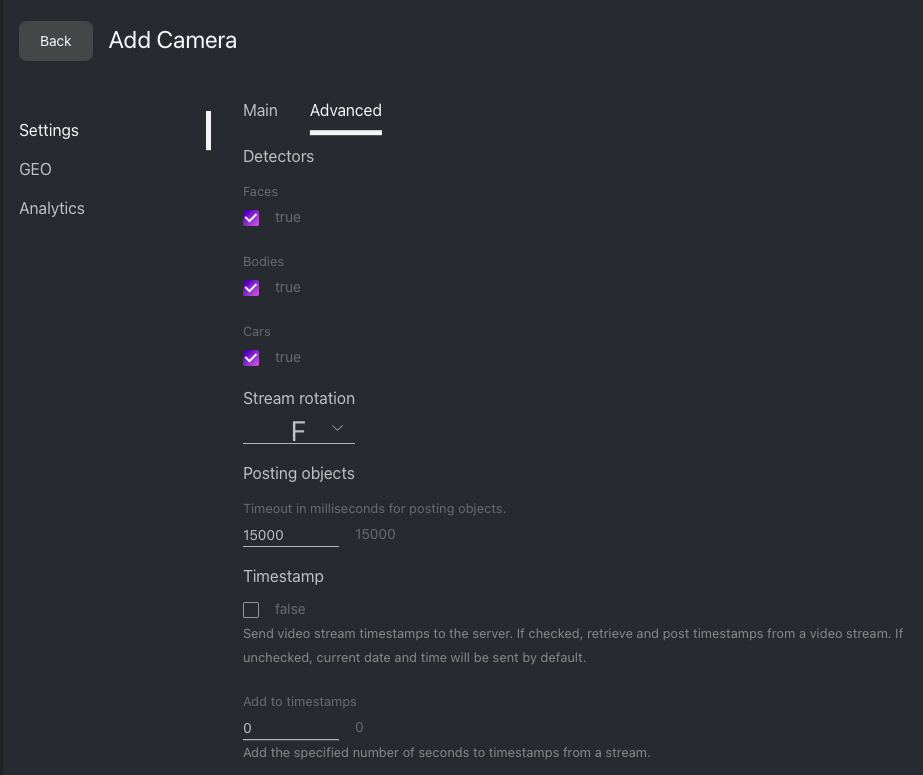
Check detectors that you want to enable on this camera: faces, bodies, cars.
If needed, change the video orientation.
Important
Be aware that the
findface-securityserver rotates the video using post-processing tools. It can negatively affect performance. Rotate the video via the camera functionality wherever possible.Timeout in ms: Specify the timeout in milliseconds for posting detected objects.
Retrieve timestamps from stream: Check to retrieve and post timestamps from the video stream. Uncheck the option to post the current date and time.
Add to timestamps: Add the specified number of seconds to timestamps from the stream.
FFMPEG format: Pass FFMPEG format (mxg, flv, etc.) if it cannot be detected automatically.
FFMPEG parameters: FFMPEG options for the video stream in the key-value format, for example, [“rtsp_transpotr=tcp”, “ss=00:20:00”].
Imotion threshold: Minimum motion intensity to be detected by the motion detector.
Verify SSL: Check to enable verification of the server SSL certificate when the object tracker posts objects to the server over https. Uncheck the option if you use a self-signed certificate.
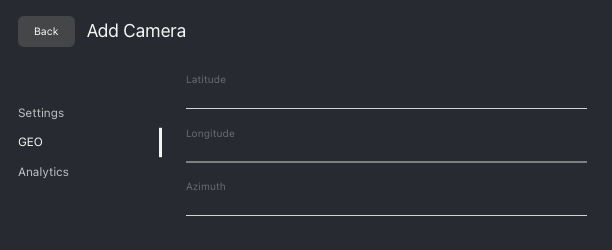
(Optional) On the GEO tab, specify the camera geographical location.
On the Analytics tab, specify settings for each object type detector.
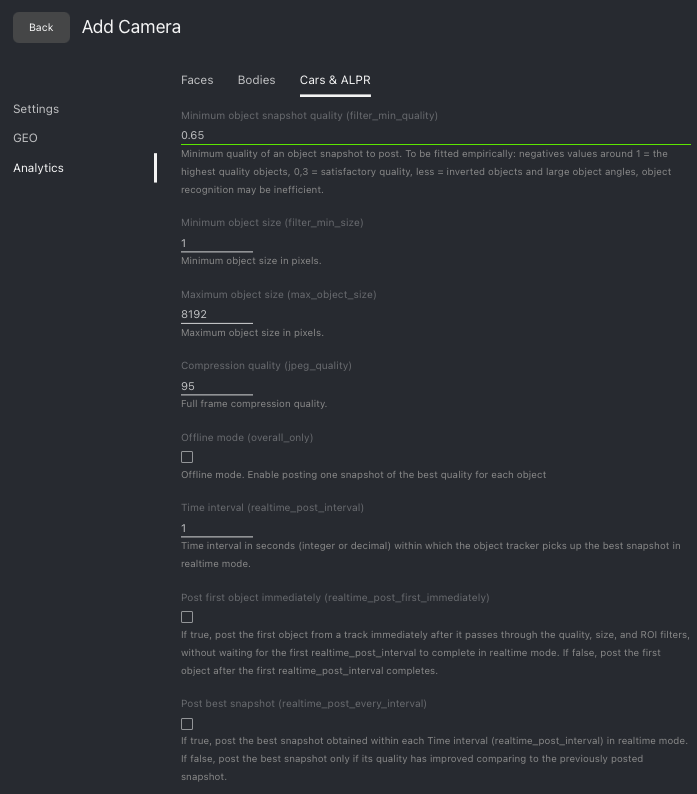
Minimum object snapshot quality: Minimum quality of an object snapshot to post. Do not change the default value without consulting with our technical experts (support@ntechlab.com).
Minimum object size: Minimum object size in pixels to post.
Maximum object size: Maximum object size in pixels to post.
Compression quality: Full frame compression quality.
Offline mode: Offline mode. Enable posting one snapshot of the best quality per entire track for each object.
Time interval: Time interval in seconds (integer or decimal) within which the object tracker picks up the best snapshot in the real-time mode.
Post first object immediately: Check to post the first object snapshot from a track immediately after it passes through the quality, size, and ROI filters, without waiting for the first
Time intervalto complete. The way the subsequent snapshots are posted will depend on thePost best snapshotvalue. Uncheck the option to post the first object snapshot only after the firstTime intervalcompletes.Post best snapshot: Check to post the best snapshot obtained within each
Time intervalin the real-time mode, regardless of its quality. Uncheck the option to post the best snapshot only if its quality has improved compared to the previously posted snapshot.
Click Apply changes.
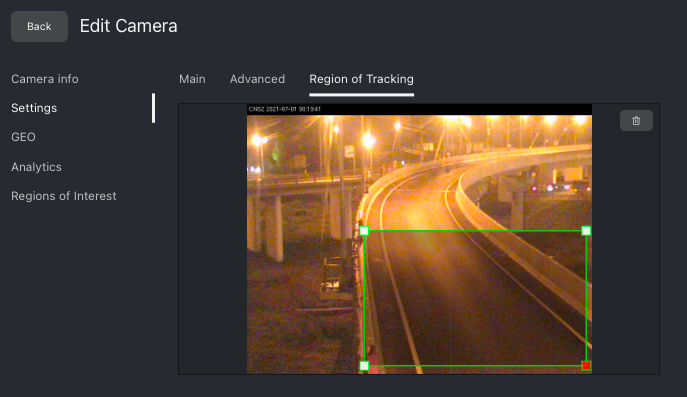
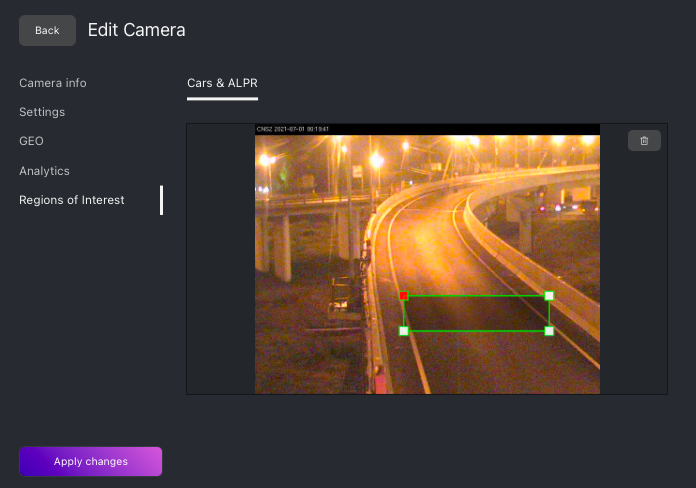
Specify the region of tracking within the camera field (General -> Region of Tracking) and detection zones (Regions of Interest) for each object type detector if necessary. Click Apply changes.
Note
Each created camera is associated with a so-called job, a video processing task that contains configuration settings and stream data and is assigned to findface-video-worker. This task can be restarted (see Monitor Camera Operation).
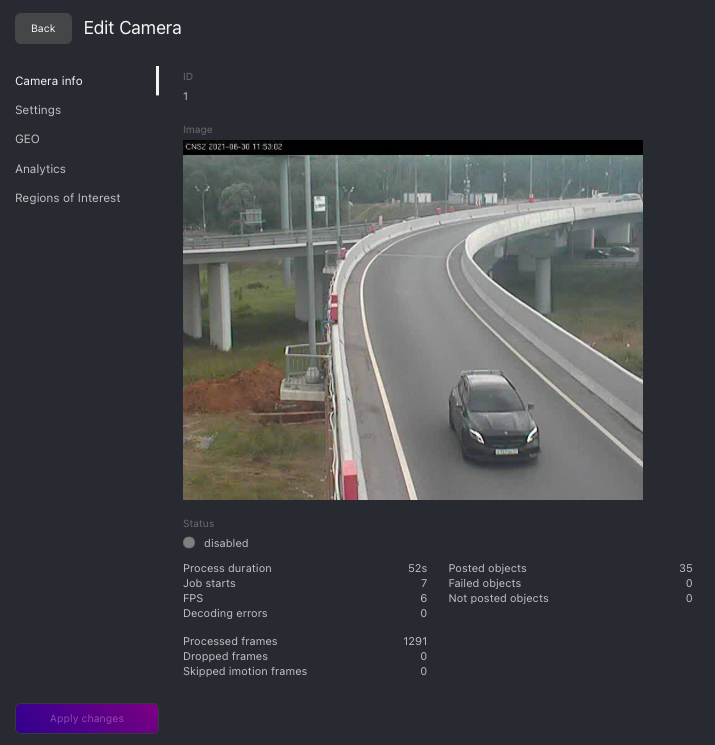
Monitor Camera Operation
To monitor the operation of cameras, navigate to the Cameras tab.
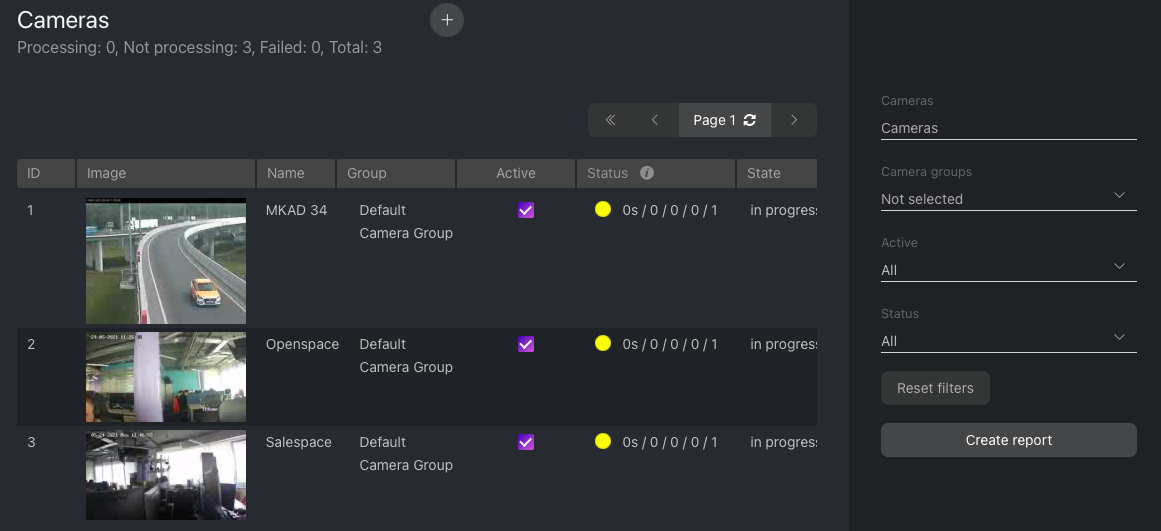
Camera statuses:
Green: the video stream is being processed without errors.
Yellow: the video stream is being processed for less than 30 seconds, or one or more errors occurred when posting an object.
Red: the video stream cannot be processed.
Grey: camera disabled.
Tip
You can configure the yellow and red statuses based on the portion of dropped frames and failed object postings. To do so, modify the following parameters in the /etc/findface-security/config.py configuration file:
sudo vi /etc/findface-security/config.py

FFSECURITY = {
    ...
    # max camera frames_dropped percent
    'MAX_CAMERA_DROPPED_FRAMES': {'yellow': 0.1, 'red': 0.3},
    # max camera objects_failed percent
    'MAX_CAMERA_FAILED_FACES': {'yellow': 0.1, 'red': 0.3},
    ...
}
Each created camera is associated with a so called job, a video processing task that contains configuration settings and stream data and is assigned to findface-video-worker. This task can be restarted.
To restart a job, click  in the Action column. In this case, the number of errors will be reset to
 0.
With a large number of cameras in the system, use the following filters:
Camera groups,
Active,
Status.
For each camera, you will be provided with complete statistics such as current session duration, the number of successfully posted objects, the number of objects processed with errors after the last job restart, the number of frame drops, and other data. To consult these data, click the camera and go to the Camera Info tab.