Area Management
Important
To be able to use the Areas functionality, you first have to enable body detection.
FindFace Multi allows you to monitor the presence of people on cameras in given areas, using rules and schedules. Once the system detects that the situation in an area fits the rule, it creates a so-called area activation.
The Areas functionality is an excellent tool for solving such problems as long queues prevention at retail outlets, theft prevention at enterprises during non-working hours, hazardous area control, work time tracking, and many others.
In this section:
Create Area
To create an area, do the following:
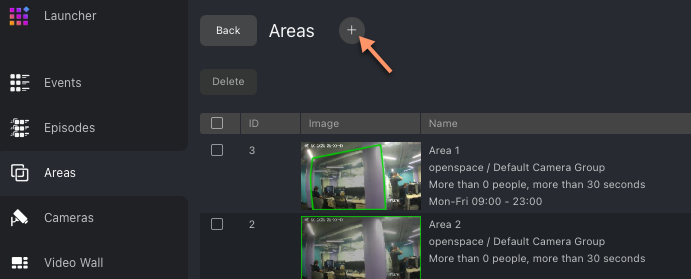
Navigate to the Areas tab.
Click +.
Specify the area name.
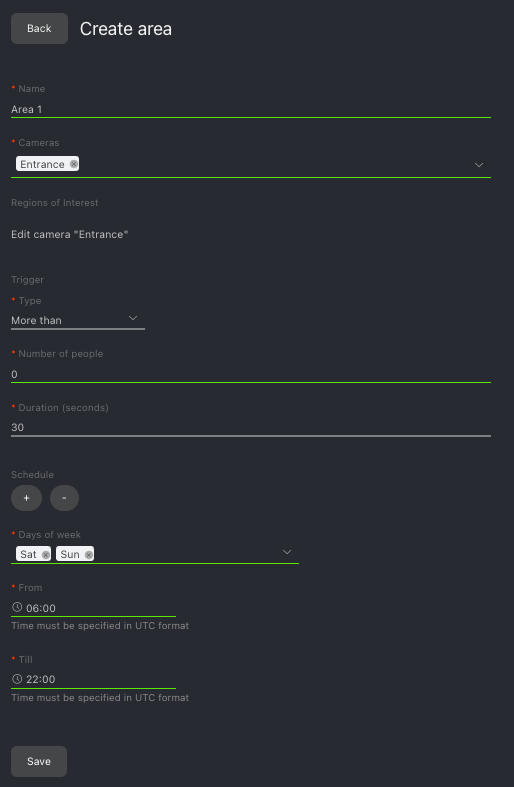
Select one or several cameras to monitor the area.
Tip
You can create multiple areas on the same camera to monitor the physical area using different rules and schedules.
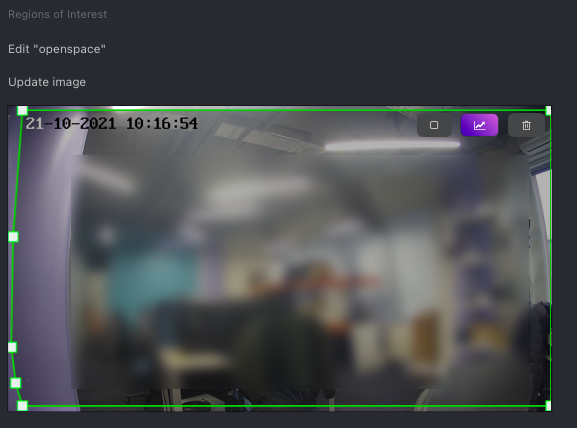
Specify the region of interest within the camera(s) field.
Note
Use the following buttons:
 : draw a rectangular region
 : draw a polygonal region point by point
 : delete the drawn region
Configure the area activation trigger (rule):
Less than: the area will be activated if the number of people has been less than the threshold value during the specified period.
More than: the area will be activated if the number of people has been more than the threshold value during the specified period.
Number of people: threshold number of people.
Duration: minimum period of trigger duration in seconds to activate the area. During this period, the number of people must remain less/more than the threshold value.
Note
For example, the rule
More than 5Duration 30applied to a cashier desk results in the area activation if more than five customers have waited longer than 30 seconds in line.Schedule: create one or several monitoring schedules. Specify the day(s) of the week and the period during which the area will be under monitoring. If no schedule is specified, the area will be permanently monitored.
Note
If a situation in the area continues to fit the activation rule after the scheduled monitoring period, the area will remain activated until this situation is over.
Click Save.
Edit Area
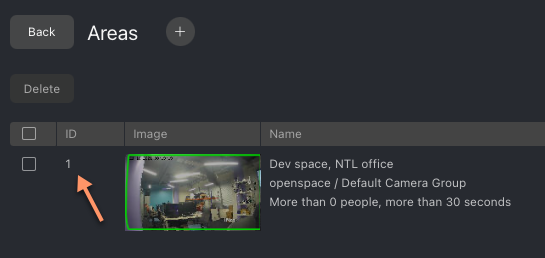
To open area settings for editing, click on the ID column in the area list.
Work with Area Activations
Once the situation in an area matches the triggering rule, the system creates an area activation. To see the list of area activations, navigate to the Areas tab. There, click on any column for the area, except its ID (leads to the area settings).
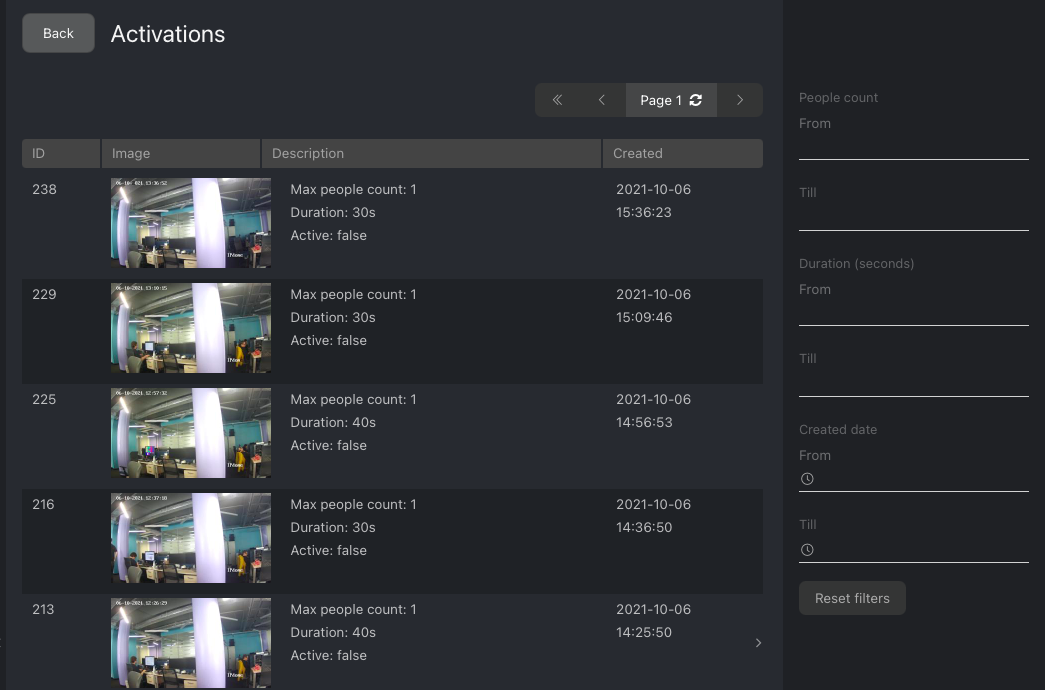
Apply the following filters to the activation list if needed:
The number of people detected in the area (
from/to)Trigger duration (
from/to)Creation date and time of an activation (
from/till)
Click an activation to view its records. The records are screenshots from the area-monitoring camera, with the detected number of people and the timestamp.
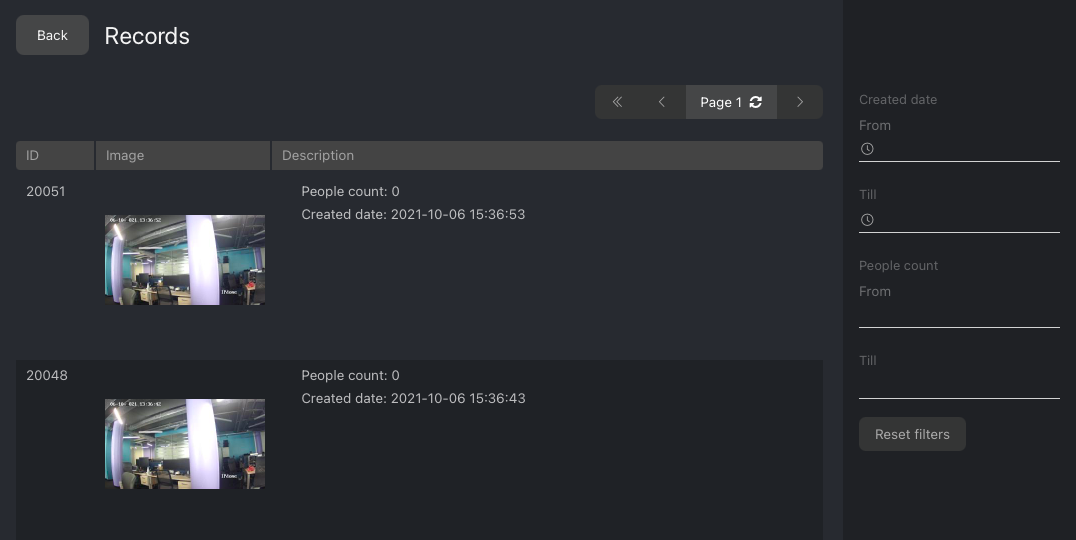
Note
The records are taken with the 10-second interval throughout the entire trigger duration.
Filter the record list using the following parameters:
The number of people in the record (
from/to)Record timestamp (
from/till)
Work Time Reports on Areas
See Reports.
Set Webhook for Area
To take it up a notch and automate your work with an area, configure a webhook.
Configure Areas
You can configure how screenshots (full frames) that you see in area activation records, and their thumbnails, are saved in the system. You can also enable body deduplication in multi-camera areas, to avoid the situation when the same person is counted on several cameras at the same time. This situation can lead to the overly increased counting result and, as an outcome, to a false area activation/absence of activation.
To configure areas, open the /etc/findface-security/config.py configuration file and modify the following parameters:
AREA_DEDUP_OPTIONS: a set of options that help avoid body duplication in multi-camera areas. Two options are available:enabled- enables body deduplication,threshold- defines the minimum level of similarity between bodies for the system to consider them duplicates.AREAS_SAVE_FULLFRAMEdetermines saving options of full frames in activation records:always,never.AREAS_THUMBNAIL_JPEG_QUALITY: JPEG quality of thumbnails.AREAS_FULLFRAME_JPEG_QUALITY: JPEG quality of full frames.
sudo vi /etc/findface-security/config.py

...
# deduplicate objects on multi-camera areas
'AREA_DEDUP_OPTIONS': {
    'enabled': False,
    'threshold': 0.65,  # model: [andariel]
},
# areas full frame saving options:
# `always` - save always
# `never` - never save full frames
'AREAS_SAVE_FULLFRAME': 'always',
'AREAS_THUMBNAIL_JPEG_QUALITY': 75,
'AREAS_FULLFRAME_JPEG_QUALITY': 75,
...
Be sure to restart the findface-security service after making changes.
sudo systemctl restart findface-security.service