Object Identification in Offline Videos
Besides real-time object identification, FindFace Multi allows for offline video processing. This functionality has a wide range of possible applications, among which the most common case is object detection and recognition in archived videos.
In this chapter:
Video File Formats
FindFace Multi supports a wide variety of file formats depending on the acceleration type (CPU or GPU).
Both CPU- and GPU-accelerated instances support all FFMPEG codecs. In addition to that, the following codecs are supported:
CPU-based acceleration: flv (both as a codec and as a container), h263, h264, h265, mjpeg, vp8, vp9, mpeg1video, mpeg2video, msmpeg4v2, msmpeg4v3
GPU-based acceleration: mjpeg, h264, h265, vp9 and others, depending on the list of codecs supported by the used video card. Apart from that, for GPU-accelerated instances the CPU-based acceleration can be enabled, thus adding flv support, which is not available by default.
Process Video File
Important
Before the video processing, the following prep work is required:
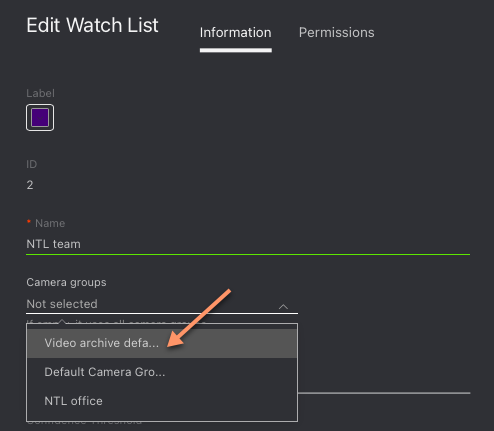
Designate a camera group to which the system will attribute the object recognition events from the video. The
Video archive default camera groupis perfect for this task. You can also create a new camera group with basic settings specifically for this video file.Assign the designated camera group to all watch lists you want to monitor when processing the video.
To identify objects in an offline video, do the following:
Create a video in FindFace Multi by uploading it from a file or online storage/cloud. To do so, navigate to the Videos tab.
Click +.

Specify the video name.
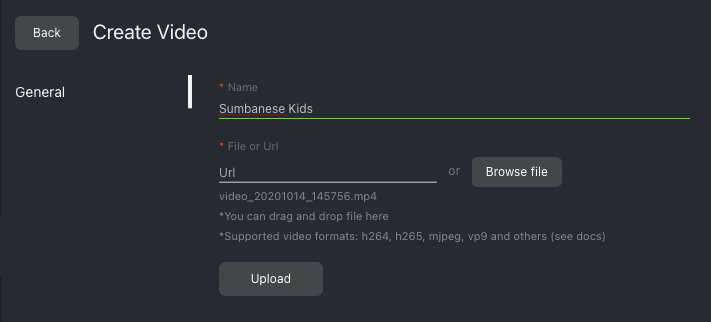
Specify a URL in online storage, or select a file.
Click Upload.
After the video is uploaded, navigate to the Parameters tab. Specify parameters of video processing:
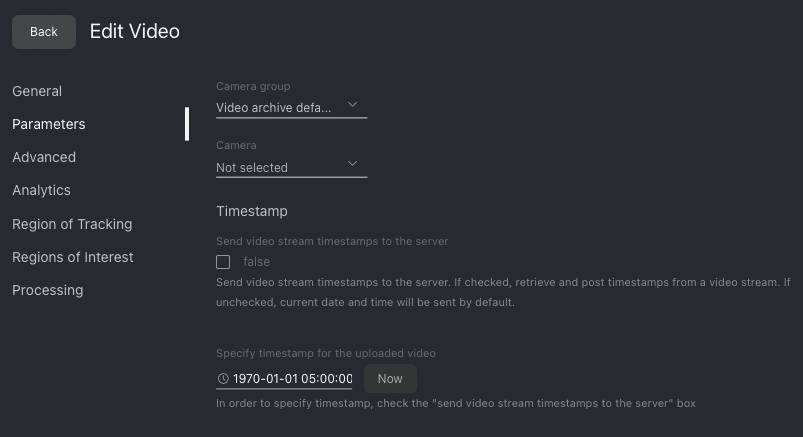
Indicate the camera group you have designated prior. (Optional) Select a camera within that camera group to tag the object recognition events from this video more precisely.
Configure the timestamps for object recognition events.
On the Advanced tab, fine-tune the video processing:
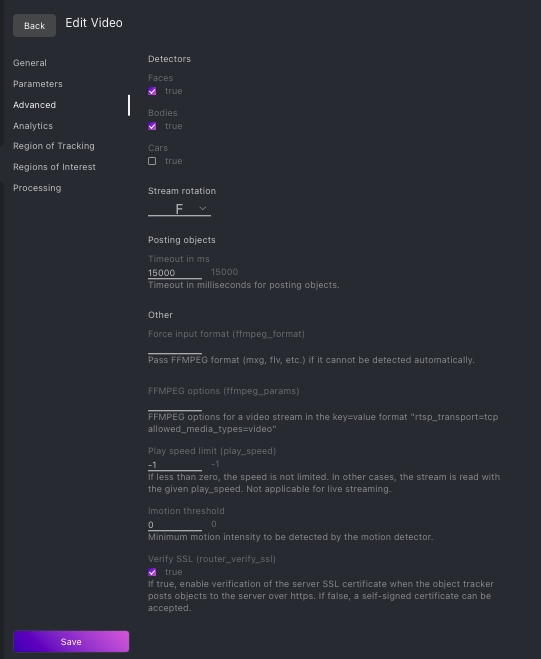
Check detectors that you want to enable for this video: faces, bodies, cars & ALPR.
If needed, change the video orientation.
Timeout in ms: Specify the timeout in milliseconds for posting detected objects.
FFMPEG format: Pass FFMPEG format (mxg, flv, etc.) if it cannot be detected automatically.
FFMPEG parameters: FFMPEG options for the video in the key-value format, for example, [“rtsp_transpotr=tcp”, “ss=00:20:00”].
Play speed limit: If less than zero, the speed is not limited. In other cases, the stream is read with the given
play_speed.Imotion threshold: Minimum motion intensity to be detected by the motion detector.
Verify SSL: Check to enable verification of the server SSL certificate when the object tracker posts objects to the server over https. Uncheck the option if you use a self-signed certificate.
On the Analytics tab, specify settings for each object type detector.

Minimum object snapshot quality: Minimum quality of an object snapshot to post. Do not change the default value without consulting with our technical experts (support@ntechlab.com).
Minimum object size: Minimum object size in pixels to post.
Maximum object size: Maximum object size in pixels to post.
Compression quality: Full frame compression quality.
Offline mode: Offline mode. Enable posting one snapshot of the best quality per entire track for each object in addition to the sequence of snapshots taken per track in the real-time mode (enabled by default).
Time interval: Time interval in seconds (integer or decimal) within which the object tracker picks up the best snapshot in the real-time mode.
Post first object immediately: Check to post the first object from a track immediately after it passes through the quality, size, and ROI filters, without waiting for the first
Time intervalto complete. The way the subsequent snapshots are posted will depend on thePost best snapshotvalue. Uncheck the option only to post the first object after the firstTime intervalcompletes.Post best snapshot: Check to post the best snapshot obtained within each
Time intervalin the real-time mode, regardless of its quality. Uncheck the option to post the best snapshot only if its quality has improved compared to the previously posted snapshot.
(Optional) On the Region of Tracking and Regions of Interest tabs, specify the region of tracking within the camera field and detection zones for each object type detector.
Navigate to the Processing tab. Click Process to start object identification.
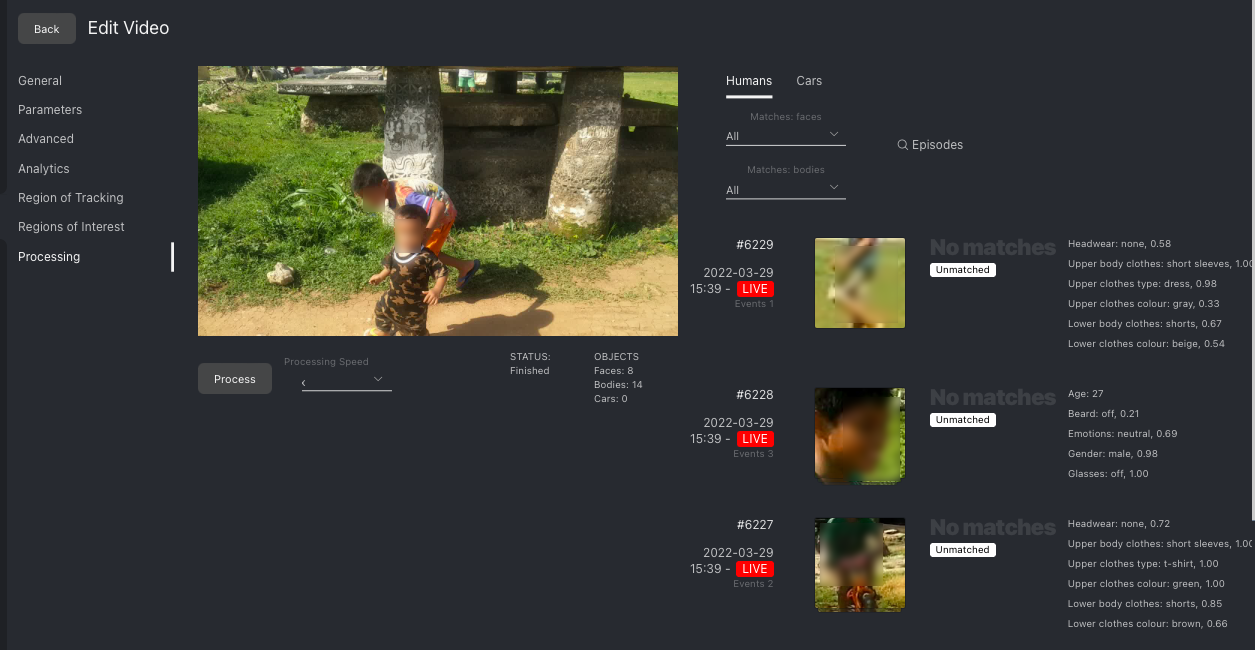
You can view object identification events right here, as well as on the Events and Episodes tabs by filtering the list of events by the camera group/camera associated with the video.
Configure Offline Video Processing
By default, video files are processed in a queued mode to prevent event drops due to resource overconsumption. You can modify the default number of simultaneously processed video files. To do so, open the /etc/findface-security/config.py configuration file and change the MAX_VIDEO_ARCHIVE_JOBS parameter. Please contact our experts prior (support@ntechlab.com) to make sure your resources are enough.
sudo vi /etc/findface-security/config.py

...

FFSECURITY = {
...
    # maximum concurrent video manager jobs for video archives processing
    'MAX_VIDEO_ARCHIVE_JOBS': 3,
    ...
}
...
Be sure to restart the findface-security service after making changes.
sudo systemctl restart findface-security.service