Role and User Management
In this chapter:
Predefined Roles
FindFace CIBR provides the following predefined roles:
Administrator is granted full access to the FindFace CIBR functionality, integrative and administrative tools.
Important
Whatever the role, the first administrator (Super Administrator) cannot be deprived of its rights.
Operator is granted full access to the FindFace CIBR functionality.
User is granted rights to modify their profile and manage cases. The other functions are available read-only.
You can change the predefined roles privileges, as well as create various custom roles.
Create Custom Role in UI
To create a custom role in the web interface, do the following:
Navigate Settings -> Roles.
Click + Add new role.
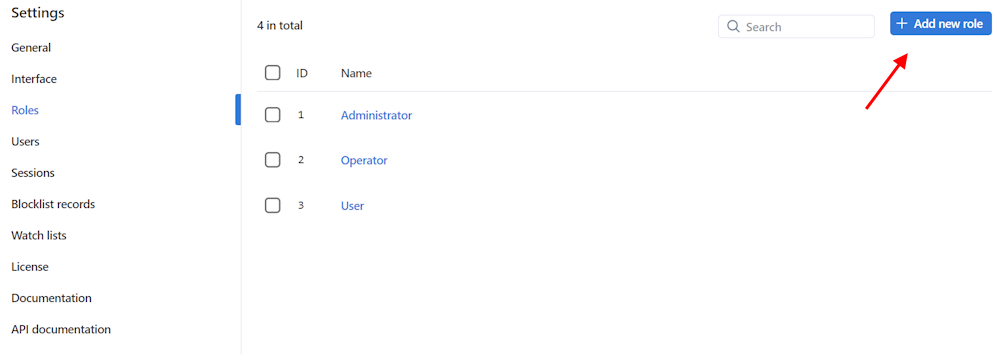
On the Information tab, specify the role name. Save the role.

After saving the role, you will see the following tabs appear next to the Information tab:
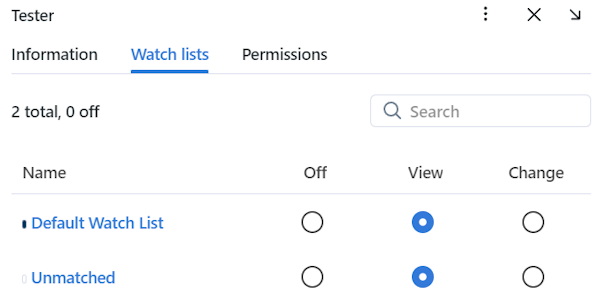
Watch Lists: role privileges for specific watch lists
Permissions: role privileges for entire system functions and entities
Set role privileges, subject to your needs. Note that there is a distinction between role privileges for a specific watch list and a system entity with the name
watchlist. For example, if you setOfffor a certain watch list on the Watch lists tab, users with this role won’t be able to work with this very watch list. Deselecting all checkboxes for thewatchlistentity on the Permissions tab will prevent users from viewing and working with all watch lists.The full list of the FindFace CIBR entities which are used in the current version is as follows:
all_own_sessions: all sessions of the current user on different devicesNote
If relevant permissions for this entity are set, users will be able to view (
view) and close (delete) all their sessions on different devices. Otherwise, users will be only allowed to view and close their session on the current device. Working with sessions takes place on the Sessions tab (Settings).case: case filedailysearchevent: daily searchdeviceblacklistrecord: blocklistfaceobject: face photo in a recordgroup: roleshumancard: record of an individualremotemonitoringrecord: remote monitoringreport: reportsearchrequest: remote searchupload: item (photo) in batch photo uploaduploadlist: list of photos in batch uploaduser: uservideoarchive: object identification in video fileswatchlist: watch list
You can also enable and disable rights for the following functionality:
batchupload_cards: bulk record uploadchange_runtimesetting: changing the FindFace CIBR general settingsview_auditlog: viewing and working with the audit logsconfigure_ntls: configuration of thefindface-ntlslicense serverview_runtimesetting: viewing the FindFace CIBR general settings
Save the changes.
Primary and Additional User Privileges
You can assign privileges to a user by using roles:
Primary role: main user role, mandatory for assignment. You can assign only one primary role to a user.
An additional user role, optional for assignment. You can assign several roles to one user. The rights associated with the additional roles will be added to the primary privileges.
All users belonging to a particular primary role automatically get access to video archives within the group and watch lists (and records in the watch list) created by a user with the same primary role, subject to the privileges defined by their additional role(s).
See also
Create User Account Manually
To create a user account manually, do the following:
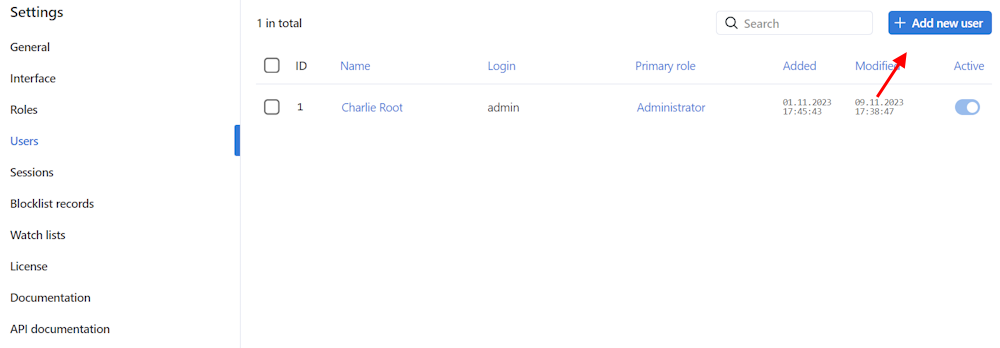
Navigate Settings -> Users.
Click + Add new user.
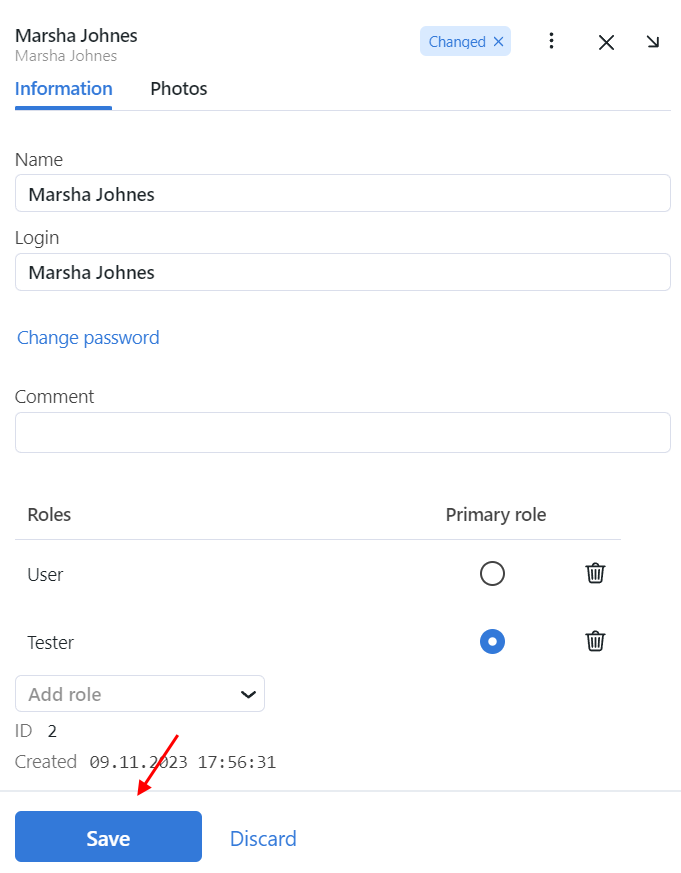
On the Information tab, specify user data such as name, login, and password. If necessary, add a comment.
Note
When setting a password, mind password requirements:
at least 8 characters long
not only numerals
not within the list of 20000 commonly used passwords
not similar to other user attributes
only Latin letters, numerals, and special characters are allowed
From the Roles drop-down menu, select one or several user roles. Set one of them as the Primary role.
On the Photos tab, attach user’s photo(s).
Save the user account.
Work with Roles and Users via Console
In case predefined roles have been removed from the system, use the following command to create them:
sudo docker exec -it findface-cibr-findface-multi-identity-provider-1 /opt/findface-security/bin/python3 /tigre_prototype/manage.py create_groups
To create a user with Super Administrator rights (superuser), execute the following command, mind that password is a required argument:
sudo docker exec -it findface-cibr-findface-multi-identity-provider-1 /opt/findface-security/bin/python3 /tigre_prototype/manage.py create_default_user --password <password>
Deactivate or Delete Users
In order to deactivate a user, move the Active slider to inactive position on the user list (Settings -> Users).
If you are going to deactivate multiple users, select them on the user list and then click Deactivate selected.

To delete users from FindFace CIBR, select them on the user list and then click Delete selected.