Role and User Management
In this chapter:
Predefined Roles
FindFace provides the following predefined roles:
Administrator is granted full access to the FindFace functionality, integrative and administrative tools.
Important
Whatever the role, the first administrator (Super Administrator) cannot be deprived of its rights.
Operator is granted full access to the FindFace functionality.
User is granted rights to modify their profile and manage cases. The other functions are available read-only.
You can change the predefined roles privileges, as well as create various custom roles.
Create Custom Role
To create a custom role, do the following:
Navigate Settings -> Roles.
Click + Add new role.
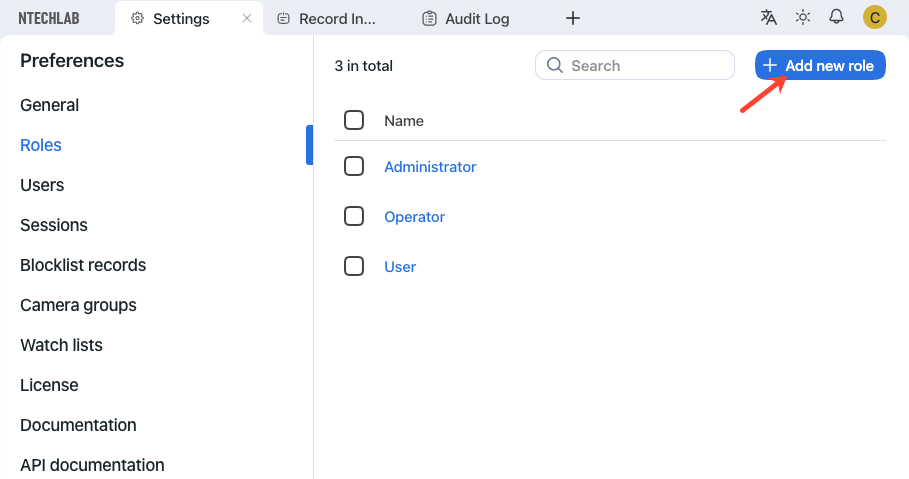
On the Information tab, specify the role name. Save the role.
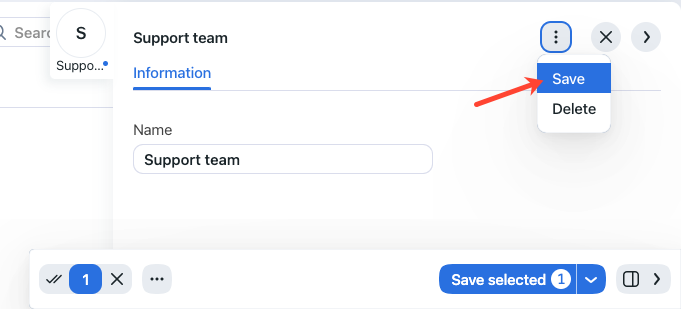
After saving the role, you will see the following tabs appear next to the Information tab:
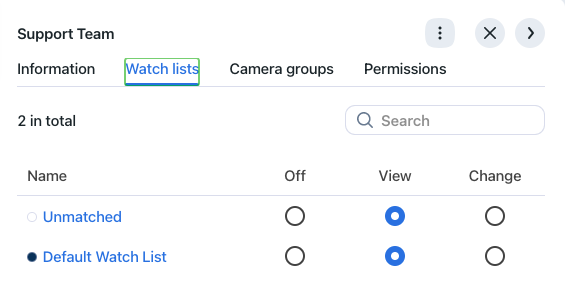
Watch Lists: role privileges for specific watch lists
Camera Groups: role privileges for specific camera groups
Permissions: role privileges for entire system functions and entities
Set role privileges, subject to your needs. Note that there is a distinction between role privileges for a specific watch list/camera group and a system entity with the name
watchlist/cameragroup. For example, if you setOfffor a certain camera group on the Camera Groups tab, users with this role won’t be able to work with this very group of cameras. Unchecking all checkboxes for thecameragroupentity on the Permissions tab will prevent users from viewing and working with all camera groups.The full list of the FindFace entities is as follows:
case: case filecaseattachment: uploading attachments to a casefaceobject: face photo in a recorddeviceblacklistrecord: blocklistwatchlist: watch listcameragroup: camera groupuploadlist: list of photos in bulk uploadupload: item (photo) in bulk record uploaduser: userreport: reportall_own_sessions: all sessions of the current user on different devicesNote
If relevant permissions for this entity are set, users will be able to view (
view) and close (delete) all their sessions on different devices. Otherwise, users will be only allowed to view and close their session on the current device. Working with sessions takes place on the Sessions tab (Settings).humancard: record of an individual
You can also enable and disable rights for the following functionality:
configure_ntls: configuration of thefindface-ntlslicense serverbatchupload_cards: bulk record uploadview_runtimesetting: viewing the FindFace general preferenceschange_runtimesetting: changing the FindFace general preferencesview_auditlog: viewing and working with the audit logs.
Save the changes.
Primary and Additional User Privileges
You assign privileges to a user by using roles:
Primary role: main user role, mandatory for assignment. You can assign only one primary role to a user.
Role: additional user role, optional for assignment. You can assign several roles to one user. The rights associated with the additional roles will be added to the primary privileges.
All users belonging to a particular primary role automatically get access to camera groups (and video archives within the group) and watch lists (and records in the watch list) created by a user with the same primary role, subject to the privileges defined by their additional role(s).
See also
Create User Account Manually
To create a user account manually, do the following:
Navigate Settings -> Users.
Click + Create new user.
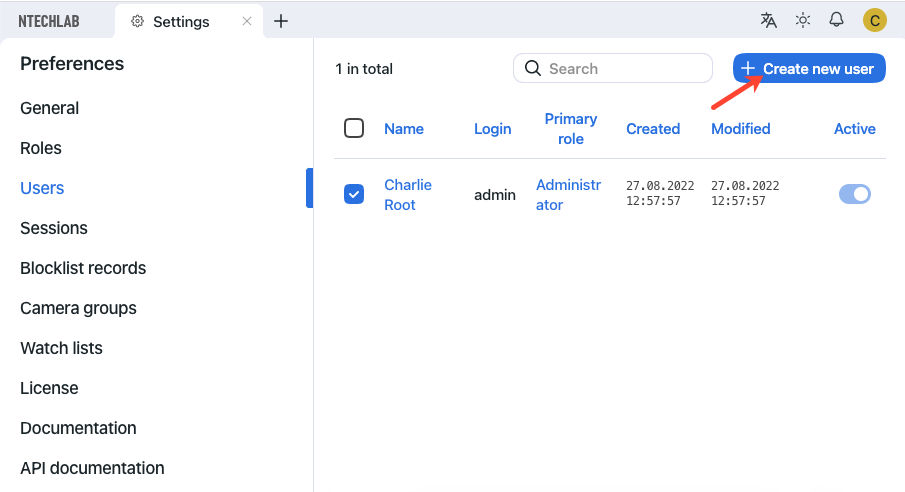
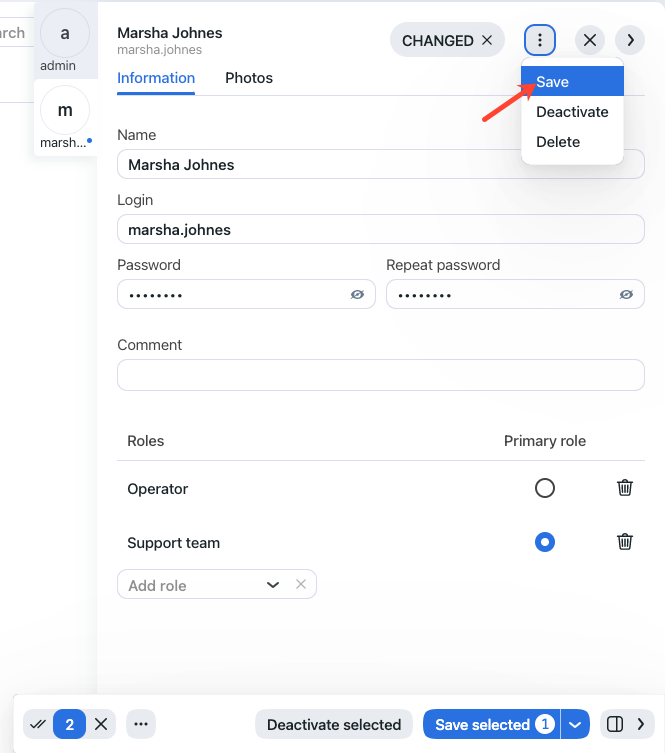
On the Information tab, specify user data such as name, login, and password. If necessary, add a comment.
From the Roles drop-down menu, select one or several user roles. Set one of them as the Primary role.
On the Photos tab, attach the user’s photo.
Save the user account.
Integrate with Active Directory for Auto User Creation
If there are many users in FindFace, it can be inconvenient to create their accounts one by one. One of the ways to facilitate the user creation is to harness the FindFace integration with Active Directory. To do so, follow the step-by-step instructions below, minding the sequence.
Install and Configure Kerberos
First of all, install and configure the Kerberos authentication protocol on the FindFace principal server. Do the following:
Install the
krb5-kdcpackage.sudo apt-get install krb5-kdc
Important
During the installation, you will have to enter the realm name. It must be equal to the Active Directory domain name, but spelled in upper case (
TESTNTL.LOCALin the example below). It’s ok to skip all other installation windows by pressing Enter.Find the
realmssection in the Kerberos configuration file/etc/krb5.conf. Specify the Active Directory domain in it.sudo vi /etc/krb5.conf [realms] TESTNTL.LOCAL = { kdc = testntl.local default_domain = testntl.local } ...
Append the following string to the
/etc/hostsfile:<Active Directory server IP address> <Active Directory domain name>.sudo vi /etc/hosts ... 192.168.0.5 testntl.local
Generate Keytab File
Log-in into the Active Directory server and do the following:
Create a new user account in the Active Directory domain to use as a service account.
Do the following:
Open Active Directory. Click Start, point to Administrative Tools, and then click Active Directory Users and Computers.
Click the domain name and then expand the contents. Right-click Users, point to New, and then click User. You will see a user creation form.
Fill-in the fields in the form at your discretion. On the second tab, check the Password never expires checkbox.
Click Next. Review the information that you provided, and if everything is correct, click Finish.
Right-click the just created user account, and then navigate Properties -> Member Of -> Add.
In the Select Groups dialog box, add the Domain Administrators and Domain Users groups to the list, and then click OK.
Click OK to finish.
Register a Service Principal Name (SPN) for the service account that you created. To do so, open PowerShell as administrator and execute the following command, specifying your actual
SERVICE USER NAMEand domain:setspn -A HTTP/<SERVICE USER NAME>.testntl.local@TESTNTL.LOCAL <SERVICE USER NAME>
In the same PowerShell window, generate a Keytab file by executing the command below with your actual
SERVICE USER NAME, domain, and desirableKEYTAB FILE NAME.ktpass.exe -princ HTTP/<SERVICE USER NAME>.testntl.local@TESTNTL.LOCAL -mapuser <SERVICE USER NAME> -crypto ALL -ptype KRB5_NT_PRINCIPAL -pass * -out c:\<KEYTAB FILE NAME>.keytab
To check the result, navigate to the root directory of the
Cdrive. You will see a keytab file with the relevant name.Move the keytab file that you created to the FindFace server.
Check the keytab file on the FindFace server. To do so, execute the following command on the console, specifying your actual
SERVICE USER NAME, domain, andKEYTAB FILE NAME.kinit -5 -V -k -t <path/to/<KEYTAB FILE NAME>.keytab> HTTP/<SERVICE USER NAME>.testntl.local
If everything is alright, you will see the message
Authenticated to Kerberos v5.
Rebuild NGINX on FindFace Server to Support Kerberos
To successfully establish a link between FindFace and Active Directory, you need to enable the Kerberos support in NGINX installed on the FindFace principal server. It can be done by rebuilding NGINX with a third-party module spnego-http-auth-nginx-module.
Important
To download spnego-http-auth-nginx-module, you will need Git.
Do the following:
Download the NGINX source code of the same version as in FindFace. It’s currently
nginx-1.14.0, click here to download.Unzip the downloaded archive.
tar -xf nginx_1.14.0.orig.tar.gz
Browse to the resulting directory. Clone the
spnego-http-auth-nginx-modulemodule into it.git clone https://github.com/stnoonan/spnego-http-auth-nginx-module
Install an auxiliary package
libkrb5-dev, essential for thespnego-http-auth-nginx-modulework.sudo apt-get install -y libkrb5-dev
Install the building toolset.
sudo apt-get install build-essential
Install a set of packages, essential for NGINX rebuilding.
sudo apt-get install libpcre3 libpcre3-dev openssl libssl-dev zlib1g zlib1g-dev libxslt-dev libgd-dev libgeoip-dev
On the console, execute the following command and copy somewhere the argument list that will appear in the output (everything that goes after
configure arguments).nginx -V nginx version: nginx/1.14.0 (Ubuntu) built with OpenSSL 1.1.1 11 Sep 2018 TLS SNI support enabled configure arguments: --with-cc-opt='-g -O2 -fdebug-prefix-map=/build/nginx-KgqPmI/nginx-1.14.0=. -fstack-protector-strong -Wformat -Werror=format-security -fPIC -Wdate-time -D_FORTIFY_SOURCE=2' --with-ld-opt='-Wl,-Bsymbolic-functions -Wl,-z,relro -Wl,-z,now -fPIC' --prefix=/usr/share/nginx --conf-path=/etc/nginx/nginx.conf --http-log-path=/var/log/nginx/access.log --error-log-path=/var/log/nginx/error.log --lock-path=/var/lock/nginx.lock --pid-path=/run/nginx.pid --modules-path=/usr/lib/nginx/modules --http-client-body-temp-path=/var/lib/nginx/body --http-fastcgi-temp-path=/var/lib/nginx/fastcgi --http-proxy-temp-path=/var/lib/nginx/proxy --http-scgi-temp-path=/var/lib/nginx/scgi --http-uwsgi-temp-path=/var/lib/nginx/uwsgi --with-debug --with-pcre-jit --with-http_ssl_module --with-http_stub_status_module --with-http_realip_module --with-http_auth_request_module --with-http_v2_module --with-http_dav_module --with-http_slice_module --with-threads --with-http_addition_module --with-http_geoip_module=dynamic --with-http_gunzip_module --with-http_gzip_static_module --with-http_image_filter_module=dynamic --with-http_sub_module --with-http_xslt_module=dynamic --with-stream=dynamic --with-stream_ssl_module --with-mail=dynamic --with-mail_ssl_module
Add the
spnego-http-auth-nginx-modulemodule to the rebuilding components. To do so, reconfigure NGINX by invoking theconfigureutility with the--add-dynamic-module=spnego-http-auth-nginx-moduleoption placed before the argument list.Briefly:
sudo ./configure --add-dynamic-module=spnego-http-auth-nginx-module <argument list>
Example:
sudo ./configure --add-dynamic-module=spnego-http-auth-nginx-module --with-cc-opt='-g -O2 -fdebug-prefix-map=/build/nginx-KgqPmI/nginx-1.14.0=. -fstack-protector-strong -Wformat -Werror=format-security -fPIC -Wdate-time -D_FORTIFY_SOURCE=2' --with-ld-opt='-Wl,-Bsymbolic-functions -Wl,-z,relro -Wl,-z,now -fPIC' --prefix=/usr/share/nginx --conf-path=/etc/nginx/nginx.conf --http-log-path=/var/log/nginx/access.log --error-log-path=/var/log/nginx/error.log --lock-path=/var/lock/nginx.lock --pid-path=/run/nginx.pid --modules-path=/usr/lib/nginx/modules --http-client-body-temp-path=/var/lib/nginx/body --http-fastcgi-temp-path=/var/lib/nginx/fastcgi --http-proxy-temp-path=/var/lib/nginx/proxy --http-scgi-temp-path=/var/lib/nginx/scgi --http-uwsgi-temp-path=/var/lib/nginx/uwsgi --with-debug --with-pcre-jit --with-http_ssl_module --with-http_stub_status_module --with-http_realip_module --with-http_auth_request_module --with-http_v2_module --with-http_dav_module --with-http_slice_module --with-threads --with-http_addition_module --with-http_geoip_module=dynamic --with-http_gunzip_module --with-http_gzip_static_module --with-http_image_filter_module=dynamic --with-http_sub_module --with-http_xslt_module=dynamic --with-stream=dynamic --with-stream_ssl_module --with-mail=dynamic --with-mail_ssl_module
Wait until the NGINX reconfiguration is completed and initiate NGINX rebuilding by executing the following commands:
sudo make

sudo make install
A new file
/usr/lib/nginx/modules/ngx_http_auth_spnego_module.sowill be created as a result.In the
/etc/nginx/modules-enabled/directory, create a new configuration filespnego-http-auth-nginx-module.confwith a stringload_module '/usr/lib/nginx/modules/ngx_http_auth_spnego_module.so';inside.sudo vi spnego-http-auth-nginx-module.conf load_module '/usr/lib/nginx/modules/ngx_http_auth_spnego_module.so';
Restart NGINX.
sudo systemctl reload nginx
Open the
/etc/nginx/sites-available/ffsecurity-nginx.confconfiguration file. Find thelocation /users/me/adsection and uncomment it. Fill in the section by analogy with the example below, placing your actual variables in the strings with comments (#).The variables to specify are the following:
auth_gss_realm: realm name in Kerberosauth_gss_keytab: location of the keytab file on the FindFace Serverauth_gss_service_name: full service user name in Active Directory, including the name of the domain it belongs to
sudo vi /etc/nginx/sites-available/ffsecurity-nginx.conf

location /users/me/ad {
      proxy_pass http://192.168.0.3/auth/ad_login/; # e.g http://127.0.0.1/auth/ad_login/;
      proxy_method POST;

      proxy_set_header   X-Real-IP $remote_addr;
      proxy_set_header   Host $http_host;
      proxy_set_header   X-Forwarded-For $proxy_add_x_forwarded_for;
      proxy_set_header  Authorization $http_authorization;
      proxy_pass_header Authorization;
      proxy_no_cache 1;
      proxy_cache_bypass 1;

      auth_gss on;
      auth_gss_realm TESTNTL.LOCAL; # Realm name in Kerberos;
      auth_gss_keytab /home/ubuntu/<KEYTAB FILE NAME>.keytab; # e.g. /var/lib/web.keytab
      auth_gss_service_name HTTP/<service_user>.testntl.local; # e.g. HTTP/web.testntl.local;
      auth_gss_allow_basic_fallback on;
}
Restart NGINX once again.
sudo systemctl reload nginx
Finalize FindFace Configuration
To finalize the FindFace integration with Active Directory, perform the following configuration steps on the FindFace side:
Open the
/etc/findface-security/config.pyconfiguration file.sudo vi /etc/findface-security/config.py
In the
SERVICESsection, set"active_directory": True.SERVICES = { ... "active_directory": True, ... } }
Fill in the
ACTIVE_DIRECTORY_CONFIGsection as follows:AUTH_LDAP_SERVER_URI:ldap: <Active Directory server IP address>AUTH_LDAP_BIND_DN: the name of the service user that you created in Active DirectoryAUTH_LDAP_BIND_PASSWORD: the service user passwordSEARCH_GROUPS: Active Directory organization units which FindFace will search for user accounts
# Specify server credentials
ACTIVE_DIRECTORY_CONFIG = {
    'AUTH_LDAP_SERVER_URI': 'ldap://192.168.0.5',
    # Domain Administrator user
    'AUTH_LDAP_BIND_DN': '<SERVICE USER NAME IN ACTIVE DIRECTORY>',
    # Domain Administrator user password
    'AUTH_LDAP_BIND_PASSWORD': 'SERVICE USER NAME PASSWORD',
    # Specify organization units where users search will be executed.
    # Follow pattern (e.g. OU=DEV,DC=domain,DC=com)
    'SEARCH_GROUPS': 'OU=DEV,DC=testntl,DC=local',
}
Restart the
findface-securityservice.sudo systemctl restart findface-security.service
Note
Check the output. The list of services should feature the LDAP Server.
Manage FindFace Users via Active Directory
If the FindFace integration with Active Directory is enabled, you will be able to set one of the Active Directory groups for a role you are creating or editing.
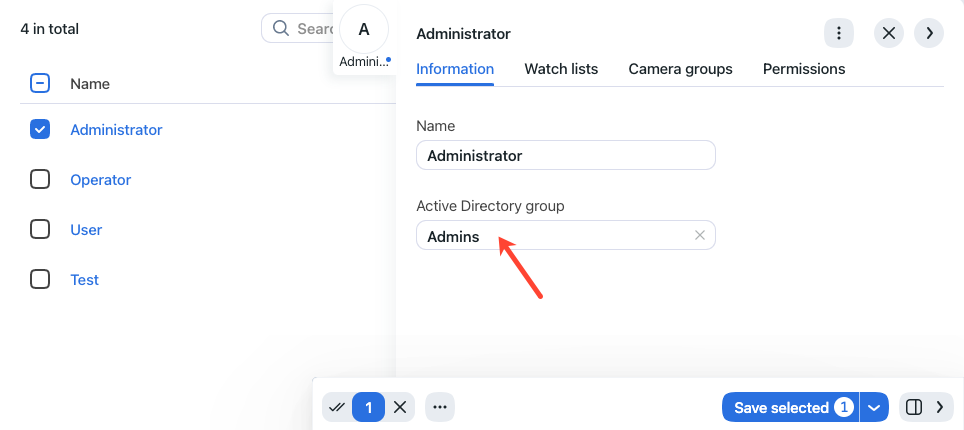
Once a user from the selected Active Directory group logs-in into FindFace for the first time, they will be automatically added to the FindFace user list.

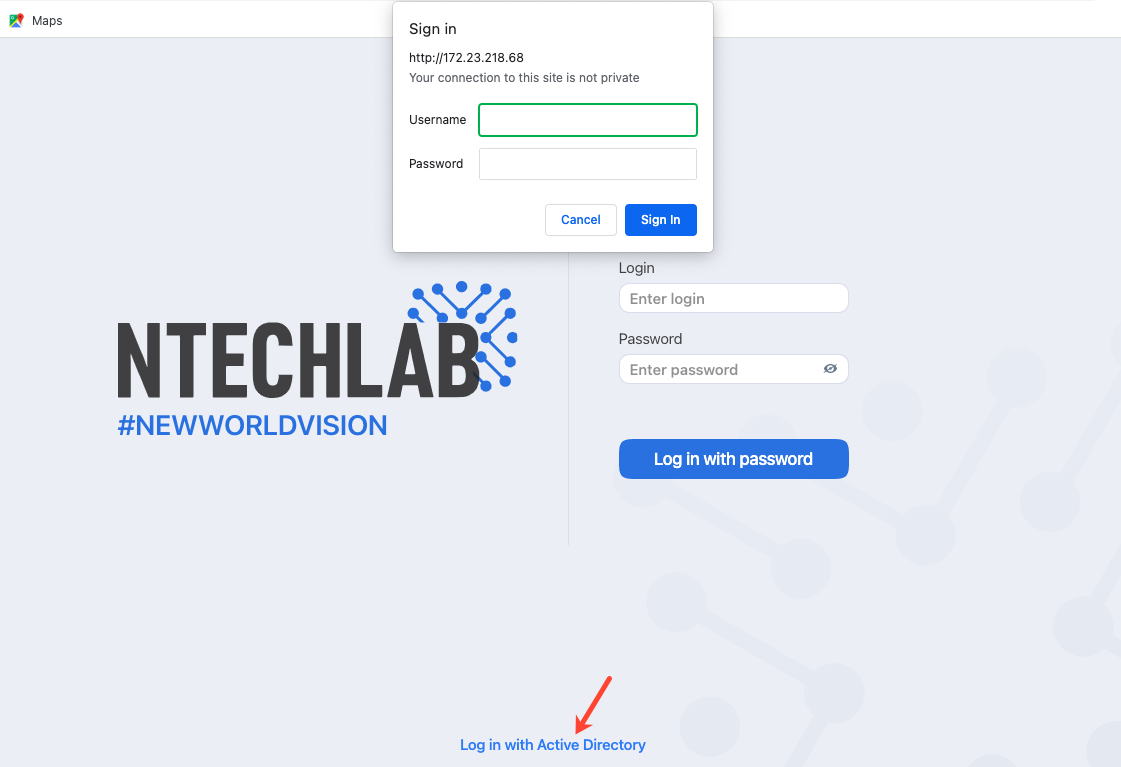
To log-in with Active Directory, a user must click the Log in with Active Directory button in the authentication window, specify their Active Directory credentials, and click Sign in.
Deactivate or Delete Users
In order to deactivate a user, unset Active on the user list ().
If you are going to deactivate multiple users, select them on the user list and then click Deactivate selected.
To delete users from FindFace, select them on the user list and then click Delete selected.